Windows 10 and above has a built-in SSH client that makes it super easy to authenticate to any servers that run an SSH service.
To authenticate, you need to know the server name, the port it's listening on (usually 22/tcp) and of course you have to have some user credentials. These credentials can be a username and the corresponding password, or the username and a private key that is set up to be accepted on the remote server.
In this article we focus on the latter, the private key authentication method.
For certificate authentication you'll need the following:
- Your own private key
- The corresponding public key
- Add the public key to the authorized_keys file on the remote server.
There are multiple reasons for why private key authentication is more preferable over password authentication. First of all it's much more secure as we use a 2048 bit unique key to identify ourselves instead of a few character long password. Second, this private key can be set up on multiple clients which in turn can authenticate to the server without any user interaction.
By this I mean a user can initiate a connection using the command line, or Putty or any other applications, but it's possible to use this method in scripts where no user interaction is needed to make the SSH connection.
Because of this trait private key authentication is a must for automation tasks.
Enough talking, let's jump into the hands-on stuff!
1. Generate a Private Key
First, we need the private and public key pair to work with.
Go ahead and generate it on our Windows computer. Note that on Linux, Mac or other Unix type systems the procedure is pretty much the same!
Open a PowerShell window (right-click on the Windows button and select Windows PowerShell), then type in the following to create a new folder and our new private-public key pair in it.
# Create folder for the new key pair
mkdir "c:\temp\New SSH Key" -Force

# Generate the new SSH key pair
ssh-keygen -f "c:\temp\New SSH Key\MySecretKey"
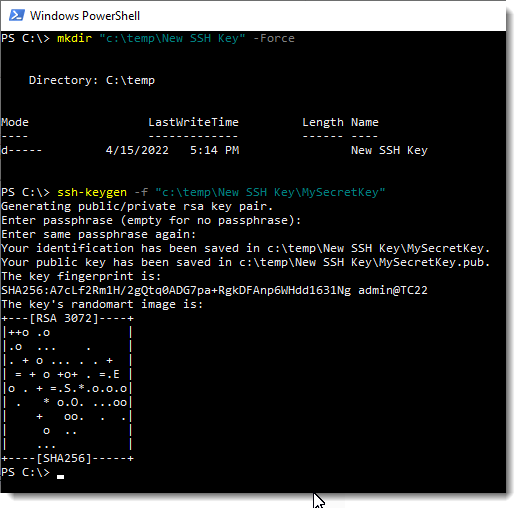
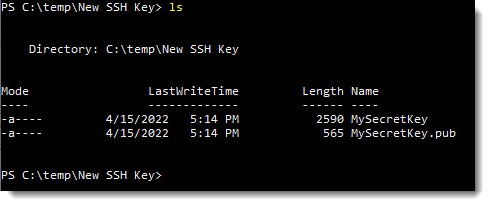
Cool, we see there are two files generated in our folder: id_rsa is our private key, id_rsa.pub is our public key.
A super important step is making the remote server aware of our key pair and make them trusted, so next time we connect the server will recognize us and let us in.
Doing this is quite simple: the user we want to authenticate as has a home directory on the server. When an SSH connection attempt is made, the SSH server checks the user's home folder if it contains a hidden .ssh directory and a file called authorized_keys in it.
If it does, it checks the contents and if it has the public key we present when connecting, the server lets us in!
So we need to make sure our public key is present in that file.
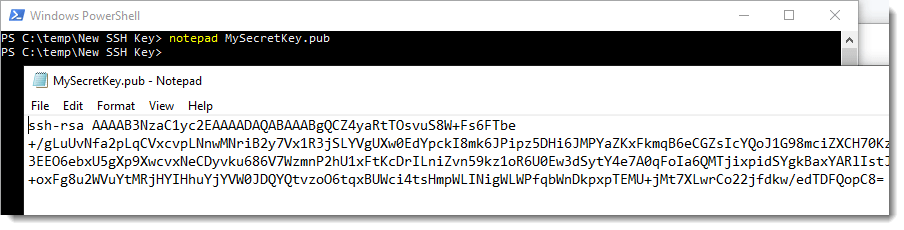
a. Get Our Private Key
Open our freshly generated public key in notepad.
Access the server (with the user password this time as the certificate authentication is not set up just yet). Use the ssh utility as follows:
ssh [remote username]@[remote server IP or DNS name]
In our example we'll authenticate to the server as user jdoe. Obviously you can set this private key authentication up to any user, or even all users so they can use the same key to log into the server.
So check the .ssh folder in the user profile. If it's not present, create it. If it's there you may skip this step:
mkdir ~/.ssh

Open the authorized_keys file, if it's not present the utility will create it for us:
vi ~/.ssh/authorized_keys

Copy and paste the public key we have open in our notepad window. If other stuff is already present in the authorize_keys file, leave them there, open a new line at the end of the file and paste our key there:

Save the job and exit the server.
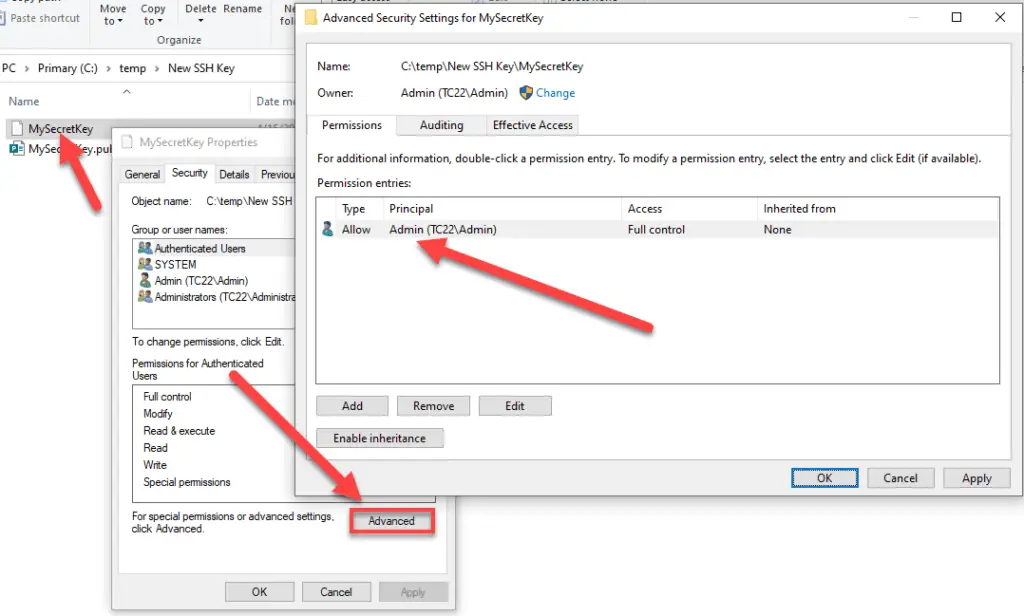
3. Restrict Access to the New Private Key
As the last step we have to restrict access to the private key file on our client computer, otherwise Windows will not let us use it, throwing the following error:
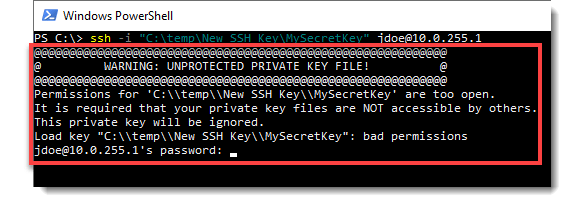
Open File Explorer, navigate to our New SSH Key folder, right-click on the MySecretKey private key file. Under the Security tab click on Advanced and make sure only your user is present in the list with Full Control rights.
If necessary disable inheritance to change permissions, otherwise permissions are copied from the parent folder (c:\temp in this case).
Note that my username is Admin but yours might be different!
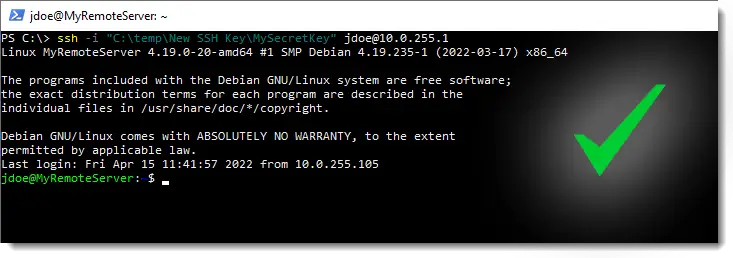
4. Connect Using the Private Key
At this point we are ready to connect using this key. We can also share it with others who can also connect the same way we do.
Below we assume the private key is saved in "C:\temp\New SSH Key\MySecretKey", and we connect to 10.0.255.1 as user jdoe:
# Connect using the private key stored in the MySecretKey file
ssh -i "C:\temp\New SSH Key\MySecretKey" jdoe@10.0.255.1
Comments