• Skip to primary navigation
  • Skip to main content
  • Skip to primary sidebar
  • Skip to secondary sidebar
OpenTechTips

OpenTechTips

Comprehensive IT Guides for Pros and Enthusiasts

MENUMENU
  • HOME
  • ALL TOPICS
    • Exchange
    • InfoSec
    • Linux
    • Networking
    • Scripting
      • PowerShell
    • SSL
    • Tools
    • Virtualization
    • Web
    • Windows
  • ABOUT
  • SUBSCRIBE
Home » Windows 2019 SSTP Server with only ONE NIC – Quick Guide

Windows 2019 SSTP Server with only ONE NIC – Quick Guide

May 19, 2020 - by Zsolt Agoston - last edited on May 22, 2020

In this short guide we deploy a Windows-based SSTP server for clients. For details about the protocol and the way to deploy a linux-based implementation of the server that has auto-renewing SSL certificates, visit my guide HERE.

Our test VM has only one network card to simulate a low-budget real-life scenario. That means we'll configure a separate subnet for connected clients and use NAT to give then network access. If the server has multiple NICs, clients can be relayed to use the local DHCP service to get unique IP addresses. Further on that later.

Before You Start

We start with a fresh install of Windows Server 2019, and join it to the alwayshotcafe.com domain.

The server is publicly accessible as vpn.alwayshotcafe.com.

As a side note: if security is a concern, only port 443/tcp needs to be allowed/forwarded to the VPN server for SSTP.

1. Install the RRAS role on the server

We need the RRAS role on the VPN server, also the NPS (Network Policy Services) role to control who is allowed to connect and when to the service.

Via PowerShell:

To install the RRAS role (VPN and Routing services) we use the following PowerShell cmdlet

PS C:\> Install-WindowsFeature RemoteAccess, DirectAccess-VPN, Routing, RSAT-RemoteAccess-PowerShell, RSAT-RemoteAccess-Mgmt, RSAT-NPAS

Alternatively, use the GUI:

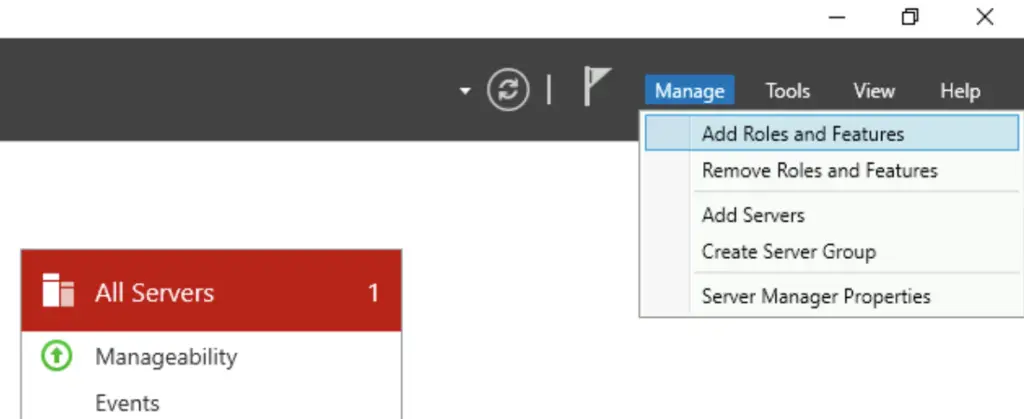
1. If you prefer the GUI, open the Server Manager, and select the "Add Roles and Features" option

Windows 2019 SSTP Server with only ONE NIC – Quick Guide

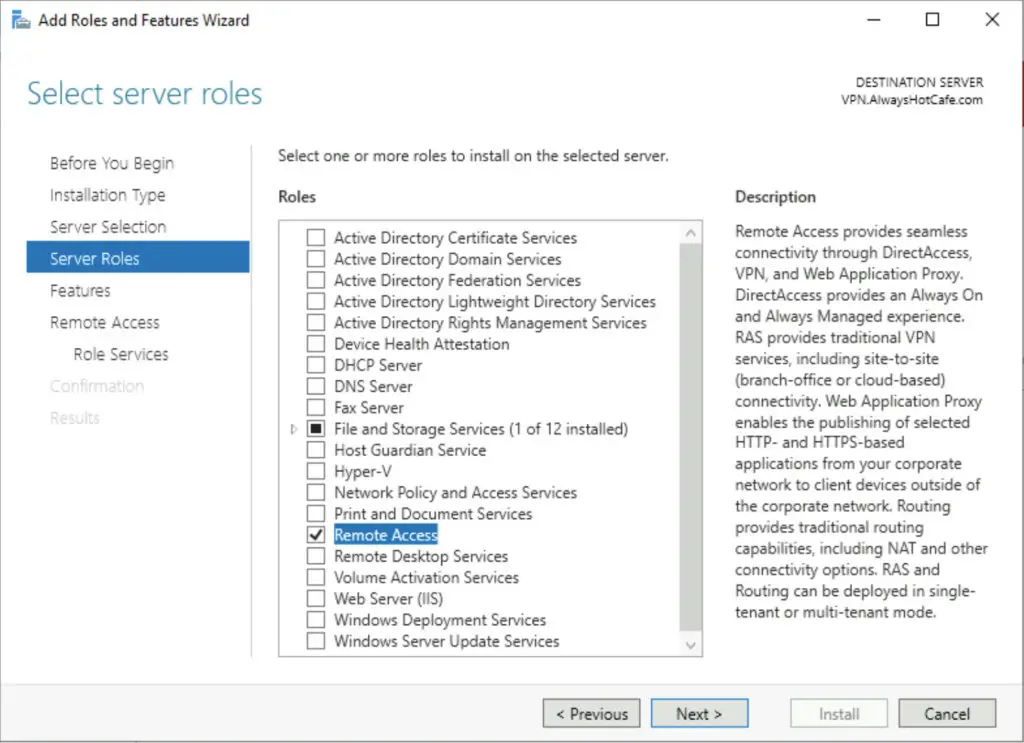
2. Check the "Remote Access" role, hit Next

Windows 2019 SSTP Server with only ONE NIC – Quick Guide

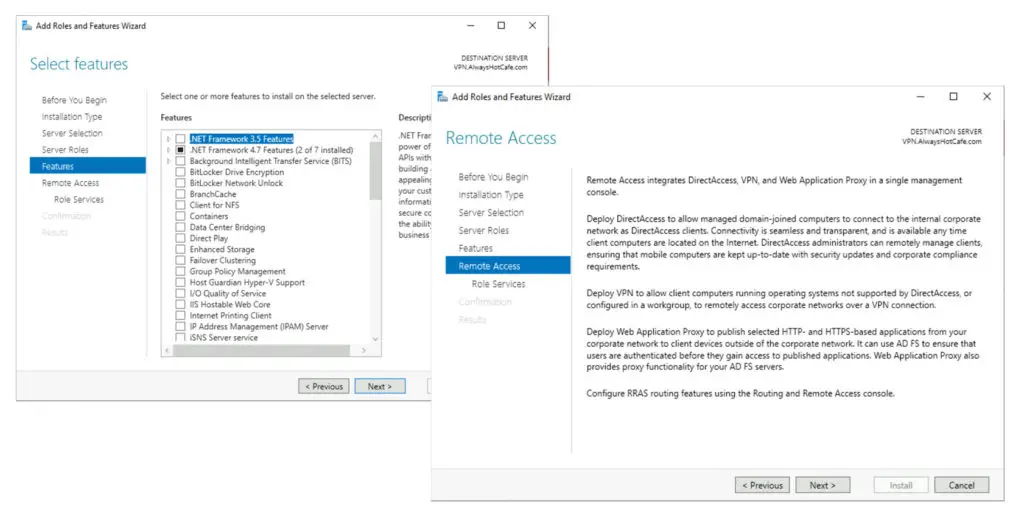
3. Pass the next two pages

Windows 2019 SSTP Server with only ONE NIC – Quick Guide

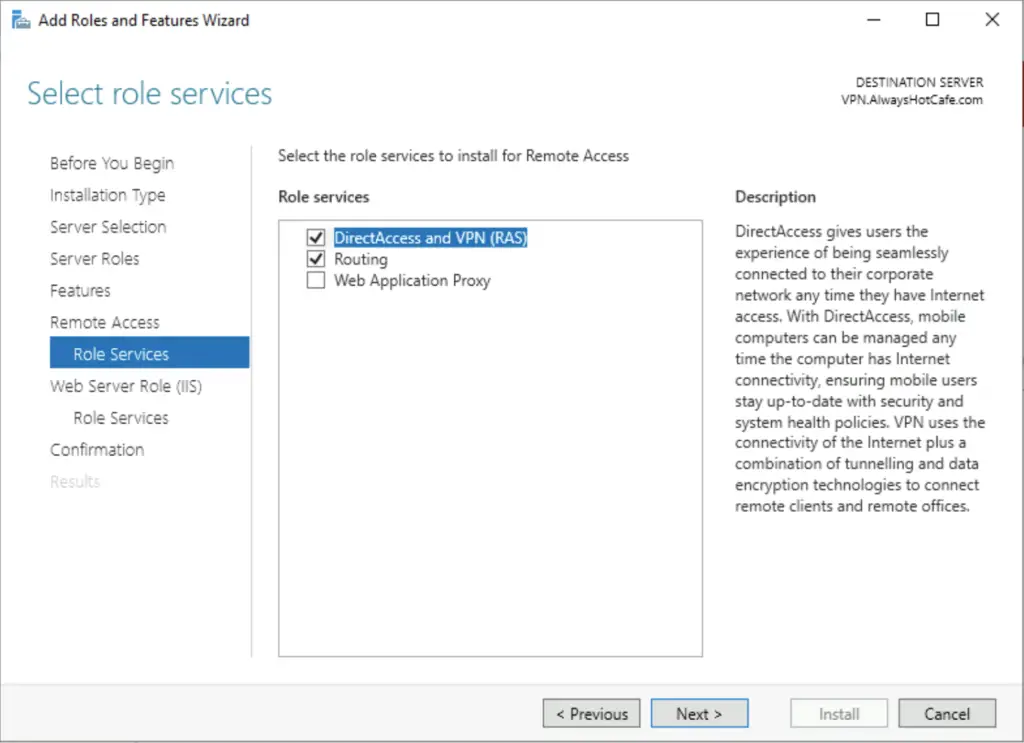
4. Select the RAS role service, also the Routing option that will be handy if NAT-ing is needed (to conserver IP addresses in your current subnet, a separate one is created for VPN clients). It is a necessity on a server with only one NIC.

Windows 2019 SSTP Server with only ONE NIC – Quick Guide

5. Accepting the defaults on the following pages, finally click on Install

Windows 2019 SSTP Server with only ONE NIC – Quick Guide

Configure the RRAS service

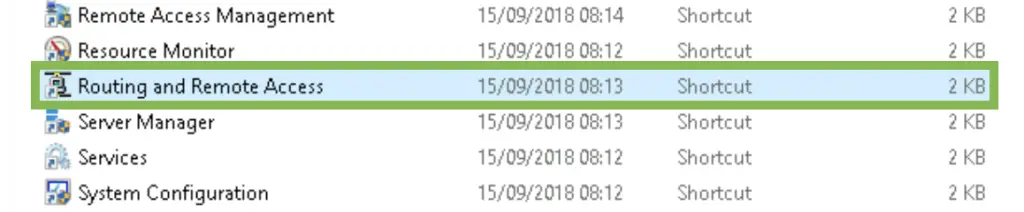
1. Open the RRAS console by running rrasmgmt.msc, or open it in the Administrative Tools folder.

Windows 2019 SSTP Server with only ONE NIC – Quick Guide

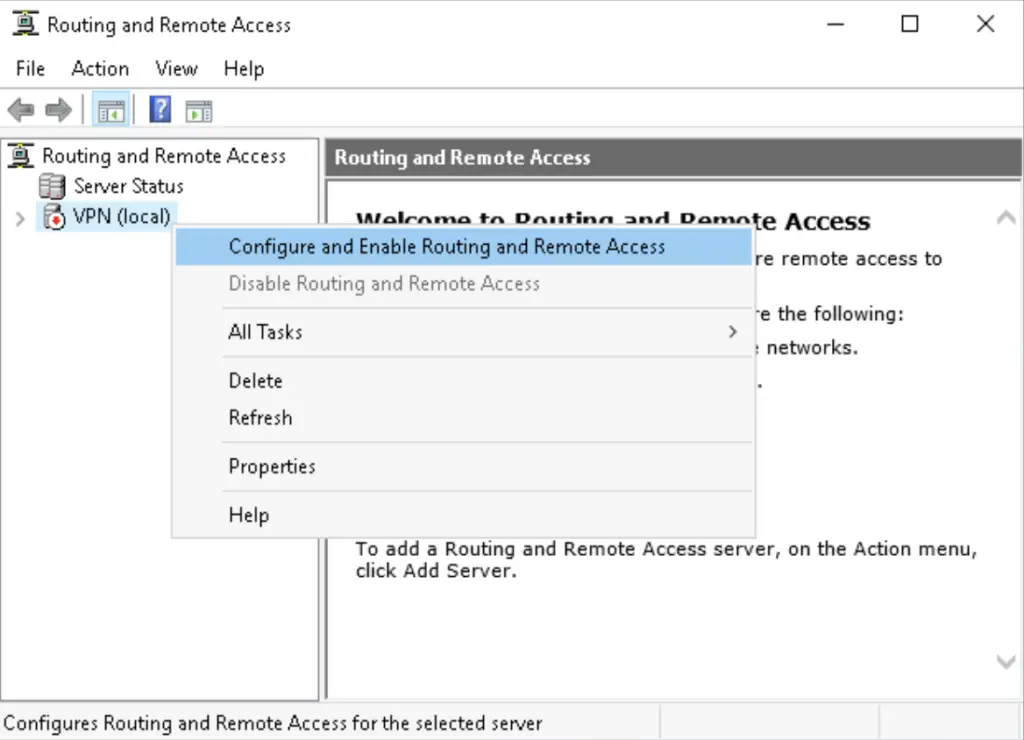
2. Right-click on the local server name (here VPN), then select the "Configure and Enable Routing and Remote Access" option

Windows 2019 SSTP Server with only ONE NIC – Quick Guide

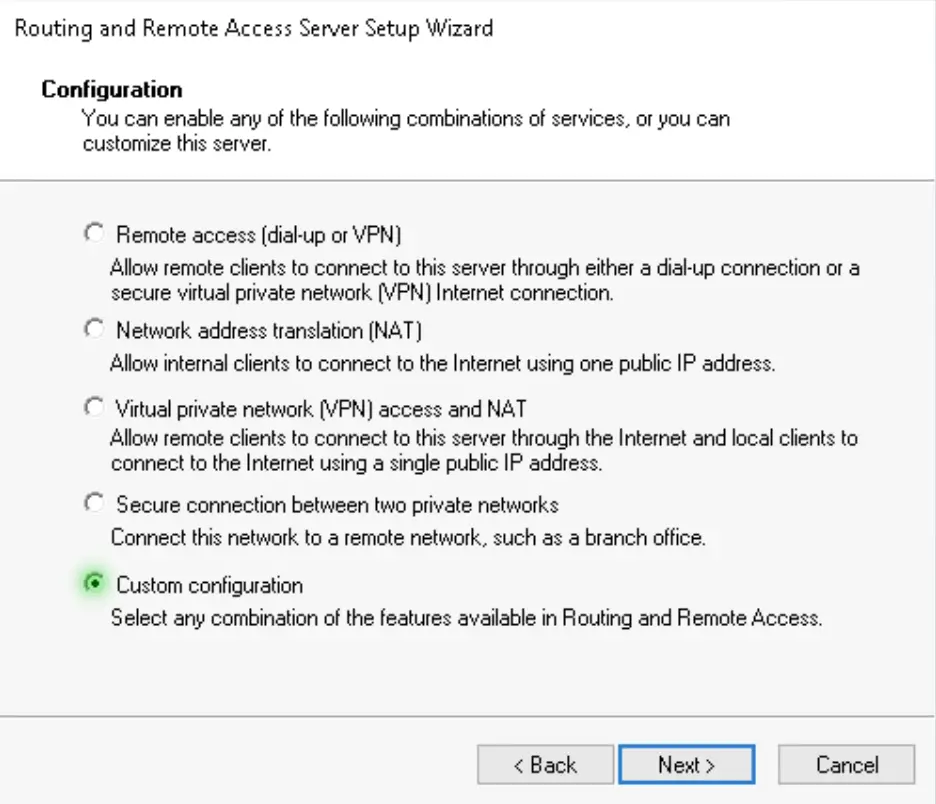
3. Choose the Custom option. If your server has only one NIC, this is the only option you have anyway, all the other will throw you errors as by default Windows RRAS servers are expected to have multiple network interfaces.

Note: it is understandable as RRAS servers should have their public interface in a DMZ subnet and the internal should be used to assign users local IP addresses to follow best practices

Windows 2019 SSTP Server with only ONE NIC – Quick Guide

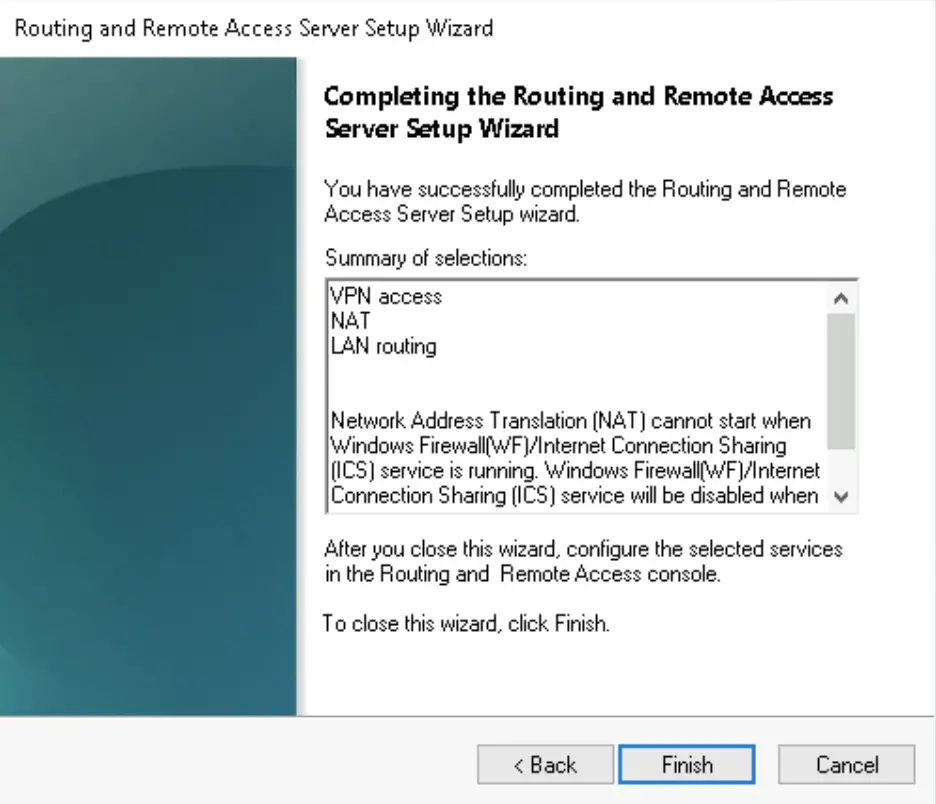
4. We need the VPN access, NAT and LAN routing services to be added to the server
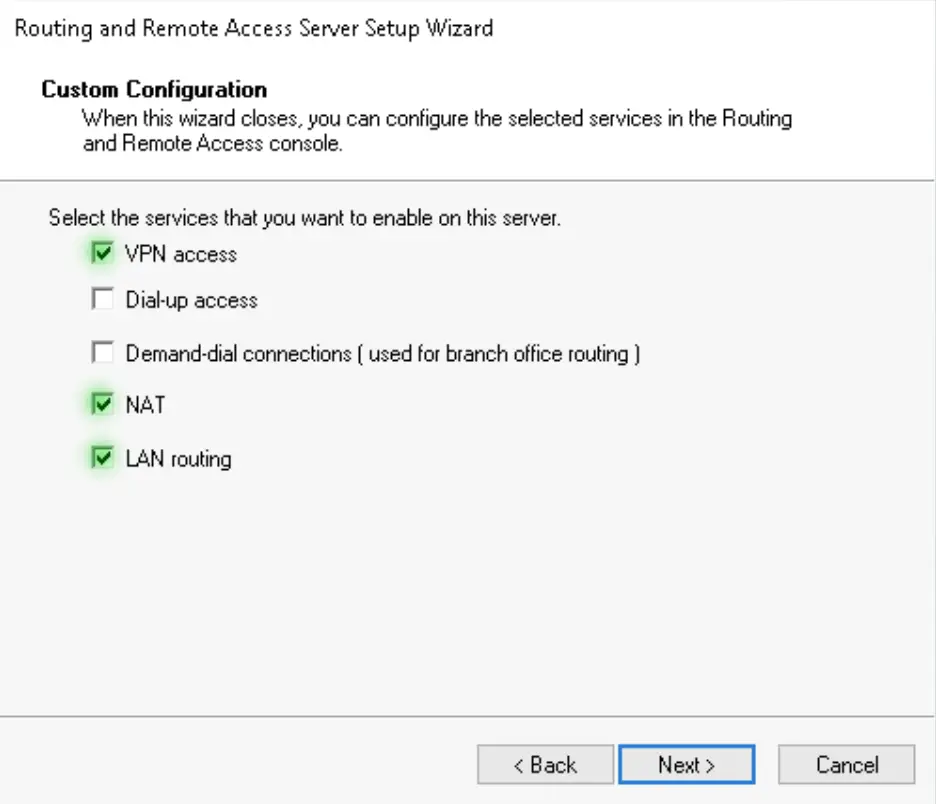
Windows 2019 SSTP Server with only ONE NIC – Quick Guide

5. Click on Finish

Windows 2019 SSTP Server with only ONE NIC – Quick Guide

Enable SSTP

To enable SSTP we need a valid SSL certificate with the subject (alternative) name which matches the FQDN of the VPN server. The client will use this FQDN to make the VPN connection. Here it is vpn.alwayshotcafe.com, and we use our wildcard certificate that covers our requirements. For a guide on how to generate an SSL certificate for Windows, click here.

1. Right-click on the server name (VPN) in the RRAS console. Switch to the Security tab and select the correct certificate from the drop-down list.

Windows 2019 SSTP Server with only ONE NIC – Quick Guide

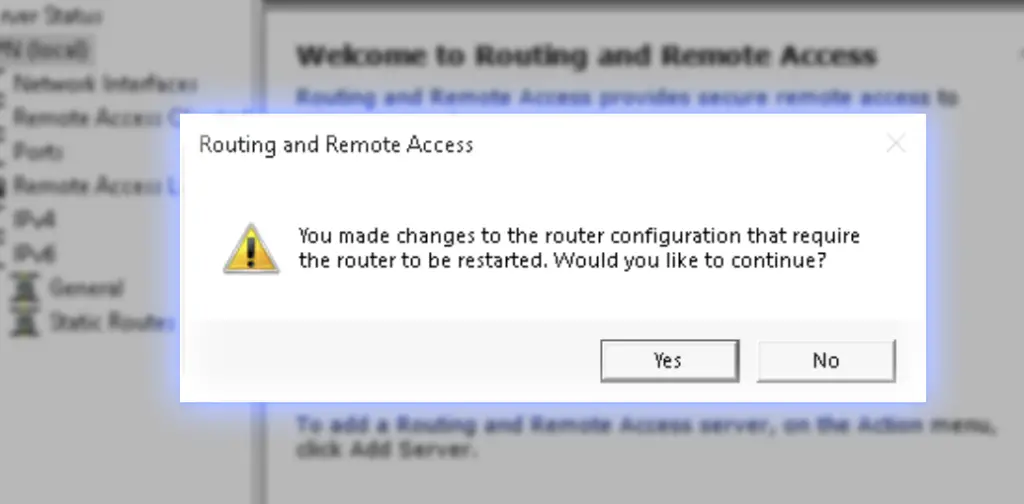
2. Then restart the service

Windows 2019 SSTP Server with only ONE NIC – Quick Guide

Set up NAT for connected clients

Clients can now connect, but they are not able to communicate with any other devices yet. The 10.255.255.0/24 is a new subnet the rest of the network isn't aware of. We use NAT to effectively masquerade client requests as if they were originating from the VPN server itself, that the rest of our network know.

It's great for flexibility, as we can expand the client IP pool as large as we want. The downside is this way it's trickier if we want to initiate connections to a client from our network and not the other way around.

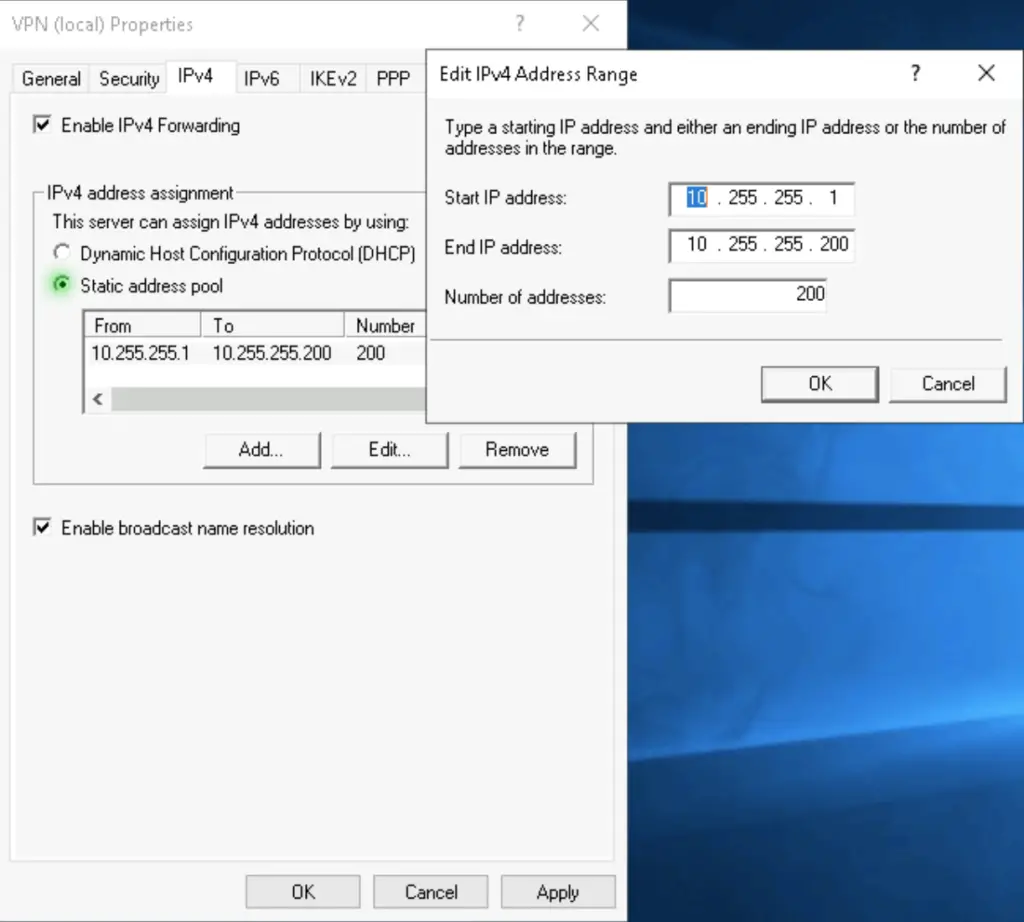
1. Open the Properties of our VPN server again. Under the IPv4 settings create a static address pool for connecting clients. In our example, the pool spans from 10.255.255.1 to 10.255.255.200, making it available for 200 clients to connect to the server at the same time.

Windows 2019 SSTP Server with only ONE NIC – Quick Guide

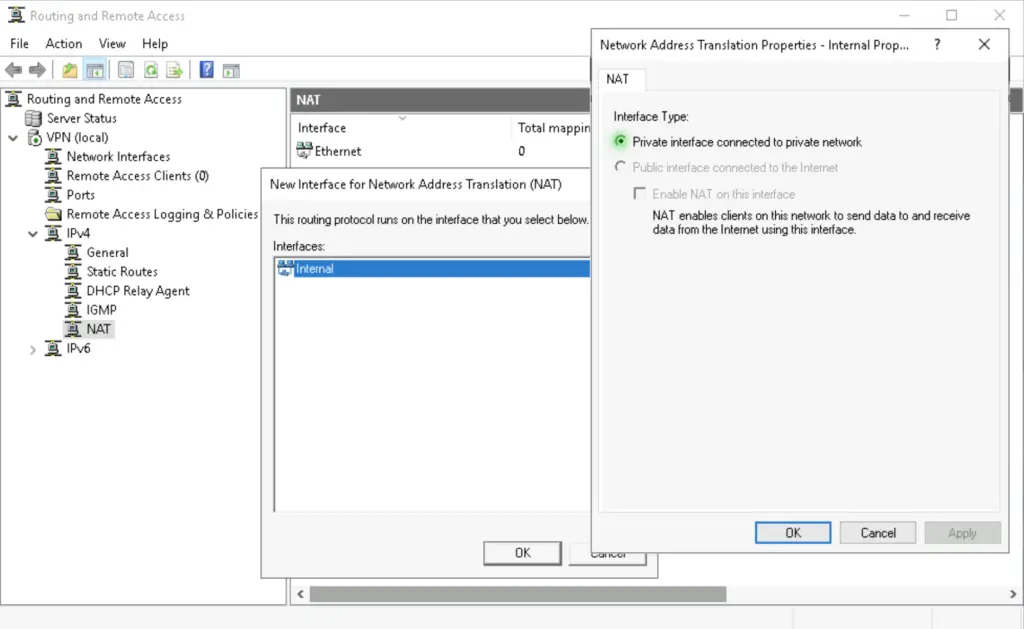
2. Highlight the NAT option in the left-side menu, and create two new interfaces as follows

Windows 2019 SSTP Server with only ONE NIC – Quick Guide

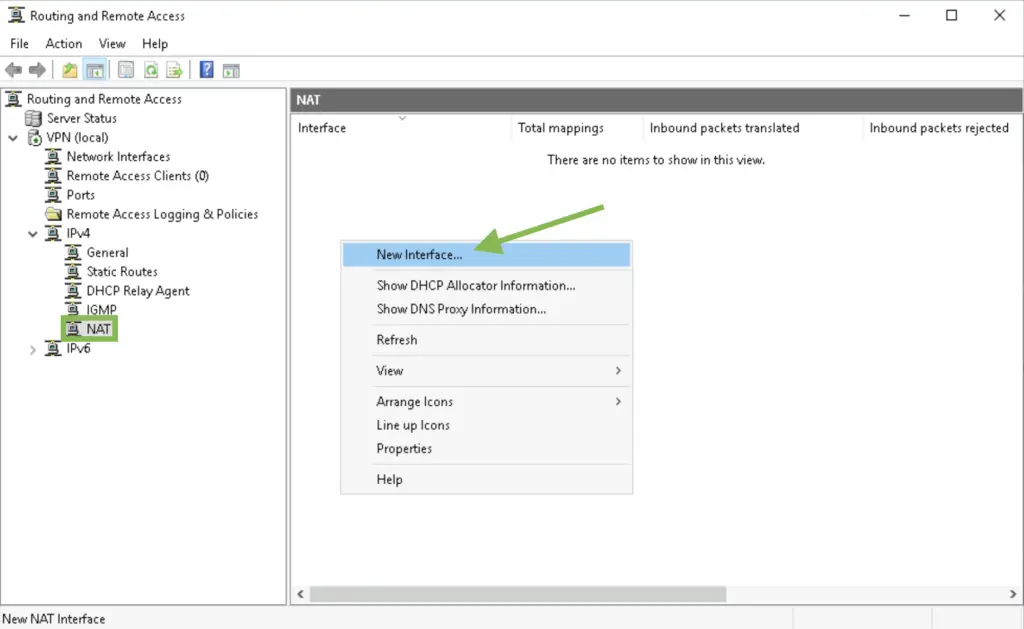
3. Add "Ethernet" as the public interface and enable NAT on it. This interface will be the our local outside interface.

Windows 2019 SSTP Server with only ONE NIC – Quick Guide

4. Add the "Internal" interface as a private interface. This means it becomes our local inside interface.

Windows 2019 SSTP Server with only ONE NIC – Quick Guide

Set the Network Policies

Network policies are controlling who can use the VPN service and when. You can declare if only machines running Windows operating systems are allowed, or if any kind of devices are accepted. You can lock down the service so only a member of a certain security group will be able to authenticate to the server. You can even specify a certain time period when the service is accepting incoming VPN connections.

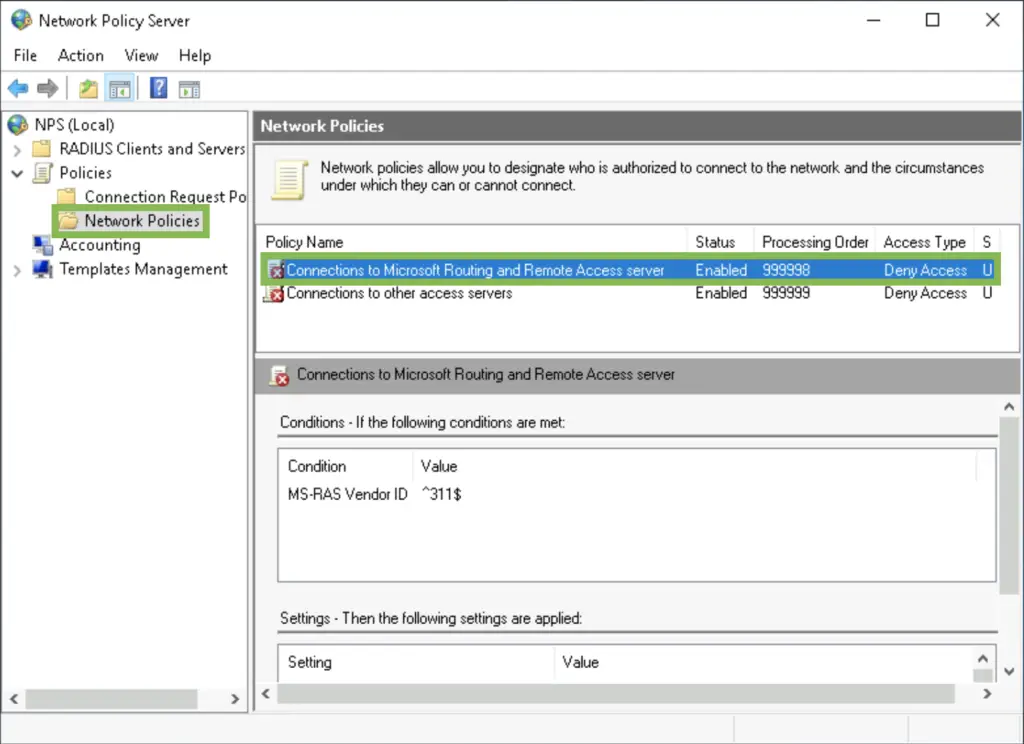
1. Open the Network Policy Server console in the Admin Tools, or use the nps.msc command.

Windows 2019 SSTP Server with only ONE NIC – Quick Guide

2. Under Network Policies double-click on the "Connections to Microsoft Routing and Remote Access server"

Windows 2019 SSTP Server with only ONE NIC – Quick Guide

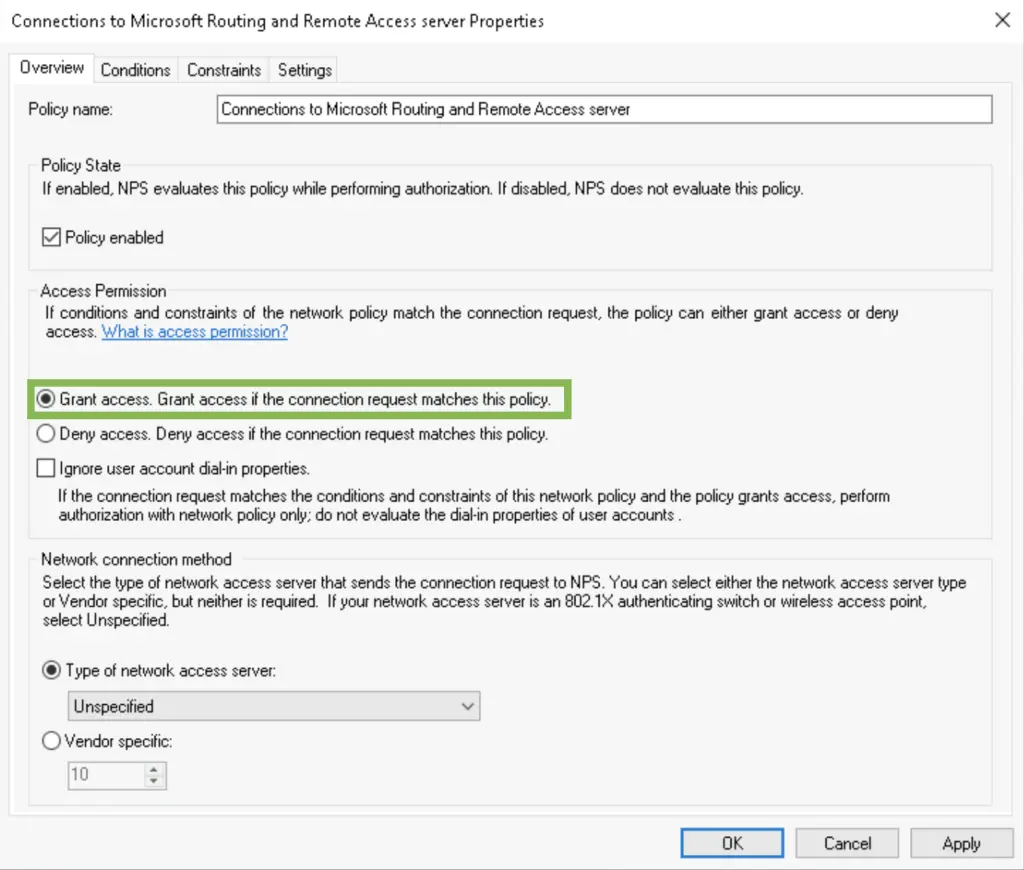
3. Select "Grant access" to specify this policy is for allowing users to connect. In the following tabs you can specify the requirements the client needs to meet in order to be allowed in.

Windows 2019 SSTP Server with only ONE NIC – Quick Guide

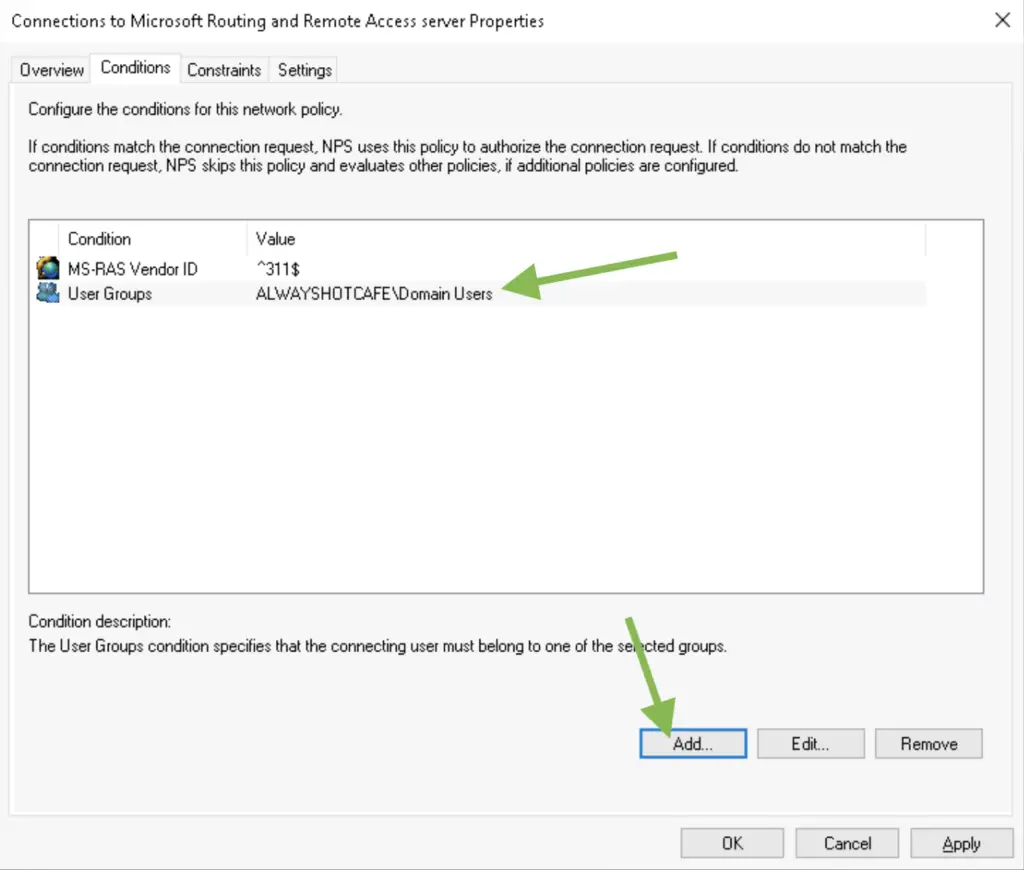
4. We want only the ALWAYSHOTCAFE.COM domain users to be remote access enabled, so we add the "Domain Users" group in the Conditions list. Ideally you can have a separate security group that only contains the remote workers. This is great for tighter security and it makes adding or removing users to a group really easy.

Windows 2019 SSTP Server with only ONE NIC – Quick Guide

5. We leave the default settings in the Constraints and Settings tab.

Alice is now ready to connect!

Client Connection Test

To verify that our service is up and running, create the connection for Alice. Use the vpn.alwayshotcafe.com server address, with her SamAccountName (alice) as username. Select the protocol: SSTP.
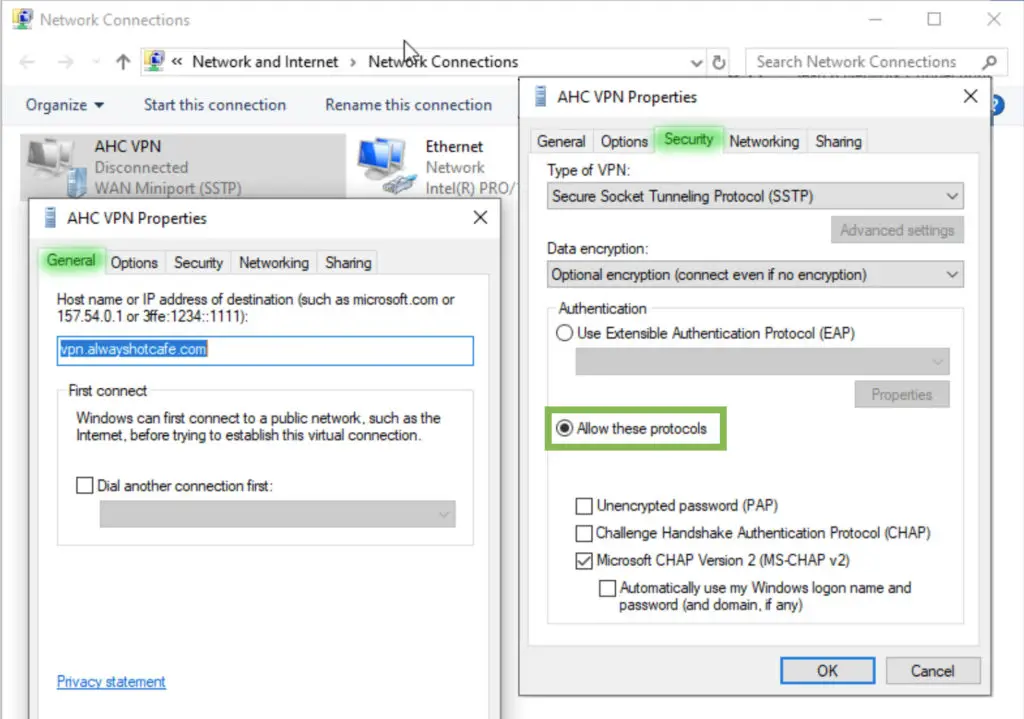
Make sure to select an authentication method, otherwise the client will throw an error message!

Windows 2019 SSTP Server with only ONE NIC – Quick Guide

Success!

Windows 2019 SSTP Server with only ONE NIC – Quick Guide

Reader Interactions

Comments

  1. Bill Voltmer says

    July 13, 2021 at 20:22

    Article is missing: Windows 2019 SSTP Server with only ONE NIC – Quick Guide

    Reply form is shown instead of article content.

    Reply
    • Zsolt Agoston says

      July 14, 2021 at 09:02

      Hi Bill,

      Thank you for your feedback, a bug prevented the sites with ActiveDirectory contents to appear. Should be OK now

      Kind regards
      Z.

      Reply
    • Zsolt Agoston says

      September 8, 2021 at 20:41

      Issue is sorted.

      Reply

Comments Cancel reply

Your email address will not be published. Required fields are marked *

Primary Sidebar

Tools

Secondary Sidebar

CONTENTS

  • Before You Start
  • 1. Install the RRAS role on the server
  • Via PowerShell:
  • Alternatively, use the GUI:
  • Configure the RRAS service
  • Enable SSTP
  • Set up NAT for connected clients
  • Set the Network Policies
  • Client Connection Test

  • Terms of Use
  • Disclaimer
  • Privacy Policy
Manage your privacy

To provide the best experiences, we and our partners use technologies like cookies to store and/or access device information. Consenting to these technologies will allow us and our partners to process personal data such as browsing behavior or unique IDs on this site and show (non-) personalized ads. Not consenting or withdrawing consent, may adversely affect certain features and functions.

Click below to consent to the above or make granular choices. Your choices will be applied to this site only. You can change your settings at any time, including withdrawing your consent, by using the toggles on the Cookie Policy, or by clicking on the manage consent button at the bottom of the screen.

Functional Always active
The technical storage or access is strictly necessary for the legitimate purpose of enabling the use of a specific service explicitly requested by the subscriber or user, or for the sole purpose of carrying out the transmission of a communication over an electronic communications network.
Preferences
The technical storage or access is necessary for the legitimate purpose of storing preferences that are not requested by the subscriber or user.
Statistics
The technical storage or access that is used exclusively for statistical purposes. The technical storage or access that is used exclusively for anonymous statistical purposes. Without a subpoena, voluntary compliance on the part of your Internet Service Provider, or additional records from a third party, information stored or retrieved for this purpose alone cannot usually be used to identify you.
Marketing
The technical storage or access is required to create user profiles to send advertising, or to track the user on a website or across several websites for similar marketing purposes.
Statistics

Marketing

Features
Always active

Always active
Manage options Manage services Manage {vendor_count} vendors Read more about these purposes
Manage options
{title} {title} {title}
Manage your privacy
To provide the best experiences, we use technologies like cookies to store and/or access device information. Consenting to these technologies will allow us to process data such as browsing behavior or unique IDs on this site. Not consenting or withdrawing consent, may adversely affect certain features and functions.
Functional Always active
The technical storage or access is strictly necessary for the legitimate purpose of enabling the use of a specific service explicitly requested by the subscriber or user, or for the sole purpose of carrying out the transmission of a communication over an electronic communications network.
Preferences
The technical storage or access is necessary for the legitimate purpose of storing preferences that are not requested by the subscriber or user.
Statistics
The technical storage or access that is used exclusively for statistical purposes. The technical storage or access that is used exclusively for anonymous statistical purposes. Without a subpoena, voluntary compliance on the part of your Internet Service Provider, or additional records from a third party, information stored or retrieved for this purpose alone cannot usually be used to identify you.
Marketing
The technical storage or access is required to create user profiles to send advertising, or to track the user on a website or across several websites for similar marketing purposes.
Statistics

Marketing

Features
Always active

Always active
Manage options Manage services Manage {vendor_count} vendors Read more about these purposes
Manage options
{title} {title} {title}