In this guide we set up a full-blown home IT lab with the end goal creating (at least) two virtual servers on two separate subnets.
Our hardware need is very simple, we need a regular computer (PC, mini PC or laptop) to host our hypervisor which is Proxmox, a Debian based Linux distibution specifically developed for virtualization.
This Proxmox computer will host our multiple virtual servers, as many as we need.
We also want to have proper networking, meaning at least two separate subnets where we can simulate multi-site AD domains, etc.
All this will be set up on the Proxmox box. Subnets will be created there virtually, managed by a virtual pfSense router to give inter-LAN and external (Internet) network access for each virtual machines in our system.
Once we are done we'll be able to add more virtual servers, or clients to our setup with just a few clicks. Let's see how.
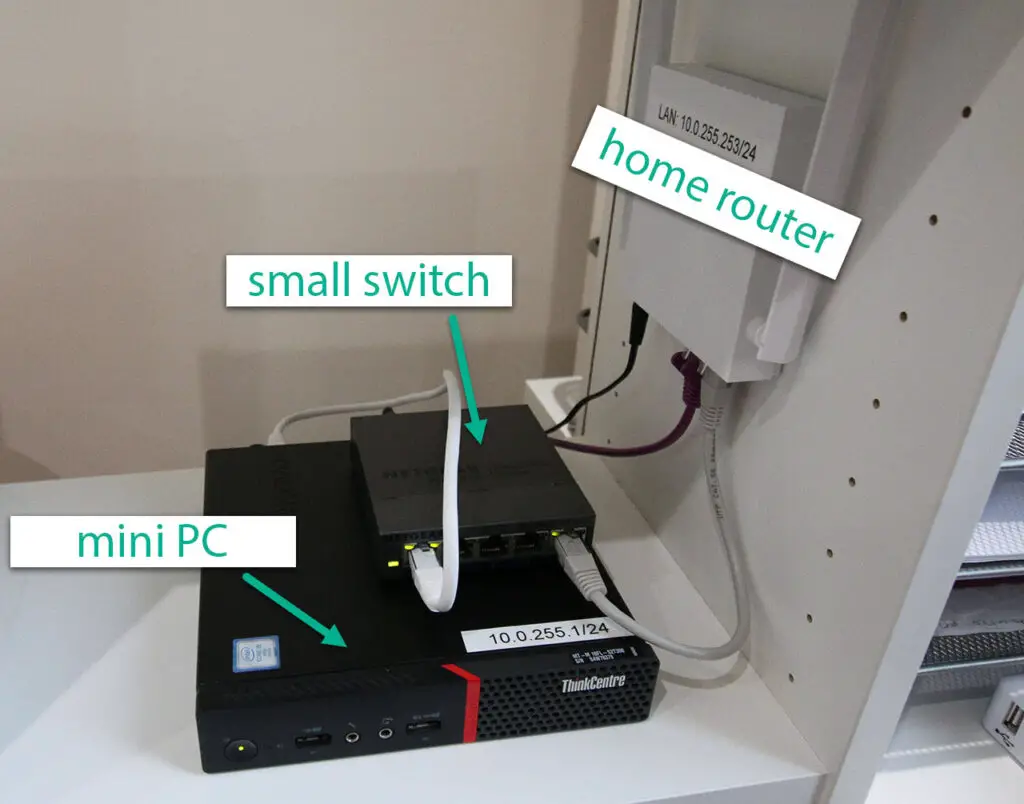
What we need:
- A home computer or laptop (with minimum 16-32GB RAM)
- A small managed or unmanaged switch.
Set up Proxmox
We start by installing and configuring the Proxmox operating system on our old computer.
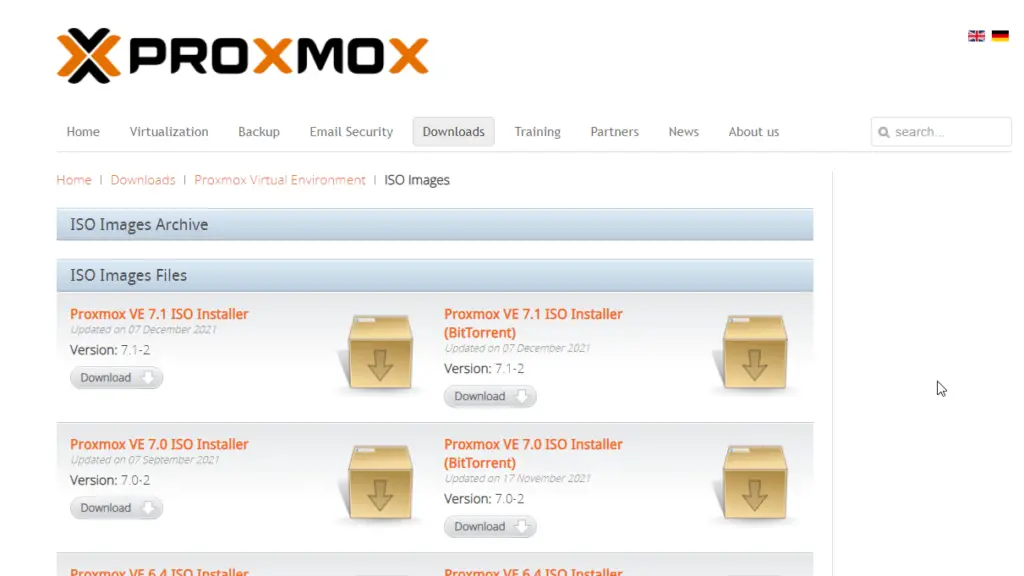
First of all download Proxmox from the following location. It's free and it has all the feautre we need in a hypervisor: Download link
Burn ISO to USB
After downloading we need to install the new operating system on our computer. You might prefer using a CD or DVD but probably the most common way nowadays is to install new operating systems using USB drives.
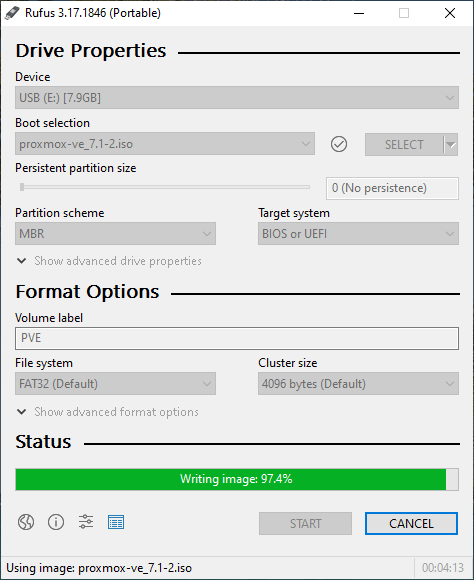
After acquiring the Proxmox ISO file we use Rufus to write it on a USB drive, creating a bootable device for installation. Download link for Rufus
Proceed to burn the downloaded ISO file on the USB.
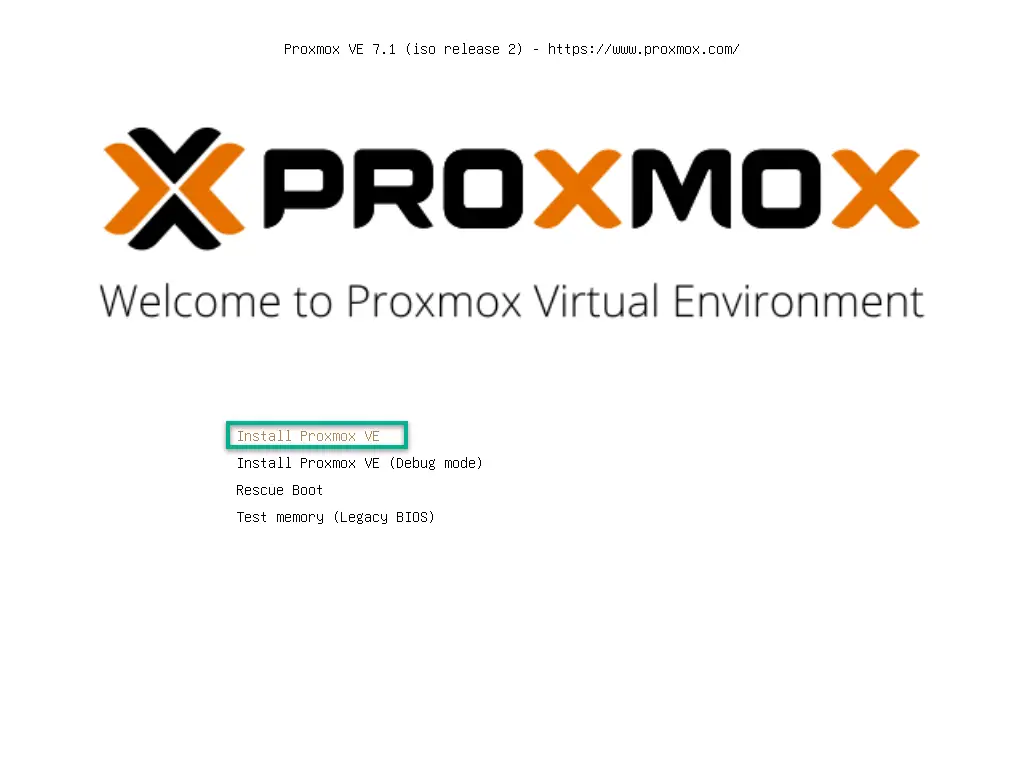
Install Proxmox
Attach the USB to the computer where we plan to install the hypervisor. Note that you might change the boot order in the BIOS to be able to boot from the USB drive.
If the computer struggles to find the drive as a bootable device you might try to experiment with burning the ISO on the USB using different settings. MBR vs GPT (MBR is preferred on legacy, older hardware), or write mode of ISO vs DD.
DD worked better in my case, writing the disk image to the USB as is.
On the next screens select the drive to install the base system on. If you have multiple disks, my advice is to use the smaller/slower one and leave the other for VM storage.
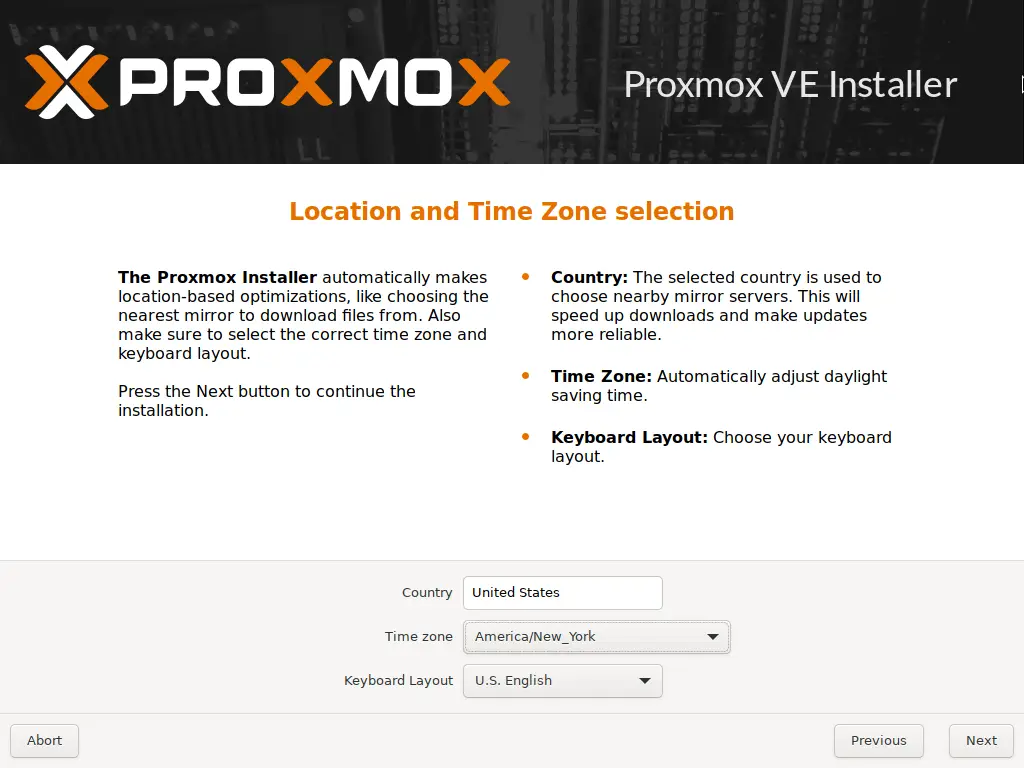
After hitting Next select the time zone and regional settings.
On the next page put in your preferred password and an arbitrary notification email address.
Make sure you remember this password as you'll need this to log into the server once it's up!
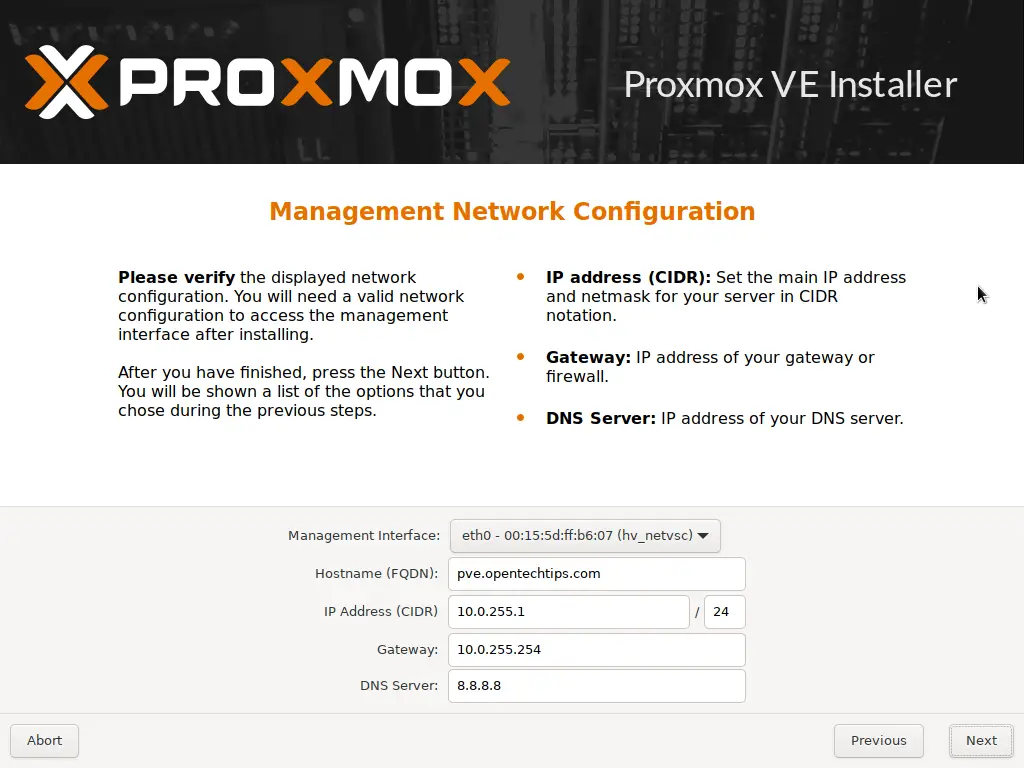
On the next screen select the management interface (the interface you'll use to access the management console). In our case we only have a single network card so obviously that's the only option we have here.
Next, the hostname. It's not super important, I chose the pve.opentechtips.com fully qualified domain name but feel free to use anything you prefer, like proxmox.local.net or anything similar.
Next, pick an available IP address on you local network. If you are not sure what your home subnet is, use the ipconfig command on a Windows machine, or ifconfig on a Mac or Linux computer to determine your IP ranges.
If you don't really manage your network, meaning you mostly your router settings default, your private IP subnet is more than likely either 192.168.0.0/24 or 192.168.1.0/24.
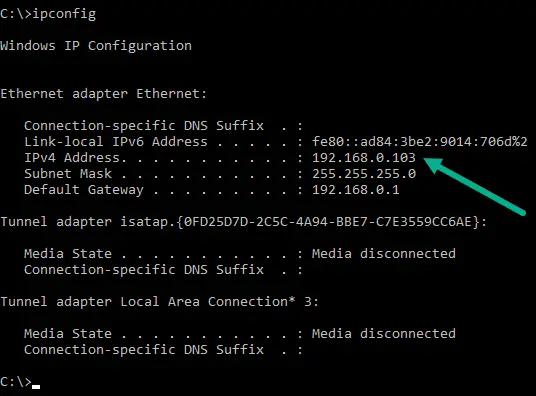
In the example above you see the subnet is 192.168.0.0 with subnet mask 255.255.255.0
This means the available IP address range is between 192.168.0.1 - 192.168.0.254
The router (default gateway) has the first usable address in the subnet (192.168.0.1)
However, in our example home lab we use a custom subnet for our home network which is 10.0.255.0/24
Example - Network Configuration
In this scenario I'd go with an IP of 10.0.255.1 or so for our new Proxmox machine:
IP: 10.0.255.1/24
Gateway: 10.0.255.254
DNS: 8.8.8.8 (the good old Google DNS server 🙂 )
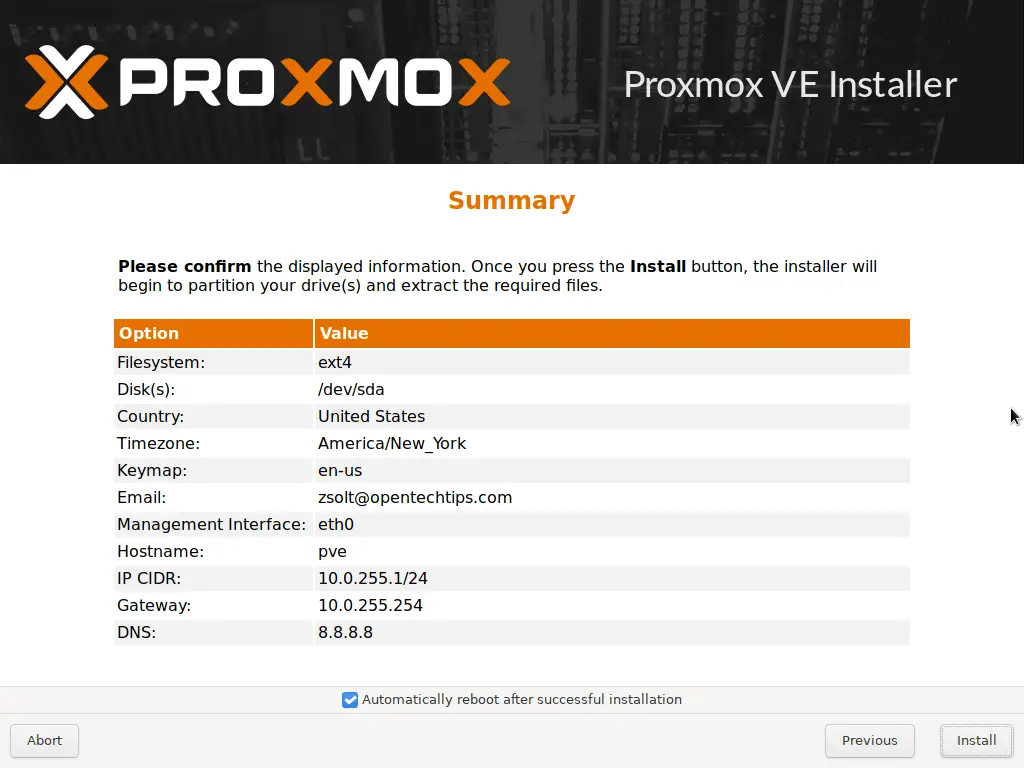
Agree to reboot after installation, then hit Install.
After installation is done reboot. You'll see a very similar text (see below) on the screen when the hypervisor finished loading.
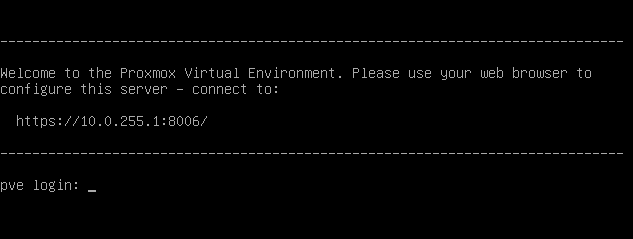
It's very informative and tells everything we have to know to log into the console.
From this point we will do everything on his computer remotely. I personally like to disconnect the monitor and keyboard/mouse as we'll likely not need them at later stages.
Login to the Proxmox Management console
Take your laptop or other home computer you are working with, open a web browser and navigate to:
https://[the IP address you specified earlier]:8006/
Username is root
Password is the password you've chosen earlier.

No valid subscription
Ignore the No valid subscription popup. For our lab, we don't need any.
If you want to disable this popup, here's a quick guide on how to do that.
Configure subnets on Proxmox
In this step we add the additional subnets (10.0.1.0/24 and 10.0.2.0/24) to the vmbr0 interface on Proxmox.
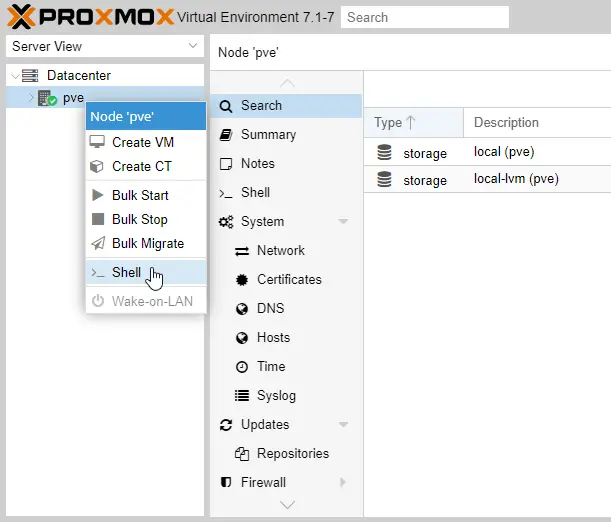
Open a shell (right-click on the name of your Proxmox host, then select Shell).
Use nano or vi to edit the /etc/network/interfaces file, adding our additional subnet IPs:
Subnet1: 10.0.1.1/24
Subnet2: 10.0.2.1/24
vi /etc/network/interfaces
auto lo
iface lo inet loopback

iface eno1 inet manual

auto vmbr0
iface vmbr0 inet static
        address 10.0.255.1/24
        address 10.0.1.1/24
        address 10.0.2.1/24
        gateway 10.0.255.254
        bridge-ports eno1
        bridge-stp off
        bridge-fd 0
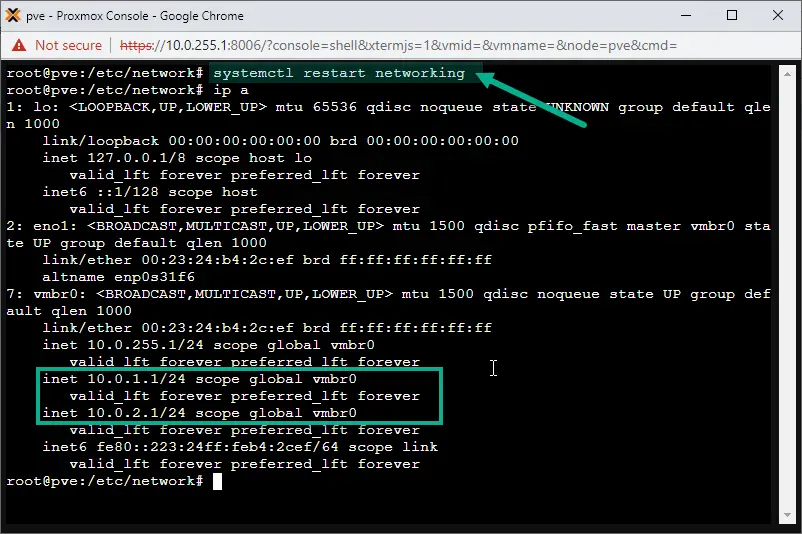
Then restart the networking service on Proxmox with the following command:
systemctl restart networking
Configure Routing Between Subnets and the Internet
To configure proper routing we have to keep two important things in mind. One is to allow communication between each subnet we have, also allowing other physical devices to be connected to any of those subnets using our small switch. We also want to have Internet connection, no matter what subnet we connect to and what device we use to access that subnet.
Virtual and physical devices both have to have proper network connection.
There are two ways to achieve this.
- The first is to use an actual physical router (which can be an old computer with a single network interface)
- The second option is installing a virtual router straight on the Proxmox box that is cheaper than purchasing separate hardware for routing purposes.
We go with option 2 in this occasion, but if you're interested in setting up the whole system with a physical router, an article is coming here showing a full tutorial with a Netgate SG1100 router, and proper VLAN configuration.
Install pfSense for Routing
We use pfSense which is one of the best routers out there. Not only it has a free community version but it can be installed on nearly any kind of devices, older computers, and of course as a virtual instance on our hypervisor.
Prepare the pfSense ISO file
Download pfSense from the official Netgate website.
Architecture is AMD64 (64-bit), and the installer type is a DVD ISO image.
The downloaded file is a gzip archive, use 7zip or your favorite extractor app to unpack the ISO file from it.
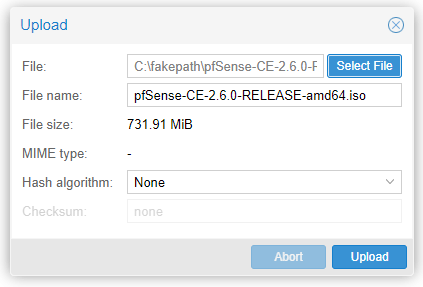
When it's unpacked, browse to the Proxmox portal again. Under the Proxmox hypervisor name (pve), select the local (pve) data store, then ISO Images and click the Upload button.
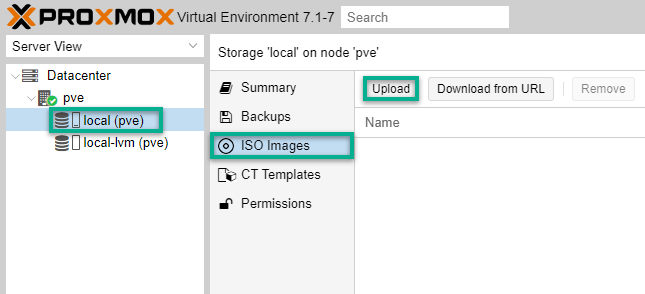
Select the file and Upload.
Create the pfSense VM
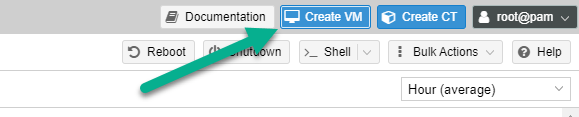
In the Proxmox console website, on the top right hit the Create VM button.
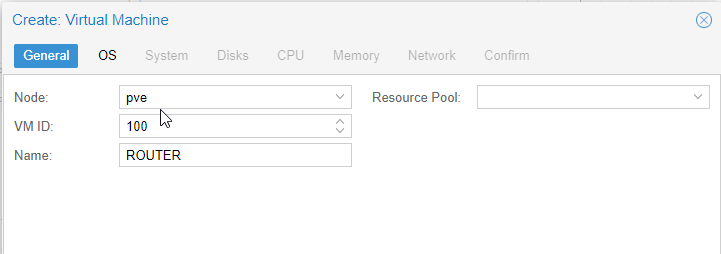
We name it ROUTER.
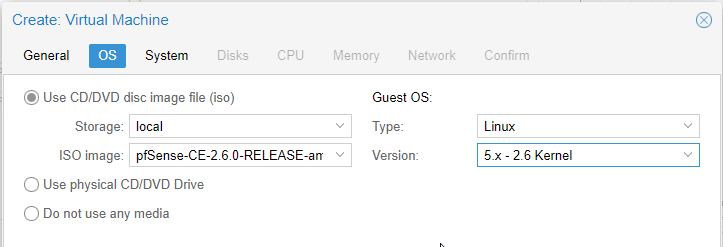
On the OS tab select the freshly downloaded pfSense ISO image.
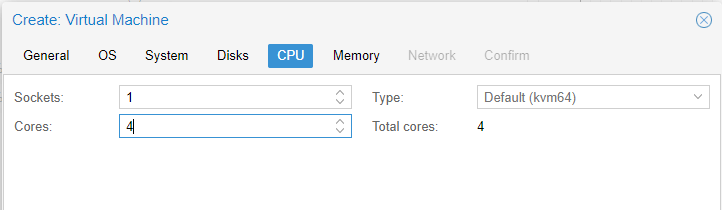
Jumping through the top tabs leave mostly everything as it is. We only increase the virtual CPU cores to 4.
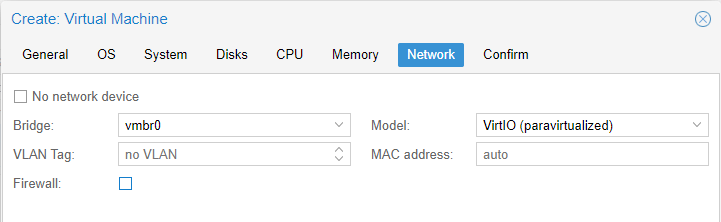
On the Network tab make sure the Firewall checkbox is unchecked!
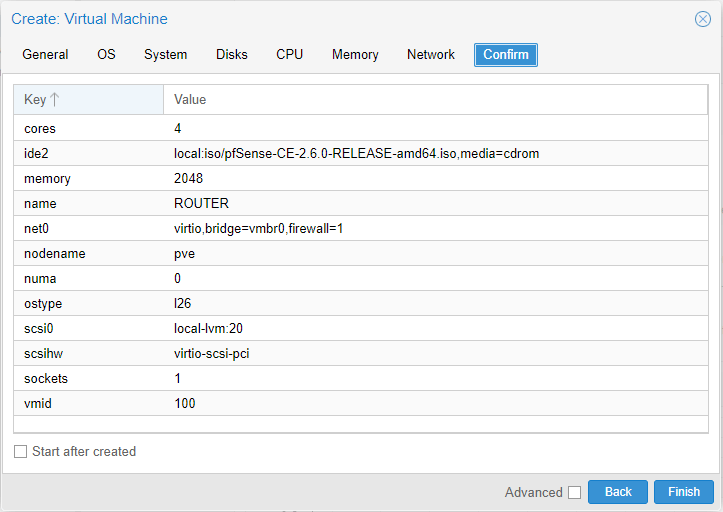
The last tab shows a summarized config list. Make sure all settings are correct. Do NOT check the Start after created box because we still need to add extra NICs for each of our new subnets before installing the operating system. Hit Finish.
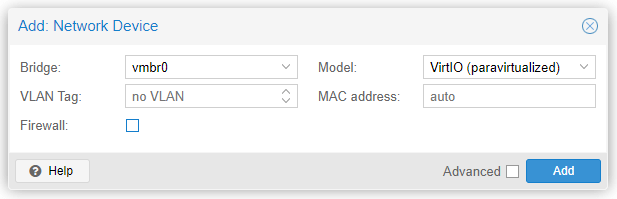
On the left side menu our new "ROUTER" virtual machine appears. Select it, click on Hardware and then hit the Add button on the top. Select the Network device option.
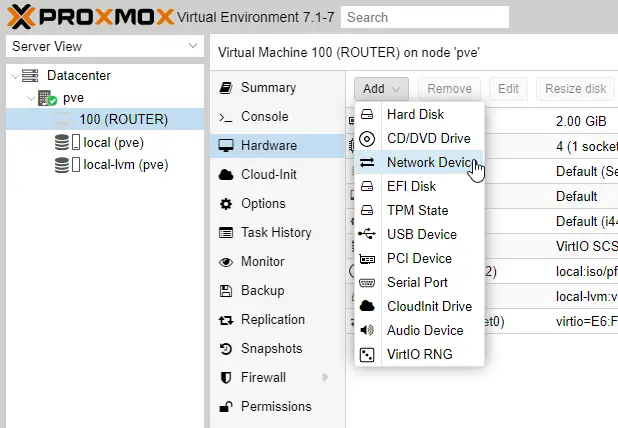
Leave everything as it is, and hit Add.
Repeat this step so at the end we'll have three virtual network interface cards attached to ROUTER as seen below:
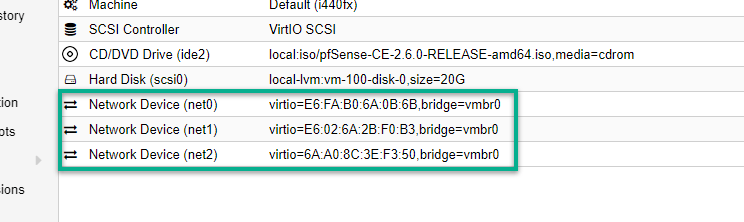
It's time to start the VM. Right-click on the name of our virtual machine instance (ROUTER) and select the Start option.
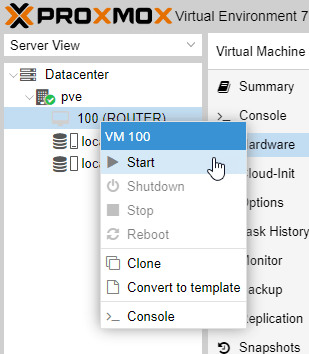
Double-clicking it opens up the virtual VNC console where we can see the VM in action.
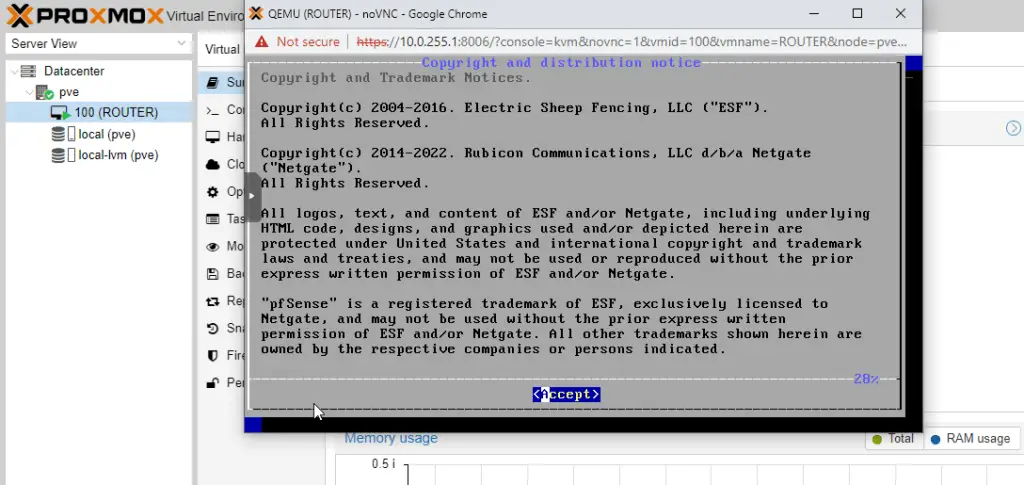
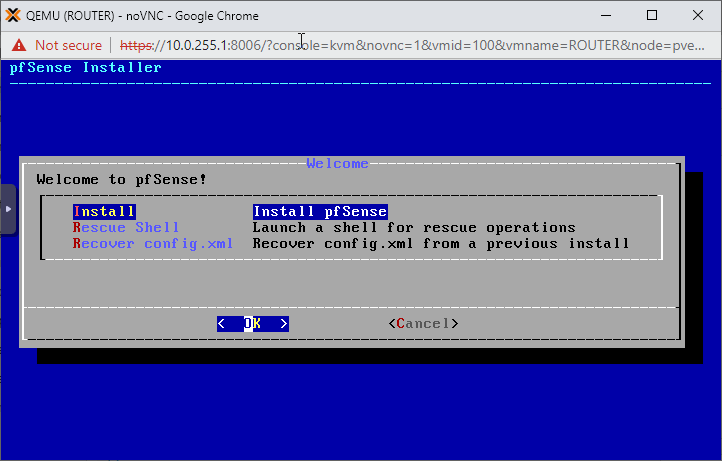
In the console select Accept, then Install.
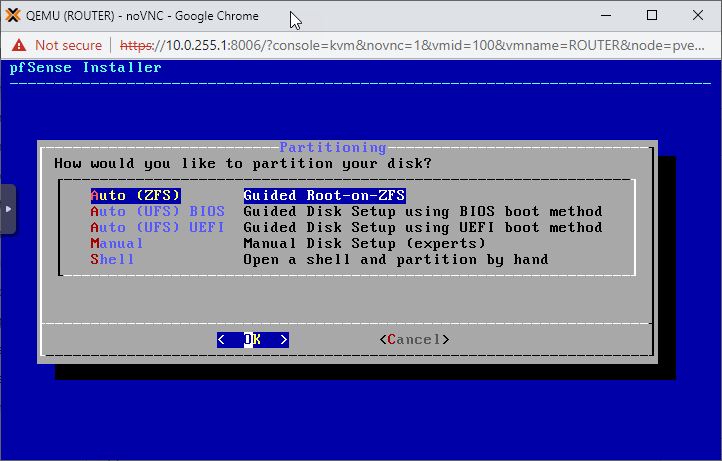
Select your preferred keyboard layout, then go with the Auto (ZFS) partitioning option on the next page.
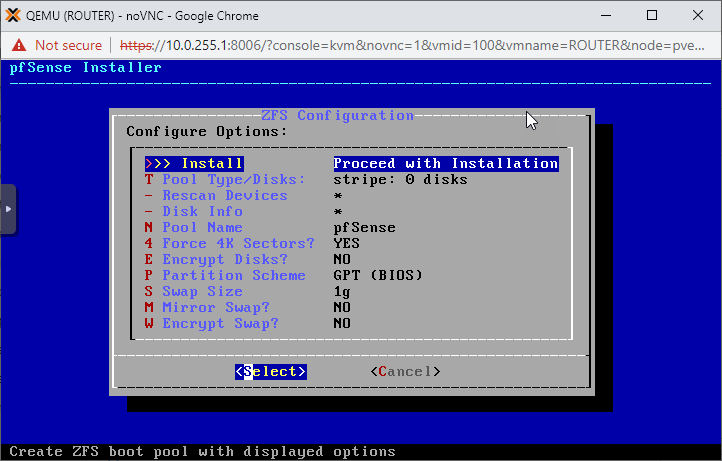
Next, select Install.
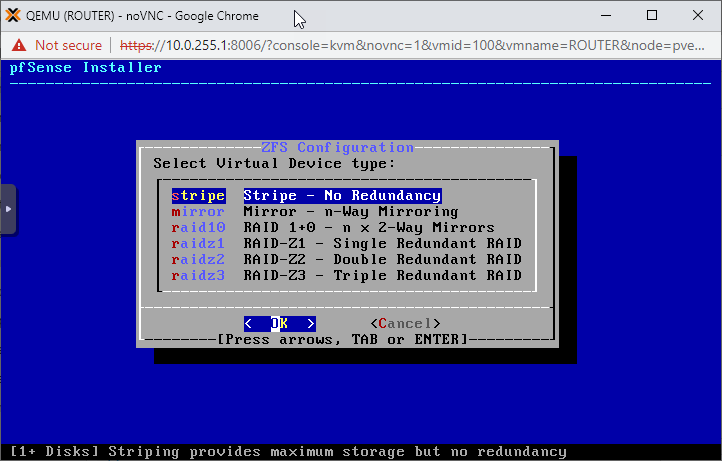
On the next page it doesn't really matter what RAID configuration we choose as we have a single disk for pfSense. Just go with the first option: stripe.
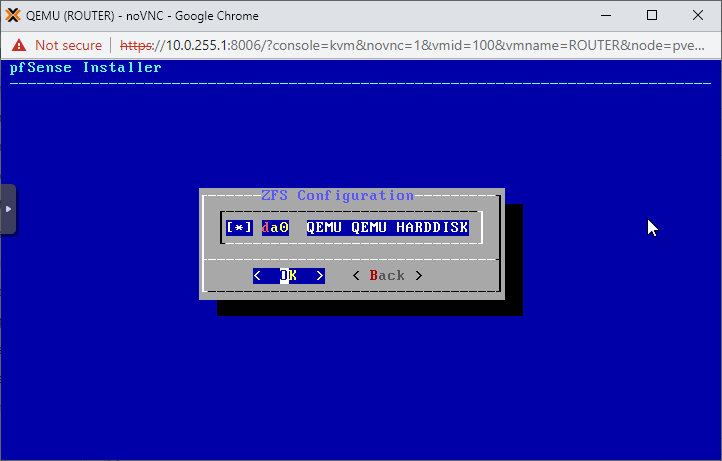
Select the single disk on the system (hit shift to check the box in front of it) and click OK.
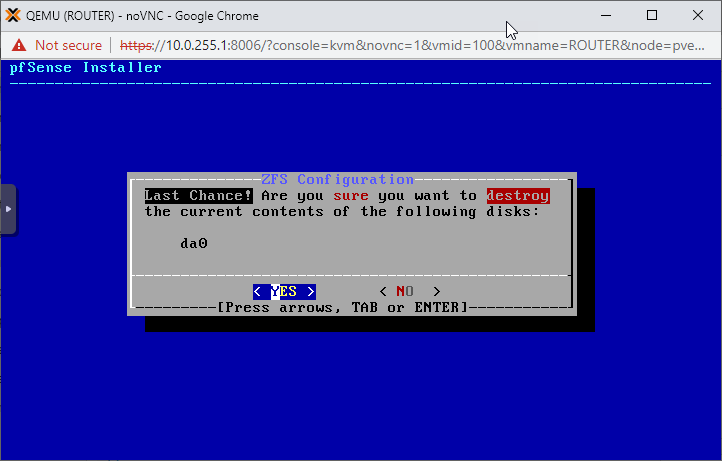
Accept the ominous last warning message, we're not risking any data loss as the VM has a totally empty virtual hard drive 🙂
Hit Yes.
When finished we are presented with the option to open a shell to make post-installation changes on the system, select No.
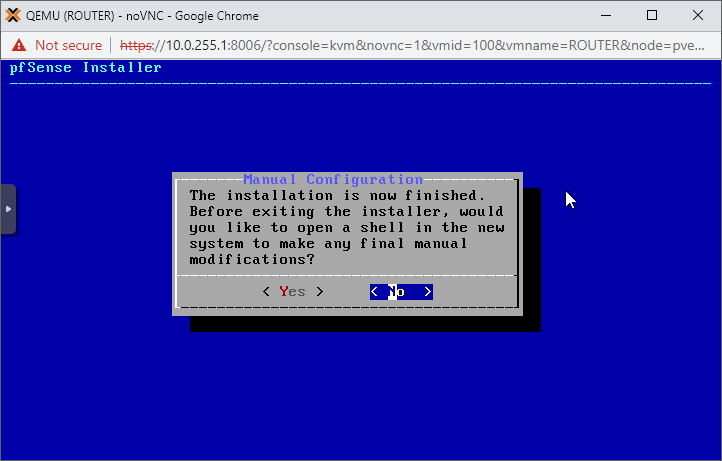
Reboot the pfSense VM.
Configure pfSense
Once the ROUTER virtual box is up, the out-of-the-box first configuration options come up.
Although ideally we'd like to configure VLANs, it's a simple home testing lab so we go vanilla and say No to the offer this time.
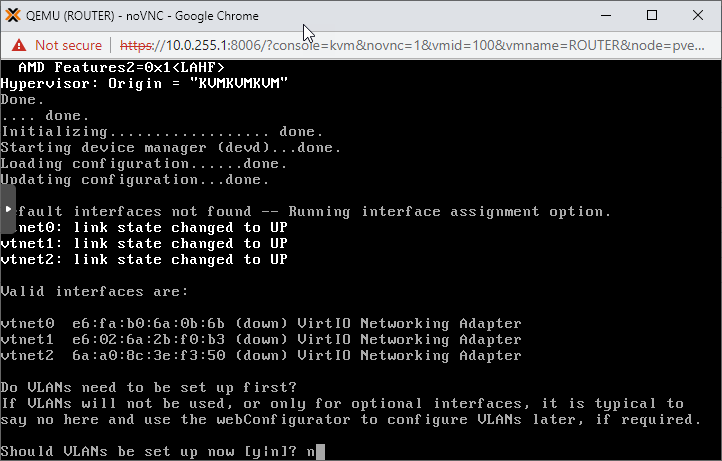
Assign vtnet0 as the WAN, vtnet1 as LAN and vtnet2 as OPT1 interfaces.

Now we have a nice basic pfSense configuration, so take a break, make yourself a coffee and lean back. We are through the biggest part.
All is left is to configure the pfSense ROUTER box, then start installing new VMs and enjoy our new virtual playground.
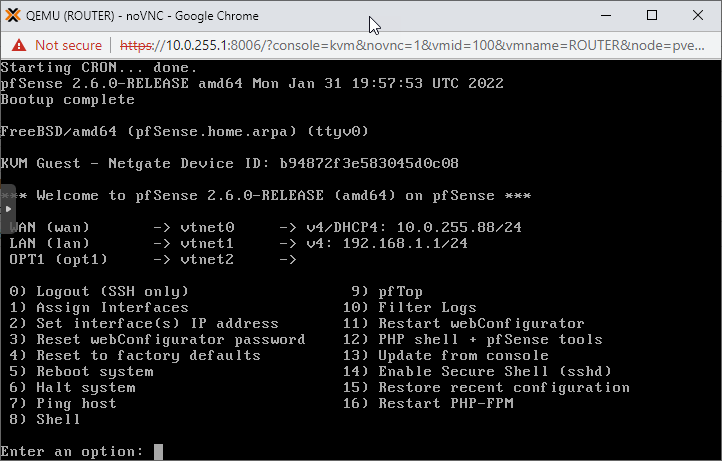
Set up the pfSense Interfaces
As seen above the WAN interface is facing our home router and we got an IP automatically from the DHCP service on the home network. This is absolutely fine, however we want to use a static IP address as our WAN interface for best practices.
Also setting up the internal Subnet1 and Subnet2 is important for the upcoming steps.
In the ROUTER console type in 2 and hit Enter to set custom IP addresses up on the router interfaces.
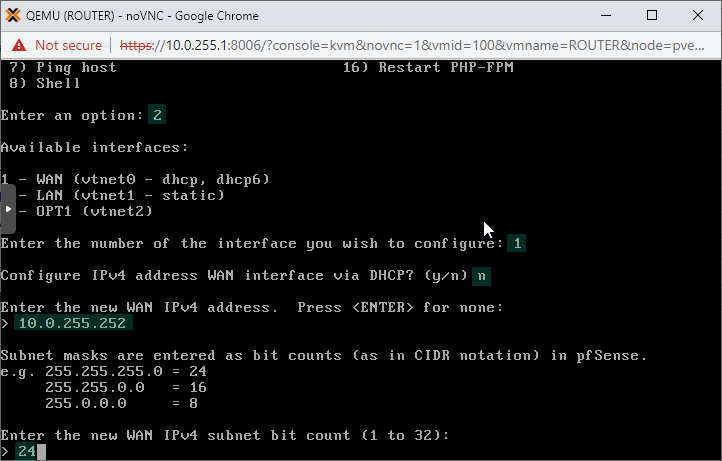
Start with interface 1 which is the Wide Area Network (external) interface. Say no to DHCP and put in IP address 10.0.255.252 and subnet mask 24. Note that your home network might have a different IP configuration refer to our earler step where we chacked the existing home network subnet.
In your case the home subnet is either 192.168.0.0/24 or 192.168.1.0/24. Let's go with 192.168.0.0/24 as a hypotetical example.
So we need to pick an IP address for our new virtual pfSense router. We use a higher IP address, in this instance 192.168.0.252 to avoid IP clashing. Your router's DHCP service likely use lower IP addresses to lease out for new devices.
The upstream gateway address is the address of your home router. Again, it's likely the first usable IP address in your home subnet, so in this hypotetical example it's 192.168.0.1.
In my case I have 10.0.255.254 as my home router, so I naturally use this subnet as the WAN subnet of the pfSense instance 🙂
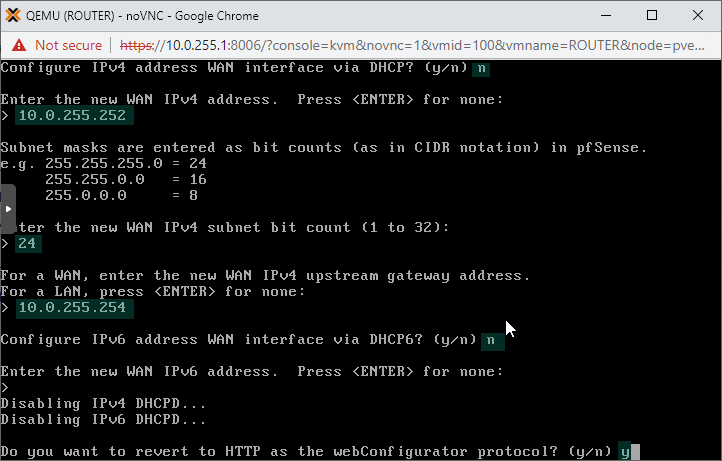
We don't configure an IPv6 address on the interface. Also feel free to revert back to HTTP for the pfSense console WebUI. If you select No here, HTTPS will be enforced on the WebUI.
In production environments that is the best practice, in our home lab the convenient thing to do is going the unencrypted HTTP way.

To configure the rest, we'll use the WebUI.
As we'll access it through the ROUTER's WAN interface, we need to disable the firewall on the pfSense box as it's only allowing management traffic on it's LAN interfaces by default.
Turn off the Firewall on pfSense
On the pfSense console type in option 8, hit Enter to get a shell. There, type in the following and hit Enter.
pfctl -d
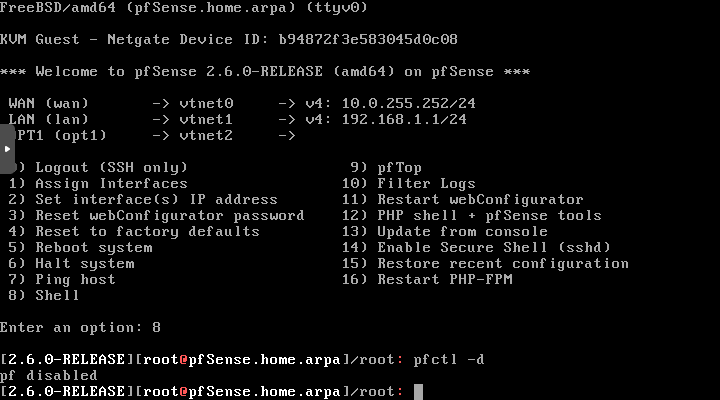
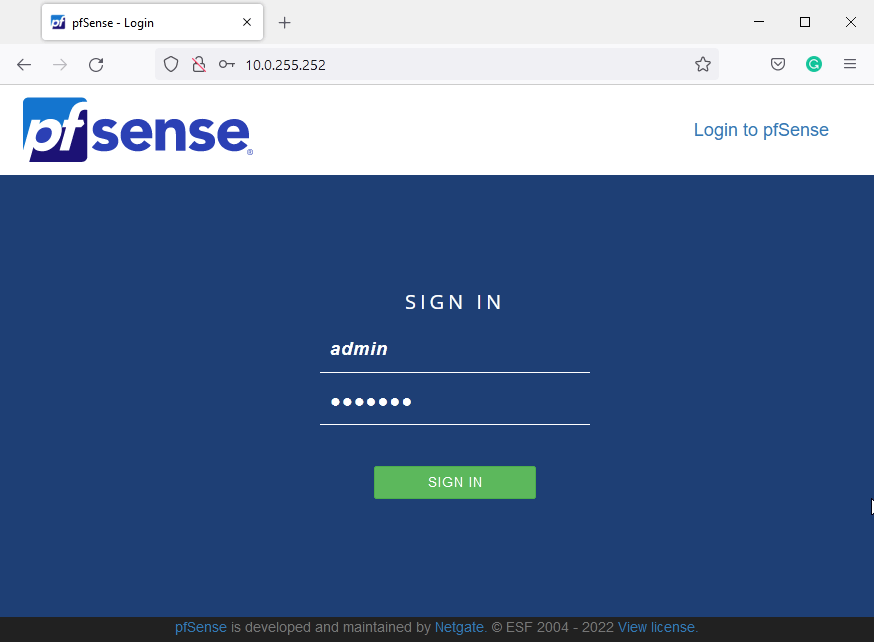
Open up a web browser window on your regular computer, and type in the IP address of your pfSense router. In my case it's 10.0.255.252
The pfSense portal opens up.
Default username is: admin
Password is: pfsense
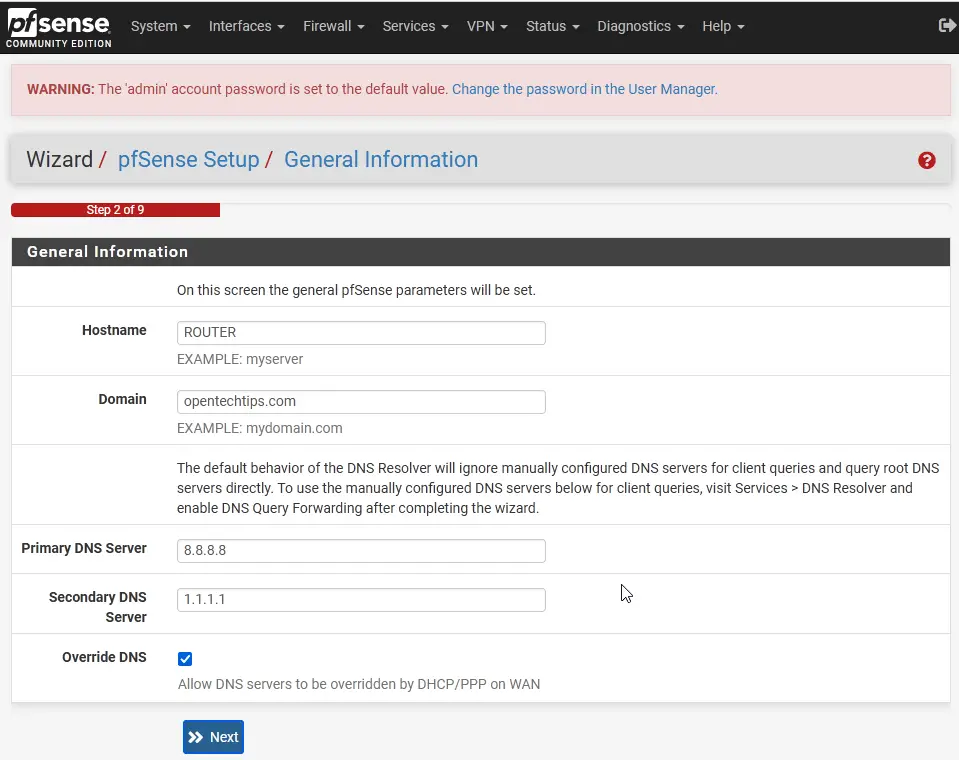
After logging in we'll see the setup wizard which comes up automatically after the first login. Acknowledging the first few pages we arrive to the General Information page. The hostname and domain are not super relevant, pick anything you prefer.
The primary and secondary DNS servers are important in the sense of the router will need them to resolve updating and repository URIs.
Hostname: ROUTER
Domain: opentechtips.com
Primary DNS: 8.8.8.8 (the Google DNS server)
Secondary DNS: 1.1.1.1 (the Cloudflare DNS server)
Hit Next.
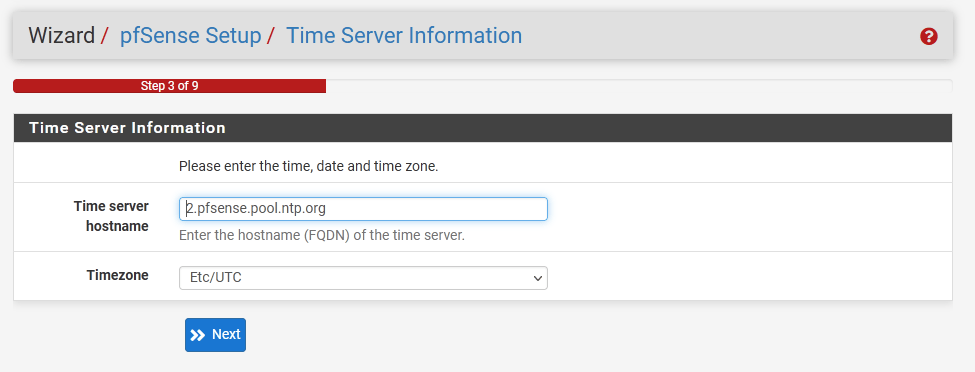
Leave the network time server details as is.
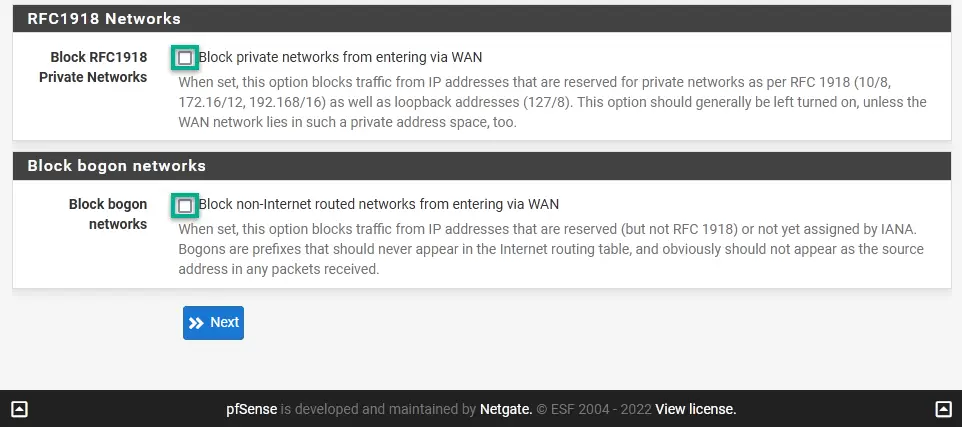
On the next screen we see the WAN network configuration already complete as we did it in the console earlier.
Scroll down to the bottom of the page and uncheck both the Block RFC1918 Networks and Block bogon networks boxes. It's our home lab and we want to access external network resources.
WAN to the pfSense box is technically our internal home network, so we'll definitely use private addresses behind the WAN interface 🙂
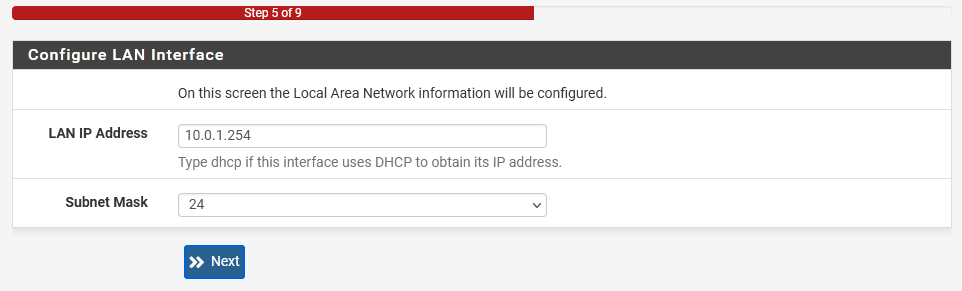
Next, configure the LAN interface. That's going to be our Subnet1 interface.
IP: 10.0.1.254
Subnet mask: 24 (or 255.255.255.0 in a longer format)
On the following page type in a new password for the admin account.
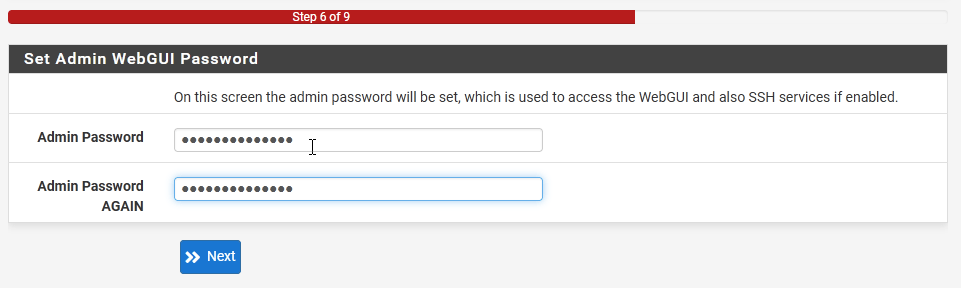
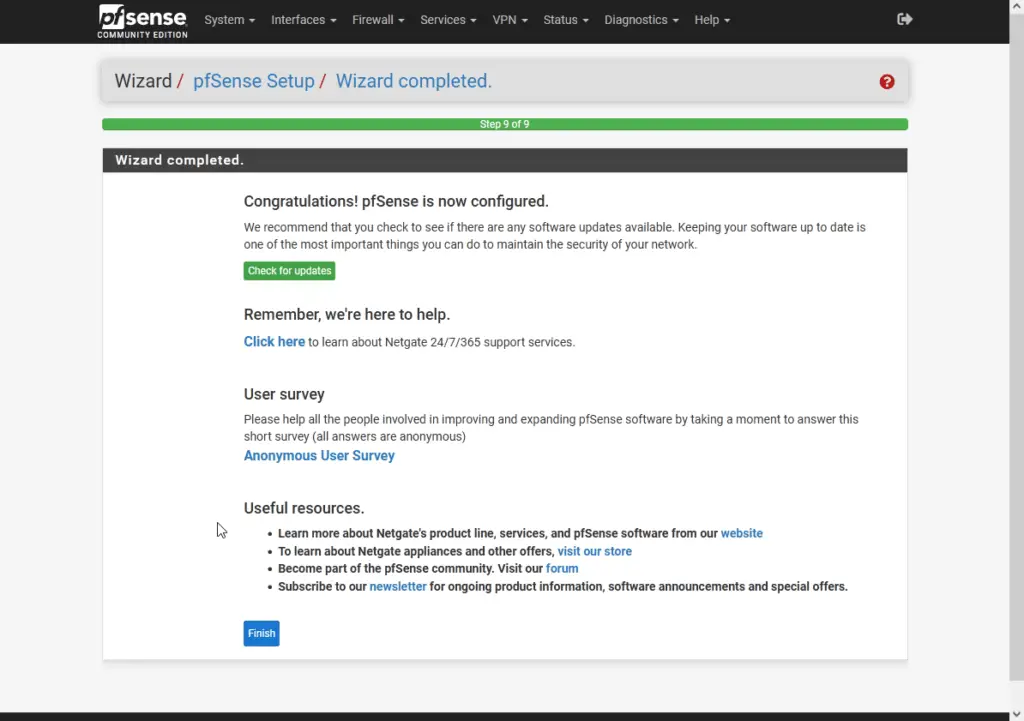
Reload the changes, and Finish the wizard.
Load Timeout!
You might need to issue the pfctl -d command in the console again to disable the firewall as it's still blocking the WAN connections, and reloading the WebUI might have re-activated it.
Configure the pfSense Interfaces
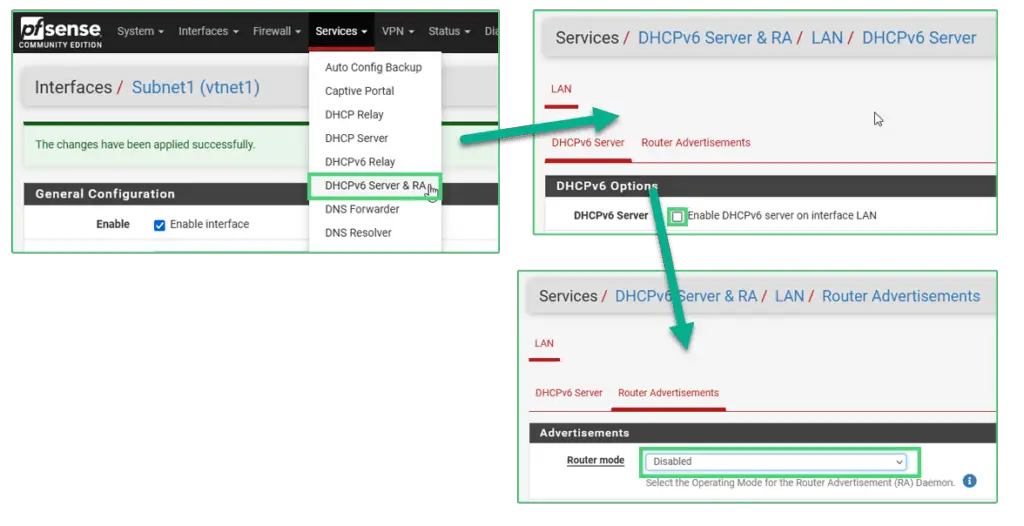
A little inconvenience here is that we need to disable DHCPv6 and Router Advertisements on the LAN interface before proceeding with the interface config.
Locate the Services tab on the top menu bar and click on Services/DHCPv6 Server & RA
Under the DHCPv6 Server tab uncheck the Enable DHCPv6 Server box.
ump to the Router Advertisements page and disable Router mode.
Pending ...
Remember, after each change the firewall service can potentially turn back on. If that happens you can always return to the pfSense console and run the pfctl -d command to turn off the service again.
Now we are ready to configure the internal subnet interfaces.
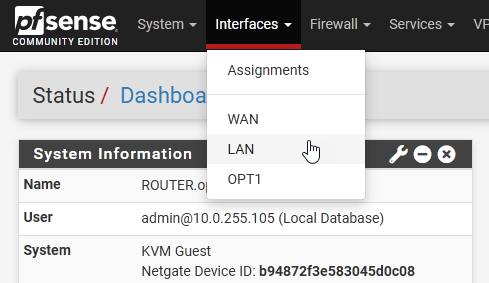
Click on Interfaces and select LAN from the list in the top menu.
Change the description to Subnet1, and choose the IPv6 configuration type on None. Click Save at the bottom of the page.
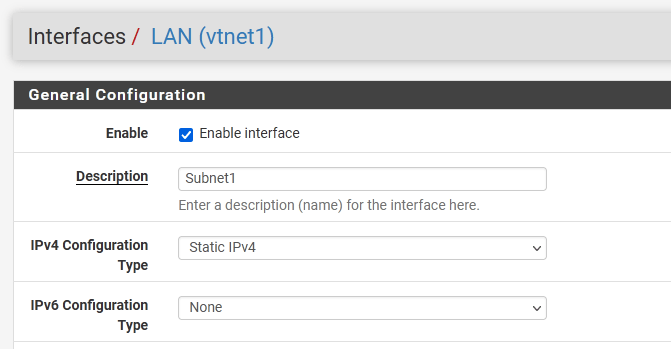
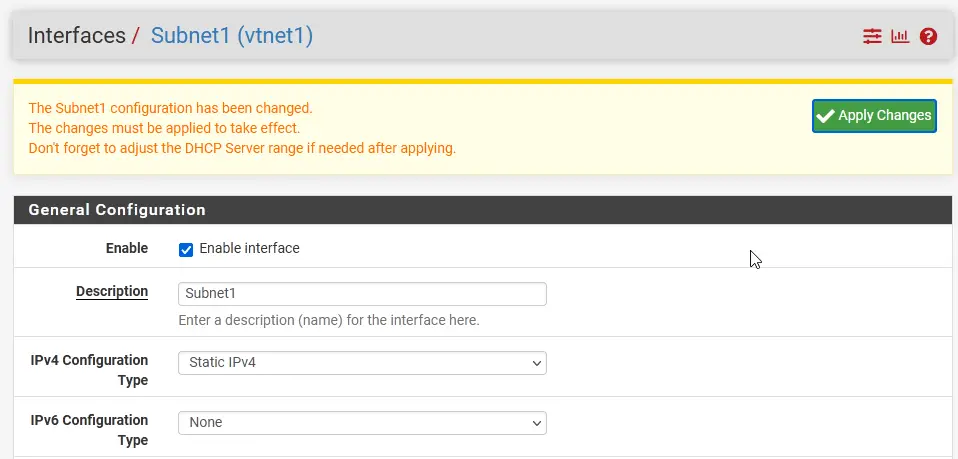
Don't forget to Apply changes!
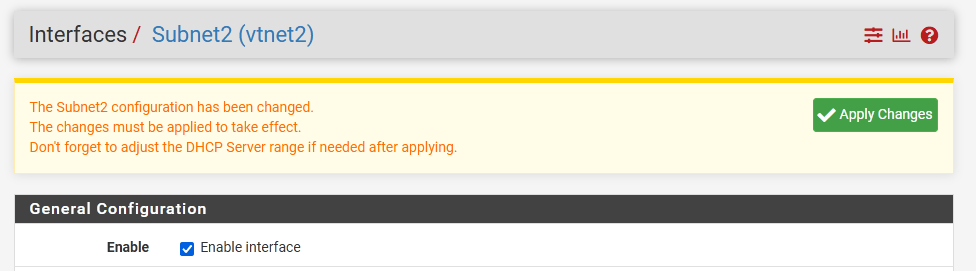
We are ready to configure Subnet2.
Click on Interfaces/OPT1.
- Enable the interface
- Name it Subnet2
- IPv4 type should be Static
- IPv4 address is 10.0.2.254/24
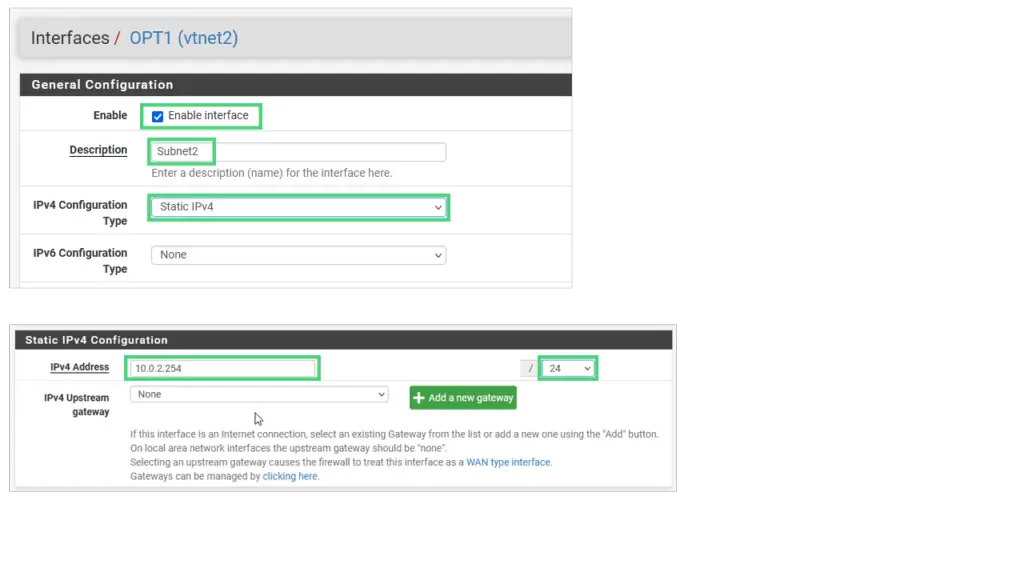
Apply changes.
Configure the pfSense Firewall
Now we tackle the firewall issue, stopping it from blocking the WAN traffic. You might ask why not to simply disable the firewall feature on pfSense permanently, we only use it as a router anyway.
It's not entirely true, we'll need the NAT functionality to give the internal subnets external network access and NAT needs the firewall service to be running.
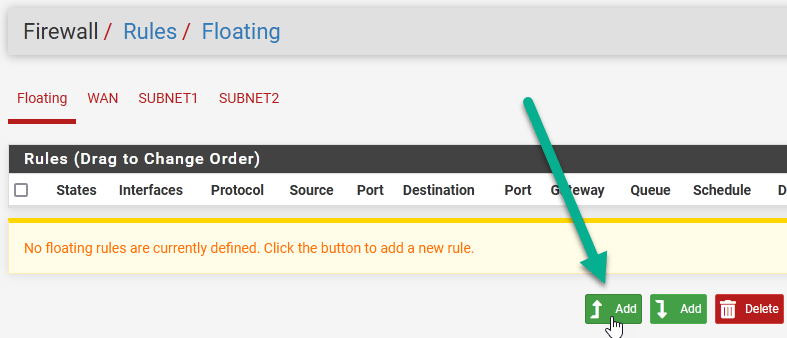
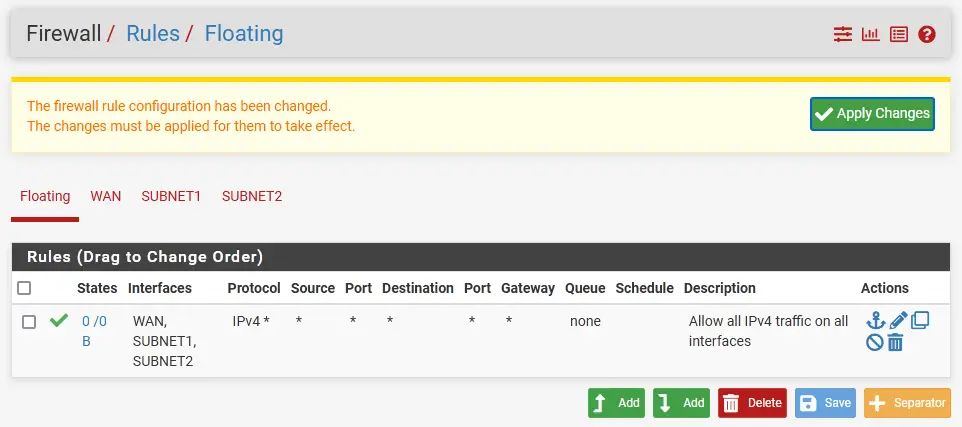
On the top of the main WebUI page click on Firewall and select Rules.
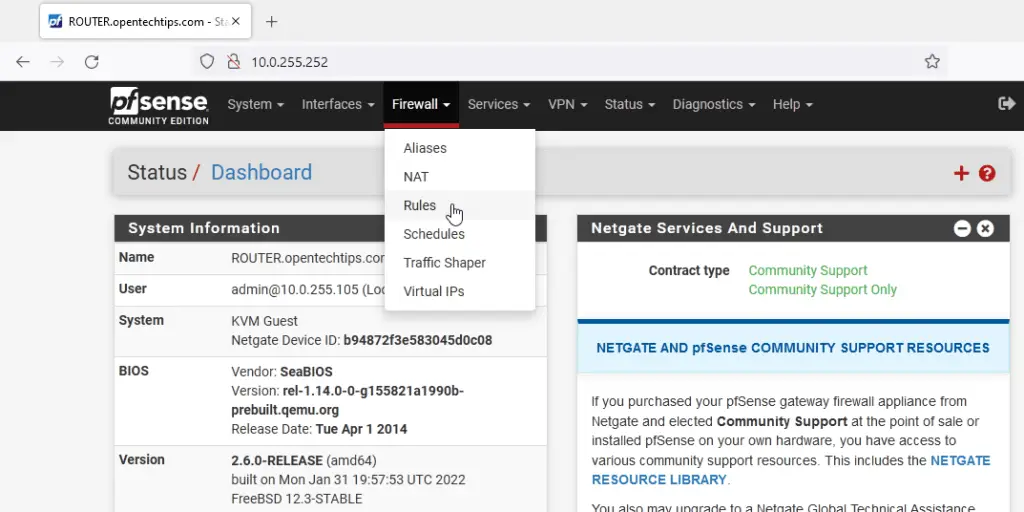
Select the Floating tab and click Add.
Set the following:
- Action: Pass
- Interface: press and hold the CTRL key on your keyboard and highlight all three interfaces in the system
- Direction: any
- Address Family: IPv4
- Protocol: Any
- Source: any
- Destination: any
Hit Save.
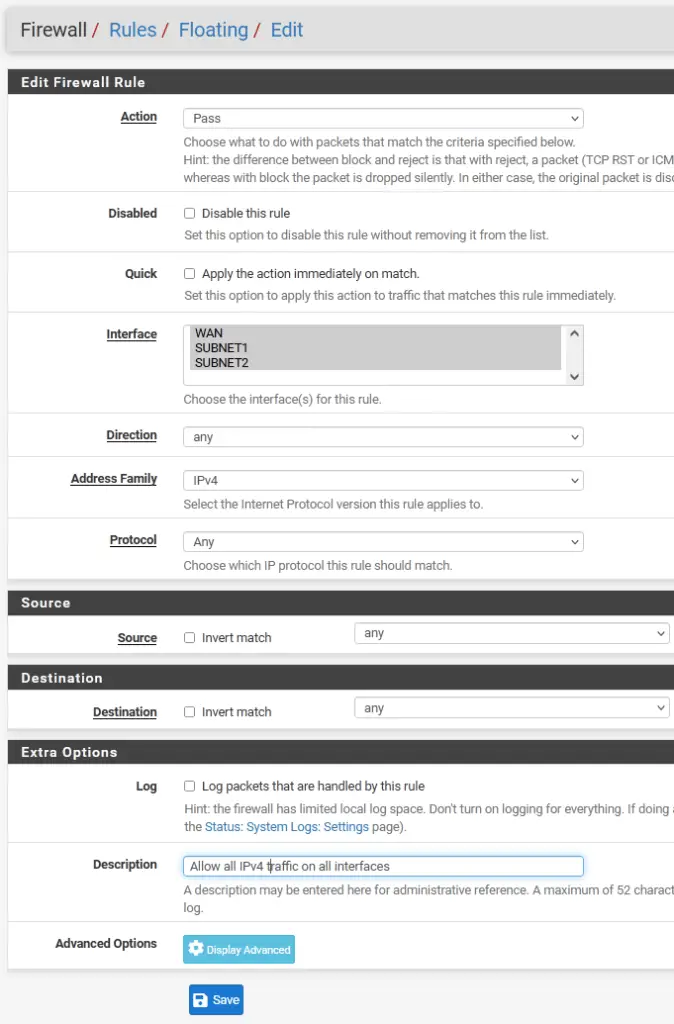
Apply changes.
Reboot ROUTER.
Our system is now fully configured. We can start building virtual machines!
Build Test Virtual Machines
We build two test VMs, connect one to Subnet1, the other one to Subnet2 to test our setup.
- Download a Windows Server 2016 ISO image like we did with pfSense before and upload it to the Proxmox host.
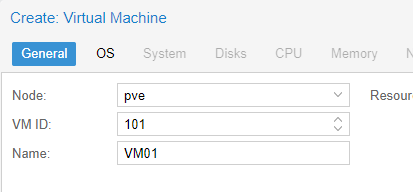
Windows Server 2016 Download Link - Click on the Create VM button on the top-right corner
- Name: VM01. Hit Next
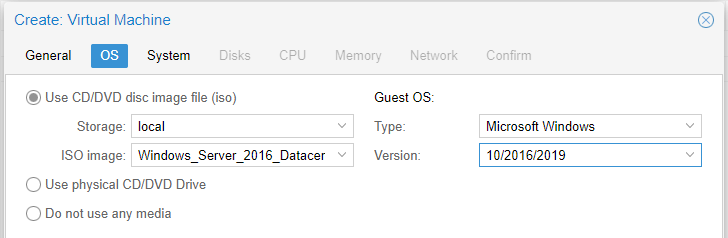
- Select the right ISO file, and the corresponding OS and version.
- On the Disks tab set the disk size to 50GB.
- Raise the CPU core count to 4.
- RAM allocation: 4096 GB (or more)
- On the Network tab uncheck the Firewall checkbox.
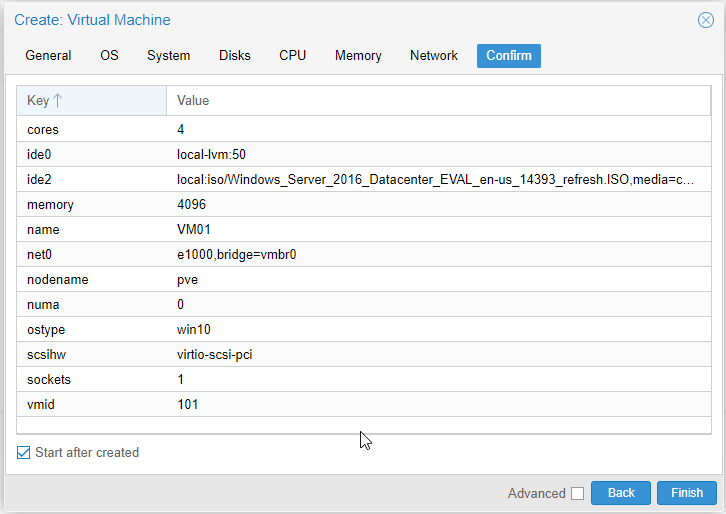
- On the Confirm tab check the configuration, make sure the Start after created checkbox is selected and hit Finish.
- Double-click on the VM name in your WebUI to open a console to the VM.
- Proceed with the installation. Make sure you select the Desktop Experience version when asked.
- Once the server is up, log in. We haven't set up a separate VLAN for each individual subnets so DHCP will likely not work as expected. The server will likey receive and IP address from your home network router. This means we need to set a static IP address for the server manually. Open a Run box (Win key + R), type in ncpa.cpl and hit Enter.
Right-click on the Ethernet interface, choose Properties.
Highlight the Internet Protocol Version 4 option in the following list, and click on Properties.
Use the following config there:
IP address: 10.0.1.10
Subnet mask: 255.255.255.0
Default gateway: 10.0.1.254
DNS servers: 8.8.8.8 and 1.1.1.1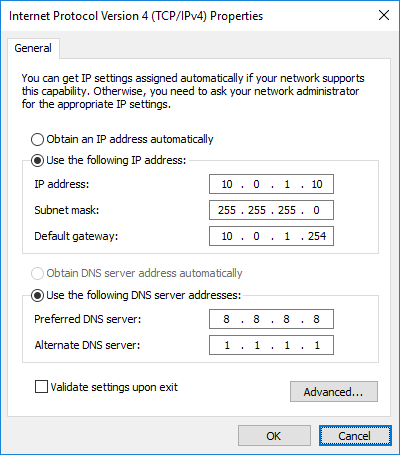
- Tun off the firewall service on the server. This will make testing a lot simpler, otherwise the ICMP echo packets would be dropped when trying to ping the other server.
a. Open an elevated command prompt (right-click on the Windows button, then choose Command Prompt (Admin) )
b. Run this command there:
netsh advfirewall set allprofiles state off
Repeat these steps (1 -13) with VM02.
The only differences:
- At step 3 use name: VM02
- Step 12 -use the following config here:
IP address: 10.0.2.10
Subnet mask: 255.255.255.0
Default gateway: 10.0.2.254
DNS servers: 8.8.8.8 and 1.1.1.1
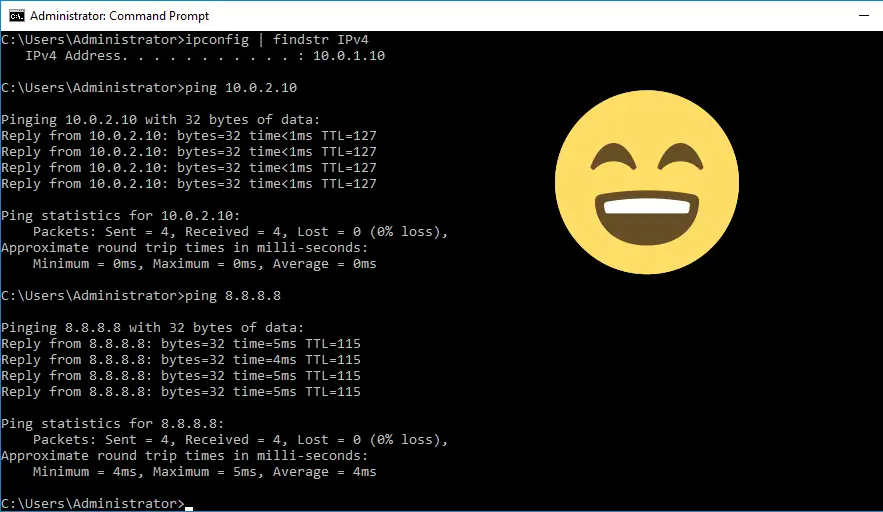
Test connectivity from VM01 (10.0.1.10), pinging VM02 (10.0.2.10) and also the public Google DNS servers (8.8.8.8).
Bonjour Zsolt,
Merci infiniment pour ce précieux partage qui permet de mieux comprendre proxmox et pfsense. J’ai beaucoup apprécié. Ce document permet de monter un lab très rapidement. Merci encore
Hi,
Thank you for the home IT lab intractable.
Just wondering why you’ve used the address 10.0.255.1/24 ?
I don’t understand why this was used during the vmbr0 config ?
Thanks
Gav
There was a mixup in the example IP configuration. So 10.0.255.0/24 is my home network, the default gateway is 10.0.255.254. I simply picked one available IP address in the home subnet (10.0.255.1 – 10.0.255.253) for the Proxmox host. The first available address is 10.0.255.1 so I used this for simplicity.
Thank you so much this was well put together. Greatly appreciated!
Followed this excellent guide creating one subnet in the 10.10.10.0/24 range and one in the 172.27.1.0/16 range. I am struggling to get internet access on the subnets, pinging an IP address gives me a redirect message ang all pings fail. Any ideas?
Sure, if you need access to the internet or between your subnets you need routing configured. Either by using a physical router or a virtual.
For details, check out the section ‘Configure Routing Between Subnets and the Internet’ in the article.
Great detailed instruction. If you could provide a network drawing with all connected devices and subnets in this setup, that would be so helpful. Thank you.
Hello thank you
small precision. the static WAN ip address does not work, you will have to remember to leave it in dchp to have the connection
THANKS
Thanks for these instructions, very helpful! What if we want pfsense to replace our router as the primary internet gateway? What needs to be done differently?
Thanks for these detailed instructions!
If you would have made the choice to configure routing via a separate 1 NIC laptop with PfSense / OPNSense installed, how would you have configured that. I think then you need a managed switch. Can you also provide a tutorial for that?
Thanks!