• Skip to primary navigation
  • Skip to main content
  • Skip to primary sidebar
  • Skip to secondary sidebar
OpenTechTips

OpenTechTips

Comprehensive IT Guides for Pros and Enthusiasts

MENUMENU
  • HOME
  • ALL TOPICS
    • Exchange
    • InfoSec
    • Linux
    • Networking
    • Scripting
      • PowerShell
    • SSL
    • Tools
    • Virtualization
    • Web
    • Windows
  • ABOUT
  • SUBSCRIBE
Home » Office365 to Office365 Migration for FREE – Step by Step » Page 4

Office365 to Office365 Migration for FREE – Step by Step

March 21, 2020 - by Zsolt Agoston - last edited on January 17, 2021

Sync the MSOL attributes into the agzsolt.com local AD accounts

Here the most important thing is that the ExchangeGUID attribute of the accounts on the destination on-prem server must match the ExchangeGUID, WindowsEmailAddress and PrimarySMTPAddress attributes of the actual cloud mailboxes. We sync them doing the following:

  1. On the cloud server we run the following command that will create a file called csv, with all the mailboxes and with the attributes we need:
Get-Mailbox -ResultSize Unlimited | select userprincipalname,windowsemailaddress,alias,exchangeGUID | Export-Csv mailboxes.csv

Now we import the important attributes into the on-prem server for compliance:

import-csv mailboxes.csv | foreach {
 $name=$_.userprincipalname
 $winname=$_.windowsemailaddress
 $alias=$_.alias
 $guid=$_.exchangeGUID
 Set-RemoteMailbox -Identity $name -ExchangeGuid $guid -WindowsEmailAddress $winname -EmailAddresses @{add="$name"} 
 Set-RemoteMailbox -Identity $name -PrimarySmtpAddress $name
 write-host "$name has given GUID: $guid"
 }

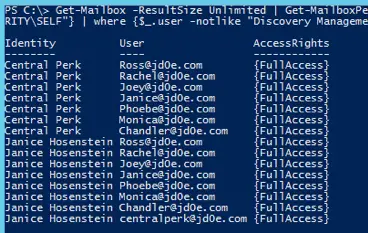
2. To save the mailbox permission structure, we create a backup file that stores that information, called perm.csv

Get-Mailbox -ResultSize Unlimited | Get-MailboxPermission | where {$_.isinherited -like "FALSE"} | where {$_.user -notlike "NT AUTHORITY\SELF"} | where {$_.user -notlike "Discovery Management"} | select identity,user,accessrights | Export-Csv perm.csv
Office365 to Office365 Migration for FREE – Step by Step

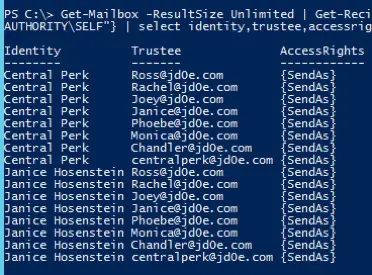
We do the same with send-as permissions (sendasperm.csv):

Get-Mailbox -ResultSize Unlimited | Get-RecipientPermission | where {$_.isinherited -like "FALSE"} | where {$_.trustee -notlike "NT AUTHORITY\SELF"} | select identity,trustee,accessrights | Export-Csv sendasperm.csv
Office365 to Office365 Migration for FREE – Step by Step

3. Next, we save the distribution groups and members as well in a file called csv

$distro = Get-DistributionGroup -ResultSize unlimited
 $distro | select samaccountname,displayname,windowsemailaddress | Export-Csv distro-list.csv
 $members = foreach ($m in $distro) { Get-DistributionGroupMember -Identity $m.Identity | Select @{Name="Group";Expression={$m.name}},PrimarySMTPAddress}
 $members | export-csv distro.csv
Office365 to Office365 Migration for FREE – Step by Step

4. Let’s export the contacts:

Get-Contact -ResultSize unlimited | select identity, name,displayname,firstname,lastname,windowsemailaddress | export-csv contacts.csv
Office365 to Office365 Migration for FREE – Step by Step

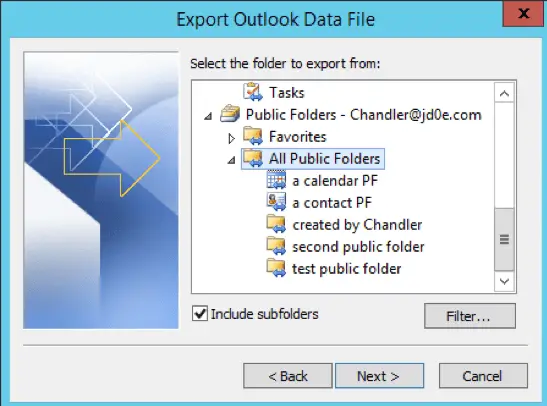
5. As the public folder migration is a little cumbersome between O365 and on-prem, even with modern public folder mailboxes, we simply export all the public folders from an Outlook client into a PST file for future ingestion

Office365 to Office365 Migration for FREE – Step by Step

Migrate users to agzsolt.com on-prem

Now we create a migration batch that will synchronize and move the opentechtips.com mailboxes to the on-prem endpoint. We create our first batch called “First Ones” from first.csv:

first.csv

EmailAddress
 Ross@jd0e.com
 Joey@jd0e.com
 Monica@jd0e.com
 Rachel@jd0e.com
 Chandler@jd0e.com
 Phoebe@jd0e.com
 Janice@jd0e.com
 CentralPerk@jd0e.com

Script:

New-MigrationBatch -Name "First Ones" -TargetEndpoint "agzsolt" -BadItemLimit unlimited -TargetDeliveryDomain agzsolt.com -CSVData ([System.IO.File]::ReadAllBytes("C:\first.csv")) -TargetDatabases "edebdf60-047b-4542-a36c-e923f9f14d9d" -Verbose
Office365 to Office365 Migration for FREE – Step by Step

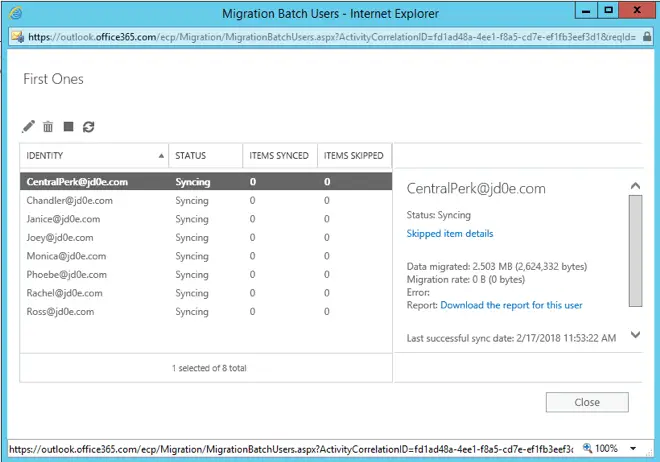
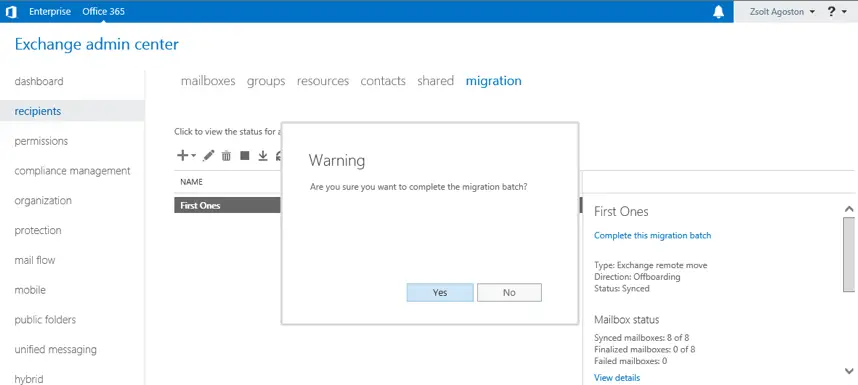
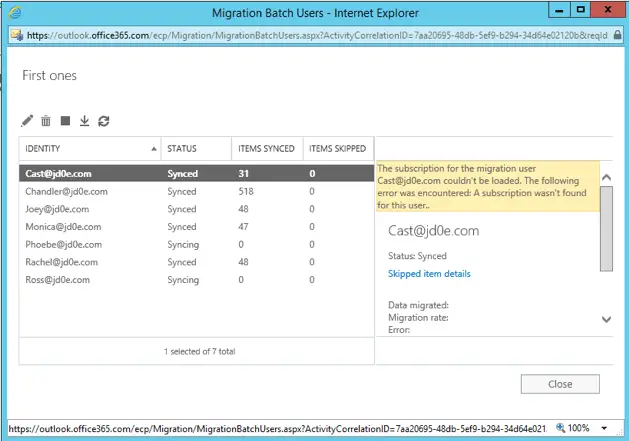
When it’s done we are ready to complete the whole batch (or just specific mailboxes, it depends on our needs)

Office365 to Office365 Migration for FREE – Step by Step

We complete the migration batch and make sure the users can access their mailboxes and they are functional

Office365 to Office365 Migration for FREE – Step by Step

Just to mention: the shared mailboxes need a license to be assigned to them

Office365 to Office365 Migration for FREE – Step by Step

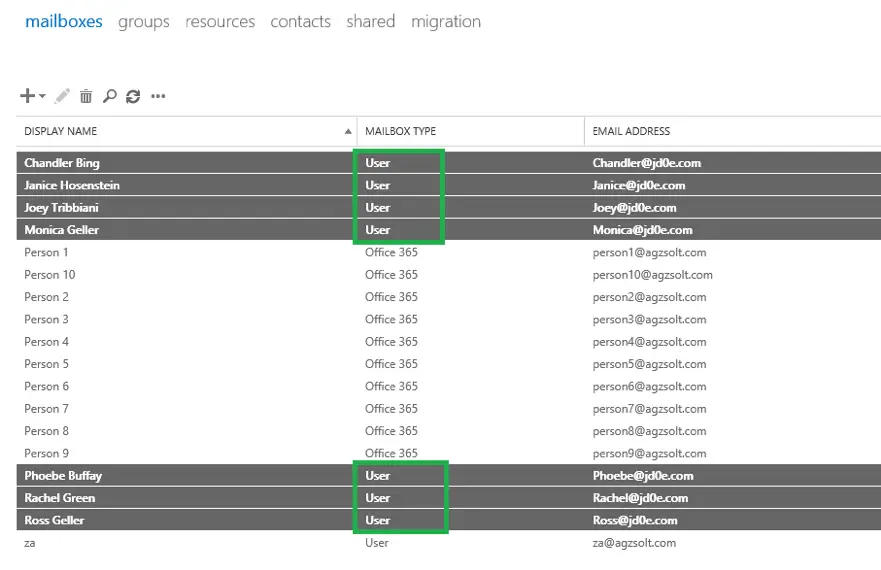
After the migration, we see that the on-prem server handles the mailboxes as local mailboxes:

Office365 to Office365 Migration for FREE – Step by Step

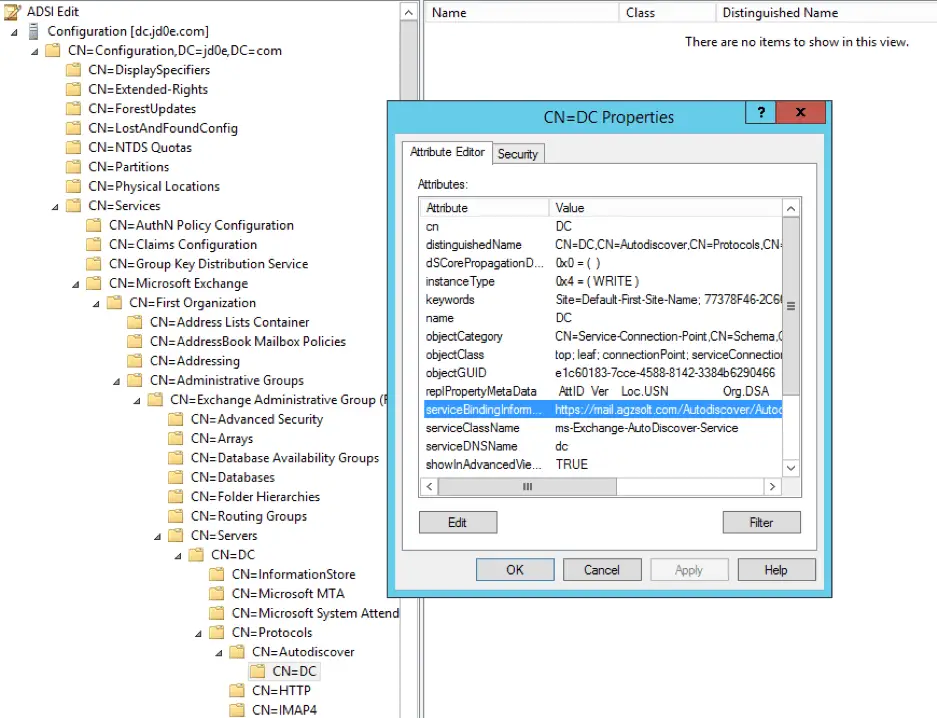
At this point we change the local SCP record for autodiscover on the opentechtips.com (source) domain controller, because this is the first place the server is looking for the autodiscover.xml data file which will not return the right values. We change that to point to the agzsolt.com (destination) autodiscover file:

https://mail.agzsolt.com/Autodiscover/Autodiscover.xml

This step ensures un-broken Outlook functionality for all the users with domain-joined  computers.

Office365 to Office365 Migration for FREE – Step by Step

If you prefer the shell the following command does the same:

Set-ClientAccessServer -Identity dc -AutoDiscoverServiceInternalUri "https://autodiscover-s.outlook.com/Autodiscover/Autodiscover.xml"

Note that the windows Outlook client is relying on the autodiscover record to locate public folders and it checks the SCP record first when it’s opened. If we changed it before moving the public folder mailbox to the new server, it would give us an error message on the client side!

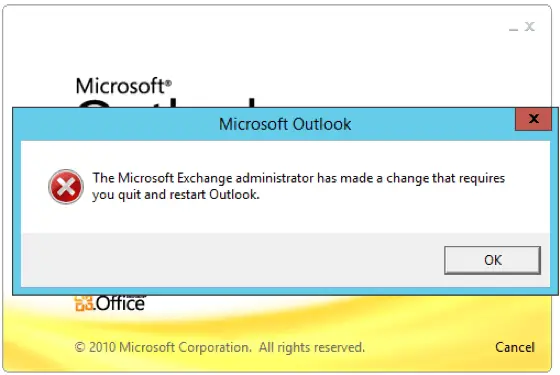
Once the users try to log in, Outlook notifies them of the changes in the background - the server name will be updated in the profile - and the users will be asked to close and open Outlook again, just like after a cloud migration:

Office365 to Office365 Migration for FREE – Step by Step

Now another good news is that from this point if a user needed to re-create his/her Outlook profile on a domain-joined client (even on the source-side in the jd0e.com forest), they won’t be prompted for their password, as long as the passwords match on the original jd0e.com and the new agzsolt.com forests -  the kerberos ticketing will work flawlessly

After logging in, we test the mail flow:

Office365 to Office365 Migration for FREE – Step by Step

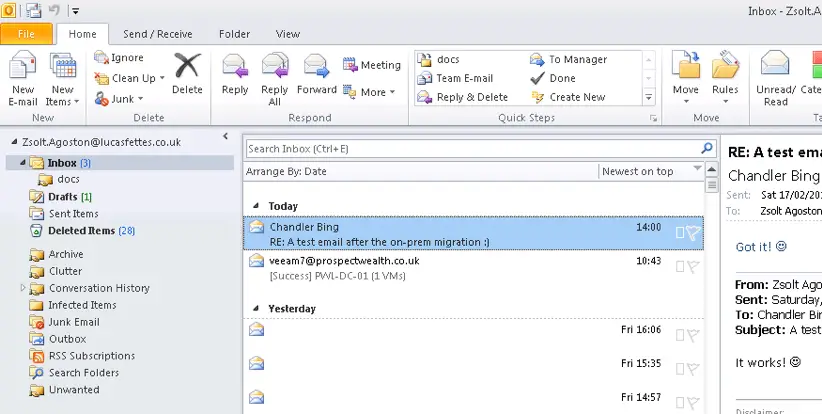
Excellent! The mail flow works in both directions!

Before we forget, we remove the old jd0e.onmicrosoft.com STMP addresses from the moved mailboxes.

import-csv users.csv | foreach {
 $name=$_.FirstName
 Set-Mailbox -Identity $name -EmailAddresses @{remove="$name@jd0e.onmicrosoft.com" }
 }
Pages: Page 1 Page 2 Page 3 Page 4 Page 5

Primary Sidebar

Tools

Secondary Sidebar

CONTENTS

  • The starting scenario
  • Mailbox situation:
  • Prepare the destination on-prem server
  • Change the jd0e.com MX record to point to the agzsolt.com on-prem server
  • Disable Federation
  • Cut opentechtips.com dirsync (can take up to 72 hours to complete), or…
  • Create jd0e.com users in the agzsolt.com local AD in a non-synced OU
  • users.csv
  • Configure the cross-forest hybrid environment
  • Sync the MSOL attributes into the agzsolt.com local AD accounts
  • Migrate users to agzsolt.com on-prem
  • Strip down the old tenant
  • Sorting the post-migration tasks: permissions check, distribution lists and contacts creation
  • MIGRATE BACK TO THE CLOUD
  • UpToTheCloud.csv
  • Script:
  • Start the migration
  • Now it’s time to complete the migration batch
  • Tidying up

  • Terms of Use
  • Disclaimer
  • Privacy Policy
Manage your privacy

To provide the best experiences, we and our partners use technologies like cookies to store and/or access device information. Consenting to these technologies will allow us and our partners to process personal data such as browsing behavior or unique IDs on this site and show (non-) personalized ads. Not consenting or withdrawing consent, may adversely affect certain features and functions.

Click below to consent to the above or make granular choices. Your choices will be applied to this site only. You can change your settings at any time, including withdrawing your consent, by using the toggles on the Cookie Policy, or by clicking on the manage consent button at the bottom of the screen.

Functional Always active
The technical storage or access is strictly necessary for the legitimate purpose of enabling the use of a specific service explicitly requested by the subscriber or user, or for the sole purpose of carrying out the transmission of a communication over an electronic communications network.
Preferences
The technical storage or access is necessary for the legitimate purpose of storing preferences that are not requested by the subscriber or user.
Statistics
The technical storage or access that is used exclusively for statistical purposes. The technical storage or access that is used exclusively for anonymous statistical purposes. Without a subpoena, voluntary compliance on the part of your Internet Service Provider, or additional records from a third party, information stored or retrieved for this purpose alone cannot usually be used to identify you.
Marketing
The technical storage or access is required to create user profiles to send advertising, or to track the user on a website or across several websites for similar marketing purposes.
Statistics

Marketing

Features
Always active

Always active
Manage options Manage services Manage {vendor_count} vendors Read more about these purposes
Manage options
{title} {title} {title}
Manage your privacy
To provide the best experiences, we use technologies like cookies to store and/or access device information. Consenting to these technologies will allow us to process data such as browsing behavior or unique IDs on this site. Not consenting or withdrawing consent, may adversely affect certain features and functions.
Functional Always active
The technical storage or access is strictly necessary for the legitimate purpose of enabling the use of a specific service explicitly requested by the subscriber or user, or for the sole purpose of carrying out the transmission of a communication over an electronic communications network.
Preferences
The technical storage or access is necessary for the legitimate purpose of storing preferences that are not requested by the subscriber or user.
Statistics
The technical storage or access that is used exclusively for statistical purposes. The technical storage or access that is used exclusively for anonymous statistical purposes. Without a subpoena, voluntary compliance on the part of your Internet Service Provider, or additional records from a third party, information stored or retrieved for this purpose alone cannot usually be used to identify you.
Marketing
The technical storage or access is required to create user profiles to send advertising, or to track the user on a website or across several websites for similar marketing purposes.
Statistics

Marketing

Features
Always active

Always active
Manage options Manage services Manage {vendor_count} vendors Read more about these purposes
Manage options
{title} {title} {title}