• Skip to primary navigation
  • Skip to main content
  • Skip to primary sidebar
  • Skip to secondary sidebar
OpenTechTips

OpenTechTips

Comprehensive IT Guides for Pros and Enthusiasts

MENUMENU
  • HOME
  • ALL TOPICS
    • Exchange
    • InfoSec
    • Linux
    • Networking
    • Scripting
      • PowerShell
    • SSL
    • Tools
    • Virtualization
    • Web
    • Windows
  • ABOUT
  • SUBSCRIBE
Home » Office 365 Onboarding and Offboarding | The Simple Way

Office 365 Onboarding and Offboarding | The Simple Way

July 31, 2020 - by Zsolt Agoston - last edited on August 15, 2020

Migrating users from on-prem to Office365 (onboarding) and from the cloud to on-premises (offboarding) is easier done by using the Shell. The migration batches are created from a csv file. After the batch is ready, we start the batch, which will synchronize the mailboxes to the cloud and keep them updated until they are completed. During the Hybrid Configuration Wizard process, a migration endpoint is automatically created in the cloud to the on-prem servers. If you don't have any endpoints configured, follow the guide here to create one.

As you see below the maximum concurrent job number is set to 20 by default. This is the number of mailboxes that can be transferred at the same time between the servers. Out of the twenty lines, 10 is made available for incremental syncs. That means when the batch finishes with the initial sync, it will keep the cloud mailbox copies updated periodically, until the batch is finalized.

PS C:\> Get-MigrationEndpoint | Select Identity,MaxConcurrentMigrations,MaxConcurrentIncrementalSyncs

Identity                                           MaxConcurrentMigrations MaxConcurrentIncrementalSyncs
--------                                           ----------------------- -----------------------------
Hybrid Migration Endpoint - EWS (Default Web Site) 20                      10

It is possible to complete either the whole batch, which technically switches the mailboxes over to the cloud and remove them from on-prem, or you can complete individual mailboxes at a time, see details below.

1. Create the CSV file with the list of mailboxes

First, we need a csv file that contains all of our mailboxes we intend to move. The b1.csv file should have only one column, called "EmailAddress" as shown below:

EmailAddress
John.Doe@AlwaysHotCafe.com
Jane.Doe@alwayshotcafe.com
jcash@AlwaysHotCafe.com
KevinSmith@AlwaysHotCafe.com
KimTaylor@AlwaysHotCafe.com
LizHarrison@AlwaysHotCafe.com
PeterCarrey@AlwaysHotCafe.com
Yesenia.Burch@alwayshotcafe.com
Zane.Aguilar@alwayshotcafe.com
Bradley.Roberts@alwayshotcafe.com
…

TIP: The following command is used to export the list of email addresses in the organization, you can further filter the list, or manually create it at your convenience. Just don't forget to rename the "UserPrincipalName" to "Emailaddress" in the first line of the csv file:

PS C:\temp> Get-Mailbox | Select UserPrincipalName | Export-Csv b1.csv -NoTypeInformation

2. Create Onboarding or Offboarding batches

On boarding is a simpler task, as we don't need to specify the target database where we want the mailboxes to be moved to, because the cloud manages that automatically. When offboarding, we want to tell Exchange where the mailboxes should be stored on-prem, as when we are talking about terabytes of data, we might want to distribute them evenly among multiple databases and possibly multiple servers.

# Onboarding:
PS C:\temp> New-MigrationBatch -Name "B1" -SourceEndpoint "Hybrid Migration Endpoint - EWS (Default Web Site)" -CSVData ([System.IO.File]::ReadAllBytes("C:\temp\b1.csv")) -BadItemLimit 100 -LargeItemLimit 100 -TargetDeliveryDomain alwayshotcafe2020.onmicrosoft.com
# Offboarding:

# Get DB guid; !!! Run this command against the on-prem Exchange server!!!
PS C:\> Get-MailboxDatabase | Select Name,Guid

Name Guid
---- ----
DB01 91bb184f-d452-49c4-835e-17dc47c95a49

# Create the offboarding batch in EOL:
PS C:\temp> New-MigrationBatch -Name "OffBoarding1" -TargetEndpoint "Hybrid Migration Endpoint - EWS (Default Web Site)" -TargetDeliveryDomain alwayshotcafe.com  -TargetDatabases "91bb184f-d452-49c4-835e-17dc47c95a49" -BadItemLimit 100 -LargeItemLimit 100 -CSVData ([System.IO.File]::ReadAllBytes("C:\temp\b1.csv"))

3. Start Batches

After creating, we start the batches. Alternatively, we might use the -AutoStart switch with the New-MigrationBatch cmdlet to automatically start the batch as soon as it's created.

PS C:\> "B1" | Start-MigrationBatch

4. Complete batches

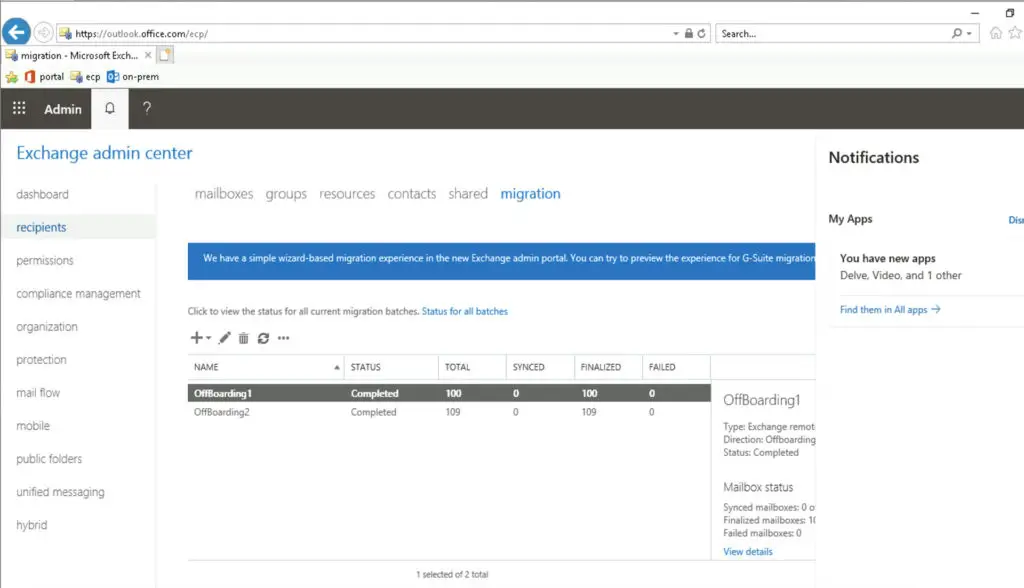
Last step is completing the migration batches when they finished syncing. Also, if you prefer you can use the -AutoComplete switch with the New-MigrationBatch cmdlet which will automatically finish the move requests for you. Best practice though is to leave it on manual mode, so you will be able to decide when jobs are completed, simply because that has an effect on the user experience and you might want to schedule that completion out of business hours.

PS C:\> "B1" | Complete-MigrationBatch -Confirm:$false
Office 365 Onboarding and Offboarding | The Simple Way

5. Complete individual users in a batch

Check out the guide here

Reader Interactions

Comments Cancel reply

Your email address will not be published. Required fields are marked *

Primary Sidebar

Tools

Secondary Sidebar

CONTENTS

  • 1. Create the CSV file with the list of mailboxes
  • 2. Create Onboarding or Offboarding batches
  • 3. Start Batches
  • 4. Complete batches
  • 5. Complete individual users in a batch

  • Terms of Use
  • Disclaimer
  • Privacy Policy
Manage your privacy

To provide the best experiences, we and our partners use technologies like cookies to store and/or access device information. Consenting to these technologies will allow us and our partners to process personal data such as browsing behavior or unique IDs on this site and show (non-) personalized ads. Not consenting or withdrawing consent, may adversely affect certain features and functions.

Click below to consent to the above or make granular choices. Your choices will be applied to this site only. You can change your settings at any time, including withdrawing your consent, by using the toggles on the Cookie Policy, or by clicking on the manage consent button at the bottom of the screen.

Functional Always active
The technical storage or access is strictly necessary for the legitimate purpose of enabling the use of a specific service explicitly requested by the subscriber or user, or for the sole purpose of carrying out the transmission of a communication over an electronic communications network.
Preferences
The technical storage or access is necessary for the legitimate purpose of storing preferences that are not requested by the subscriber or user.
Statistics
The technical storage or access that is used exclusively for statistical purposes. The technical storage or access that is used exclusively for anonymous statistical purposes. Without a subpoena, voluntary compliance on the part of your Internet Service Provider, or additional records from a third party, information stored or retrieved for this purpose alone cannot usually be used to identify you.
Marketing
The technical storage or access is required to create user profiles to send advertising, or to track the user on a website or across several websites for similar marketing purposes.
Statistics

Marketing

Features
Always active

Always active
Manage options Manage services Manage {vendor_count} vendors Read more about these purposes
Manage options
{title} {title} {title}
Manage your privacy
To provide the best experiences, we use technologies like cookies to store and/or access device information. Consenting to these technologies will allow us to process data such as browsing behavior or unique IDs on this site. Not consenting or withdrawing consent, may adversely affect certain features and functions.
Functional Always active
The technical storage or access is strictly necessary for the legitimate purpose of enabling the use of a specific service explicitly requested by the subscriber or user, or for the sole purpose of carrying out the transmission of a communication over an electronic communications network.
Preferences
The technical storage or access is necessary for the legitimate purpose of storing preferences that are not requested by the subscriber or user.
Statistics
The technical storage or access that is used exclusively for statistical purposes. The technical storage or access that is used exclusively for anonymous statistical purposes. Without a subpoena, voluntary compliance on the part of your Internet Service Provider, or additional records from a third party, information stored or retrieved for this purpose alone cannot usually be used to identify you.
Marketing
The technical storage or access is required to create user profiles to send advertising, or to track the user on a website or across several websites for similar marketing purposes.
Statistics

Marketing

Features
Always active

Always active
Manage options Manage services Manage {vendor_count} vendors Read more about these purposes
Manage options
{title} {title} {title}