The following steps describe how to set up a proper load balancer on pfSense for Exchange 2019, 2016 or 2013 using HAProxy.
1. Before You Begin
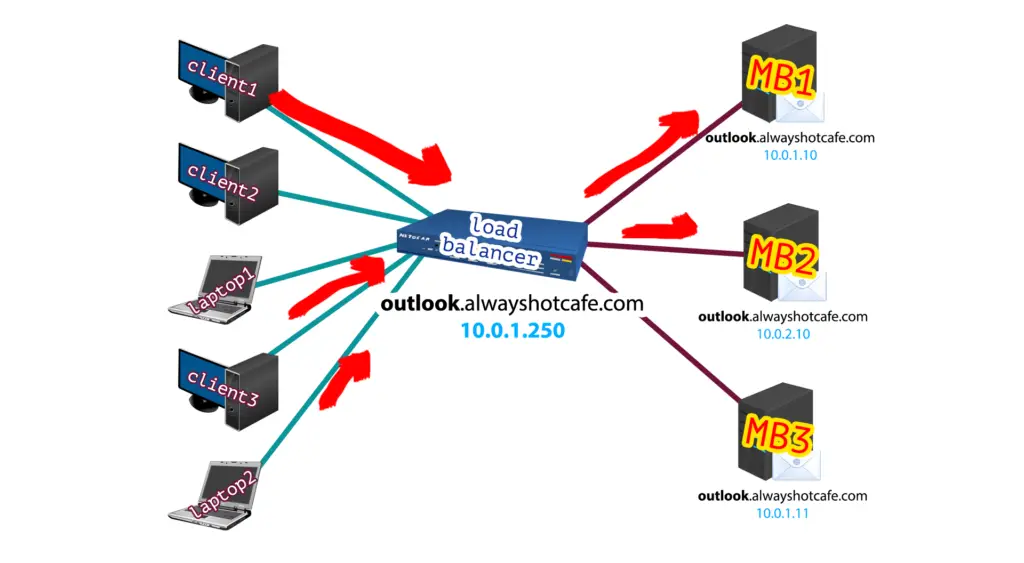
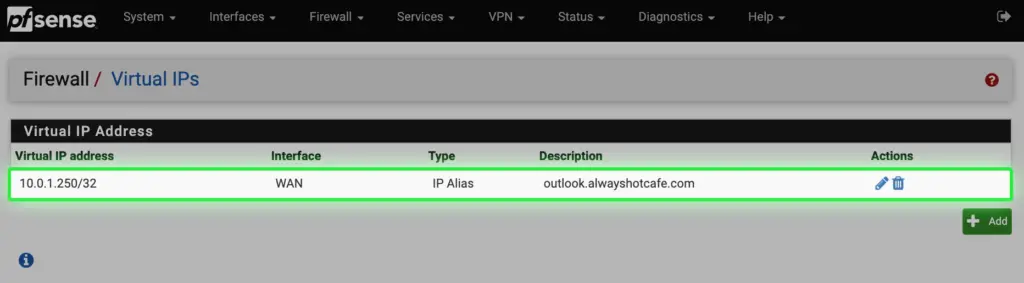
The outlook.alwayshotcafe.com A record is added to the alwayshotcafe.com domain zone file. IP is 10.0.1.250 as seen in the screenshot.

2. The Planned Setup
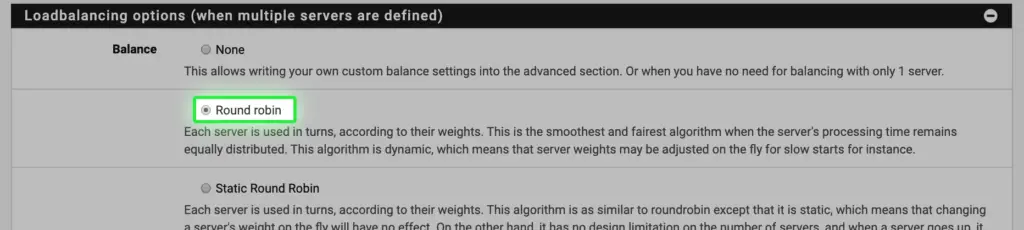
When we are done, all clients will connect to our load balancer. The balancer will forward client traffic to one of the configured CAS servers. We use round robin load balancing but you can use any other method you prefer, as the client connections are stateless we have a great amount of flexibility in that sense.
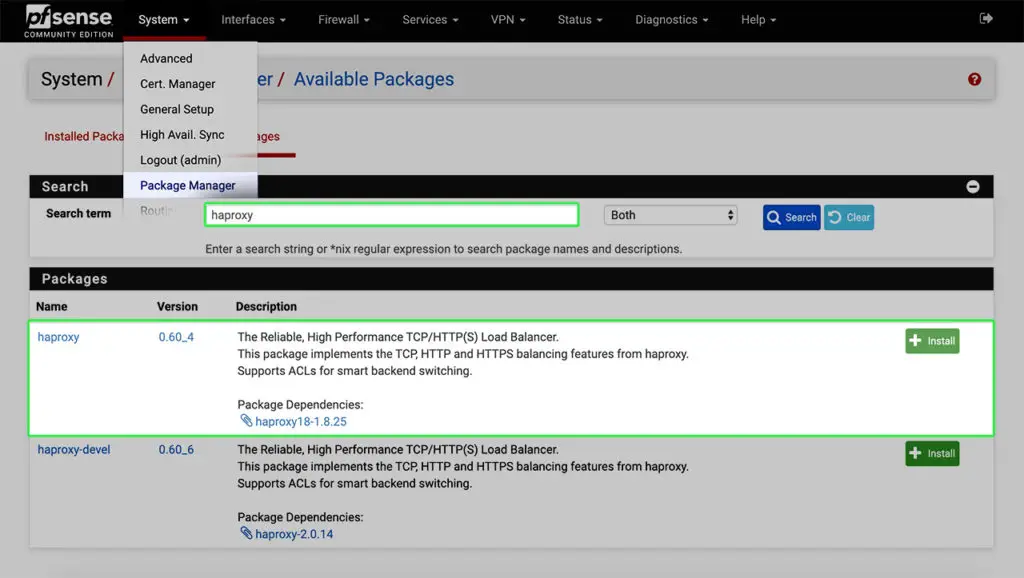
3. Install HAProxy on pfSense
Under System, select Package Manager/Available Packages and search for "haproxy". Click on the Install button.
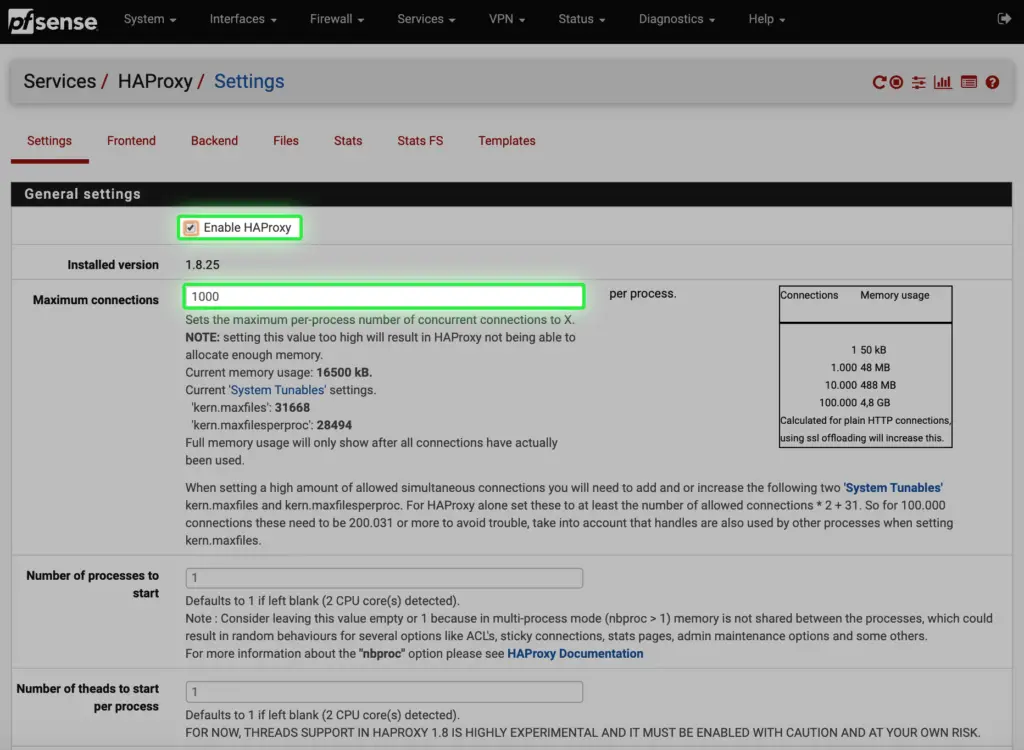
4. Configure HAProxy
After installing it open the configurator under the Services tab. a. Under Settings enable the service, set max connection number to 1000.
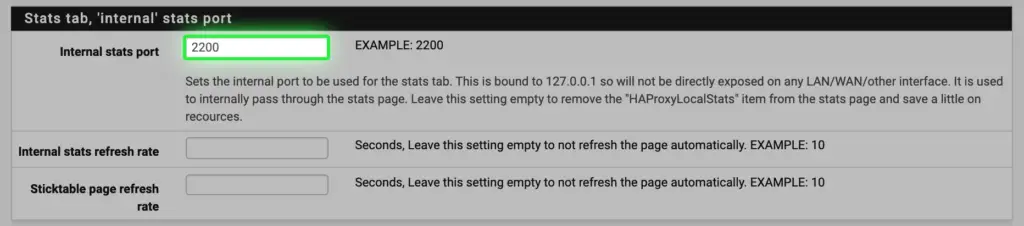
b. Set the internal stats port to 2200 so the stat page can be accessed later
c. SSL DH size needs to be at least 2048

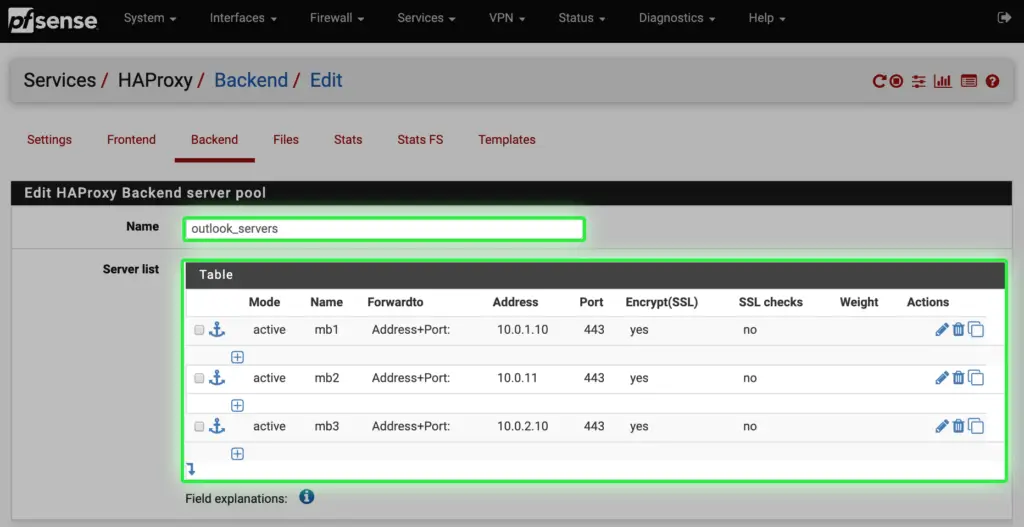
d. Under the Backend tab we specify the name of the backend server collection, which is outlook_servers for easy identification. Then we add our three mailbox servers to the list, specifying port 443 with SSL encryption on.
e. Load balancing is set to round-robin, but you can set any option you prefer.
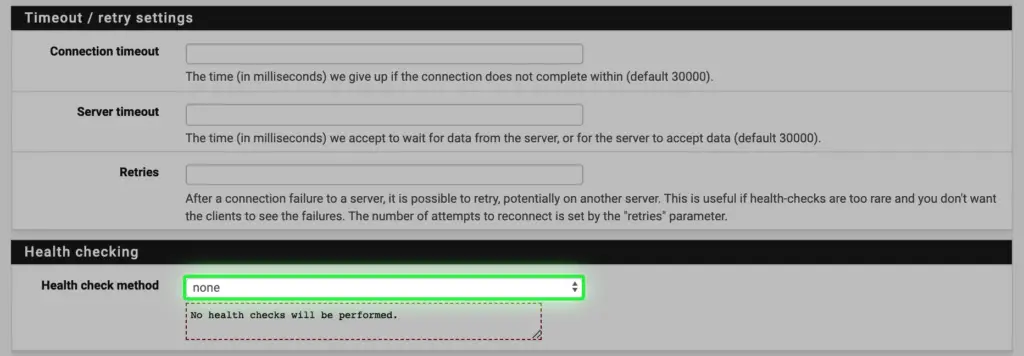
f. Health checking is 'none' in our case, as we have a lab it doesn't need to check if the connection to the backend servers are up. If one goes down, we adjust the load balancer manually.
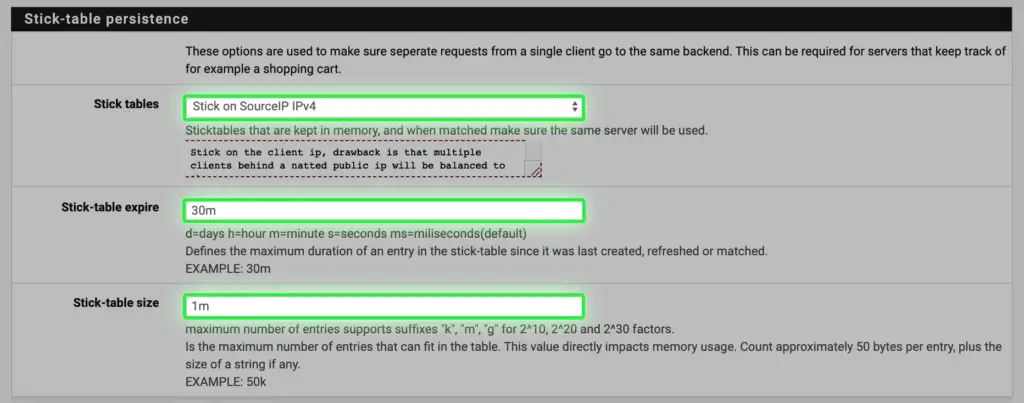
g. Make connections sticky, so clients will not jump from one backend server to another making their user experience more seamless. Outlook can hang briefly when jumping CAS servers.
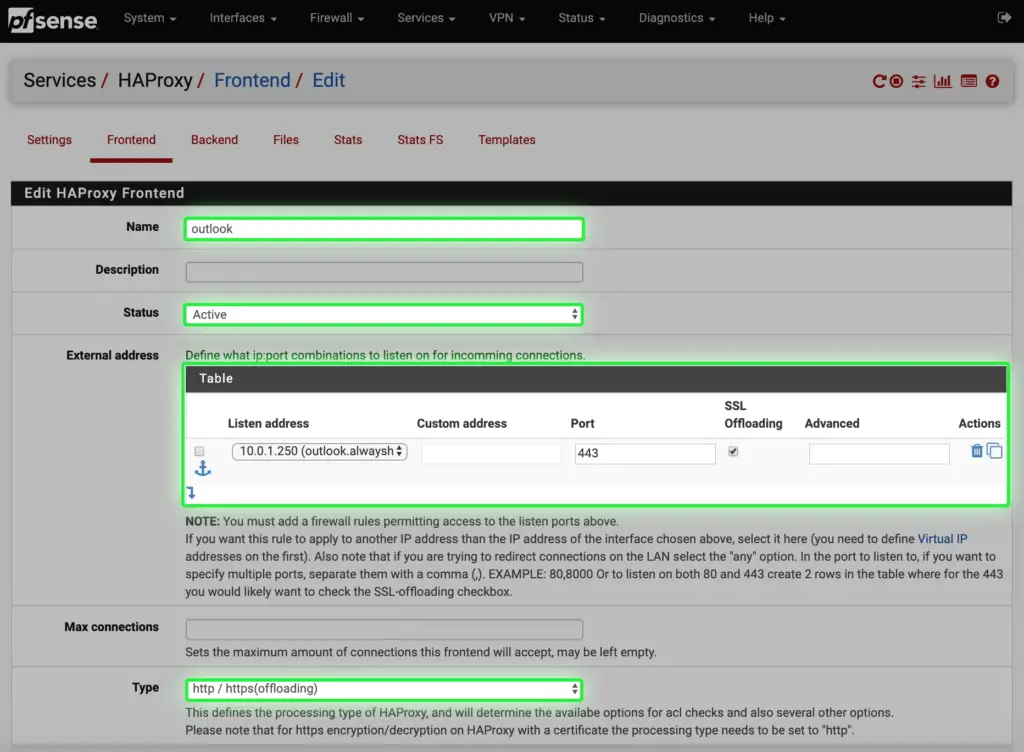
h. Set up the 10.0.1.250 virtual IP address earlier under the Firewall tab for the "outlook" listener
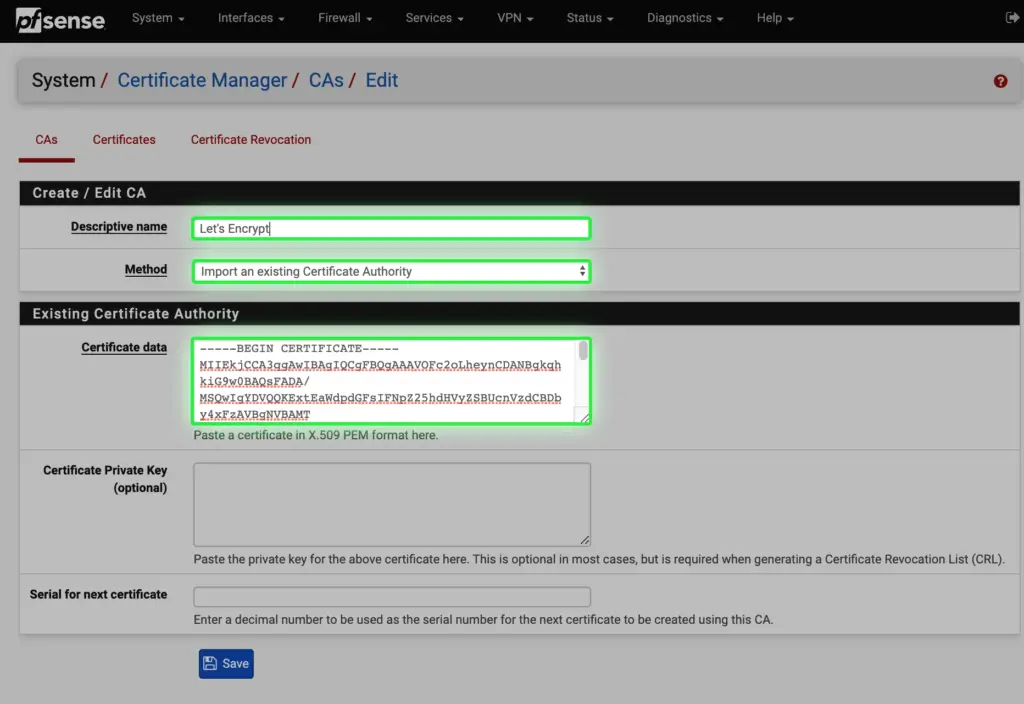
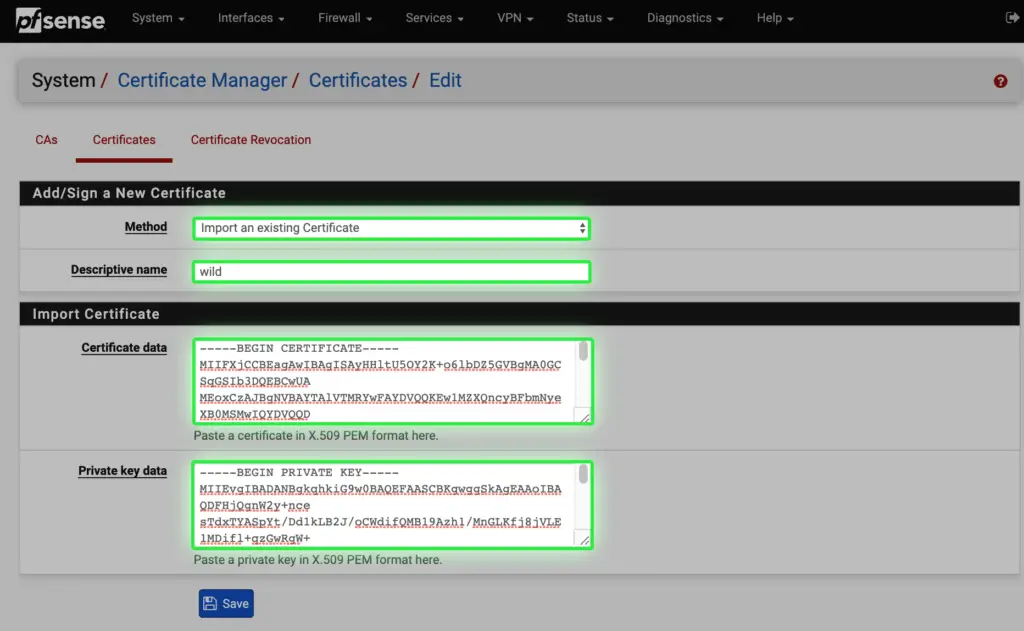
i. For SSL offloading to work (see next step), we need to import the SSL certificate for outlook.alwayshotcafe.com, that same that we use on the mailbox servers. In this example we use a wildcard cert which covers all hosts in the alwayshotcafe.com domain. For detailed steps on how to export the SSL certificate from an Exchange server and extract the private-, public keys and CA certificate from the PFX file, see the guide here.
Import the ca.cer to CAs
Then import pub.cer and priv.cer in the certificate store.
j. Under the Frontend tab we can set up the listener on the pfSense firewall. We use the virtual IP from step h., with port 443 listening. SSL offloading is also enabled. That means the client connection has the endpoint on the firewall, so the load balancer can see connection details, like session information for proper L7 balancing. This would be inaccessible if the encrypted HTTPS connection just passed through the load balancer.
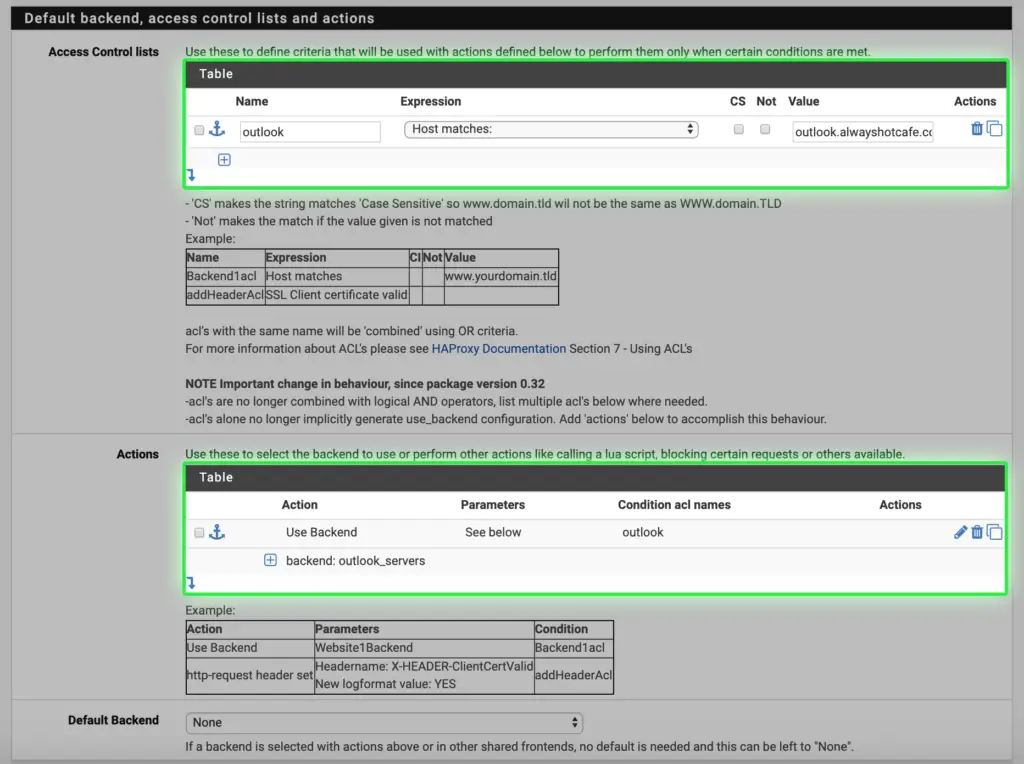
k. Create an access list called "outlook", with incoming https requests to match outlook.alwyashotcafe.com. Action is set to use the "outlook_servers" backend collection
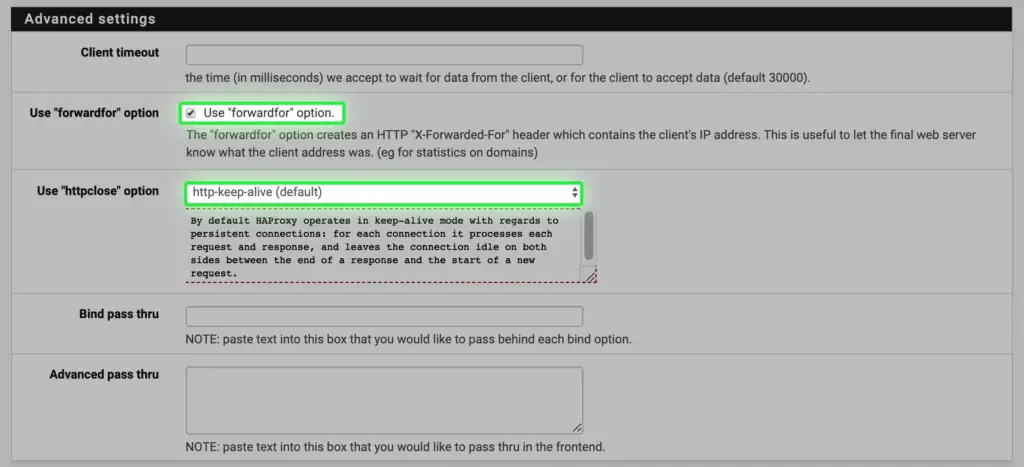
l. The forwardfor option is checked
m. Under the SSL Offloading section select the wildcard certificate we imported in step i.
Hello! This is the Gutenberg block you can edit directly from the WPBakery Page Builder.
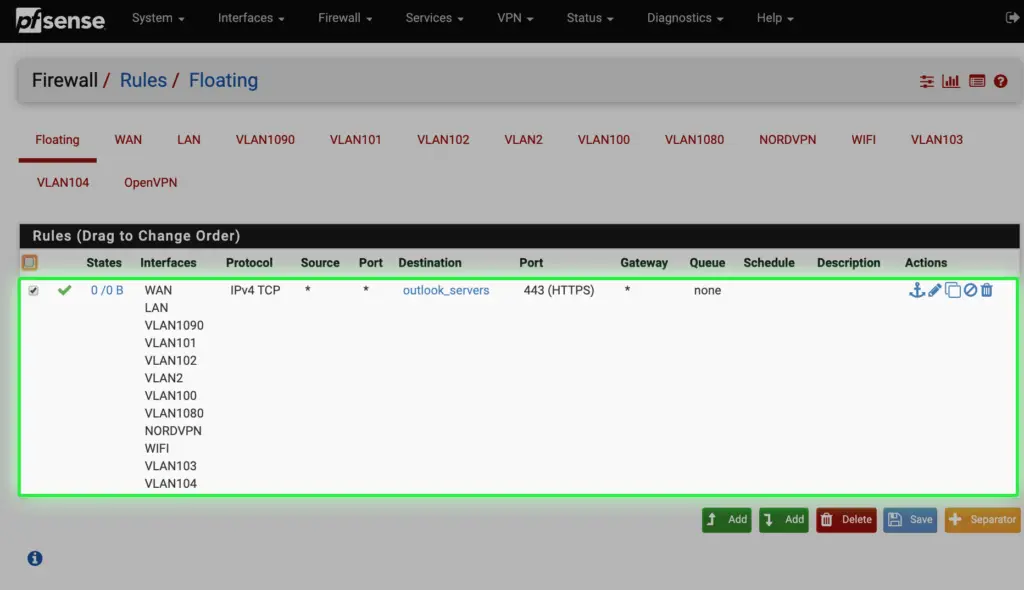
n. The last step is very important: to allow connection on this address, under the firewall section we allow HTTPS traffic from all sources on all interfaces to the "outlook_servers" alias.
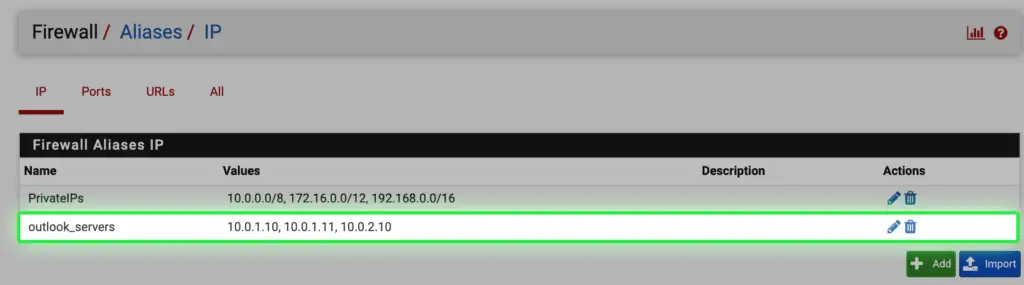
First, create alias for the three mailbox servers
Now you can add a floating firewall rule that is flexible as it applies to all interfaces
Hi, thanks for this tutorial, very helpfull.
But I have a question regarding the firewall rule to allow access to the backend servers, I think this shouldn’t happen because we proxy all traffic via the VIP interface! so I think you have to allow only https traffic to the VIP interface only not the backend servers.
Thanks.