A pfx file is technically a container that contains the private key, public key of an SSL certificate, packed together with the signer CA's certificate all in one in a password protected single file.
Here are the steps to extract these three in case they are needed, for instance importing them in an apache server, in a load balancer, etc.
1. Export PFX from an existing server
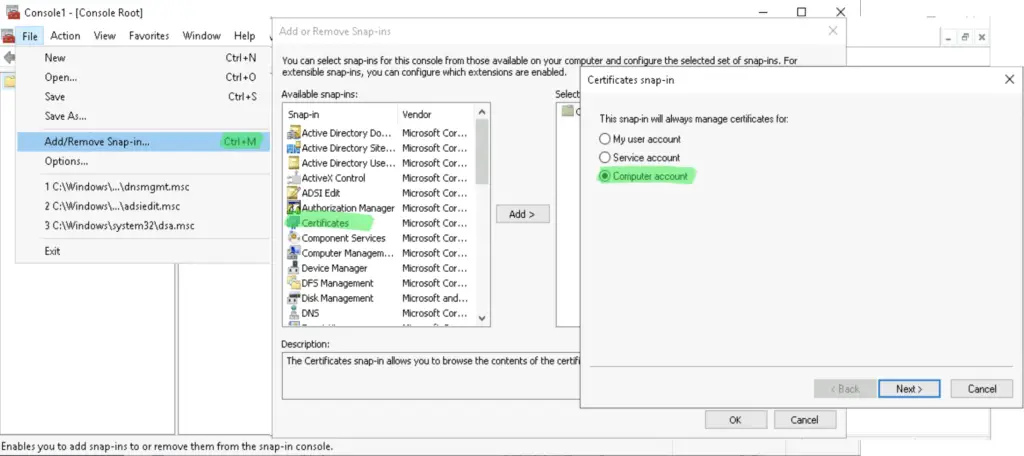
Run mmc.exe, then import the Certificate snapin, choosing the Computer cert repository.

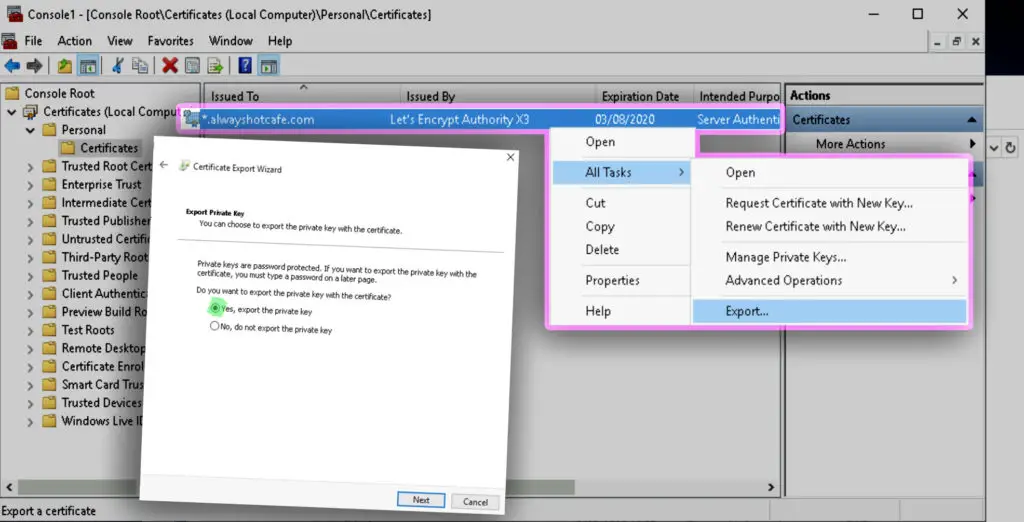
Right-click on the cert that you want to export, select "All Tasks", then "Export". Include the private key when it's asked.

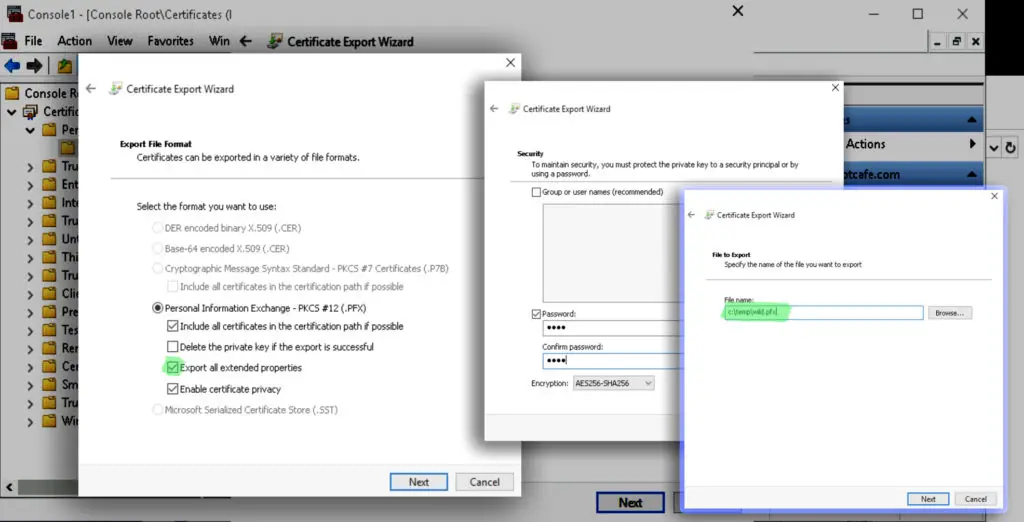
Export all properties that will include the CA cert in the PFX export. Specify a password witch which you can open the pfx later. The password is needed to protect the private key from unauthorized people as if malicious parties would get a hold on it, they could decrypt intercepted traffic that happens between the server and clients.

2. Install OpenSSL
We utilize OpenSSL to extract the packed components into a BASE64 encoded plain text format.
Unix systems have the openssl package available, if you system doesn't have it installed, deploy it as below. On a Windows system follow the path to get the installer:
# Install OpenSSL on Debian and Ubuntu systems
sudo apt install openssl
# Install OpenSSL on RHEL, CentOS
sudo yum install openssl
# Windows installer location:
https://slproweb.com/products/Win32OpenSSL.html
3. Extract the private key, public key and CA certificate
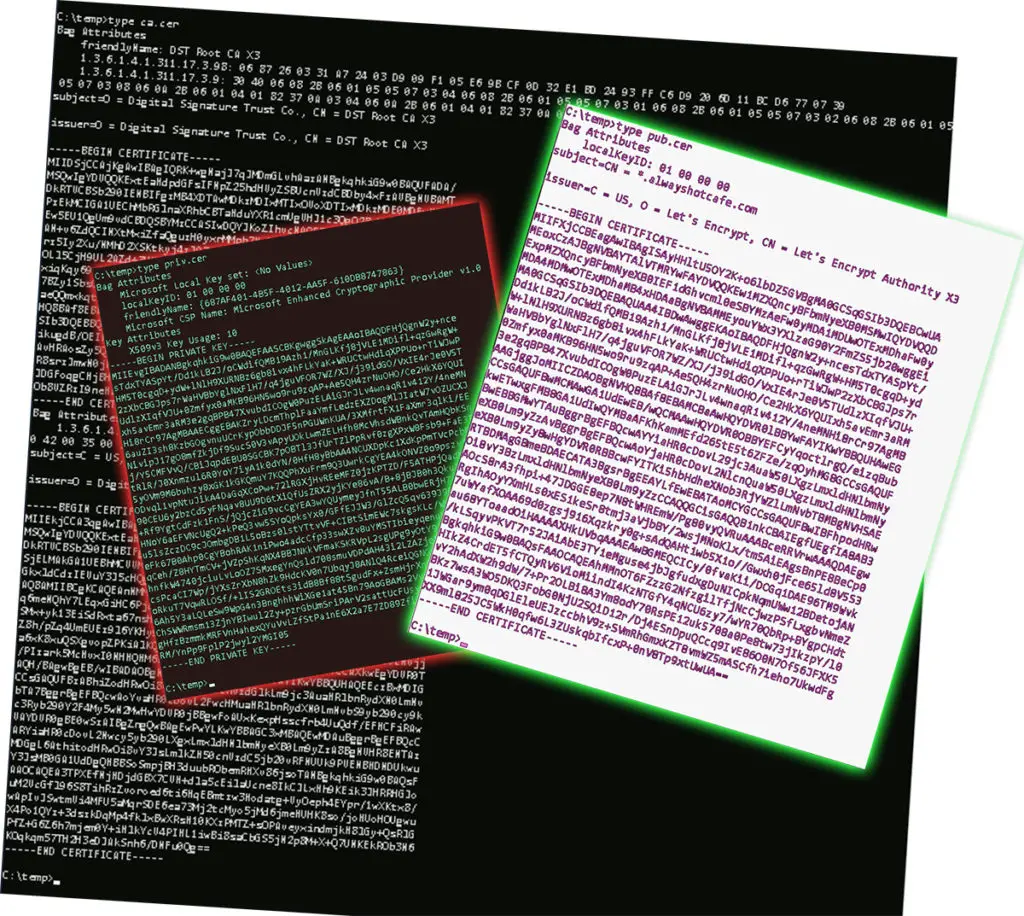
We use the following commands to extract the private key to priv.cer, the public key to pub.cer and the CA's certificate into ca.cer from wild.pfx that has our *.alwayshotcafe.com wildcard SSL. Use the password you specified earlier when exporting the pfx.
# Extract the private key
openssl pkcs12 -in wild.pfx -nocerts -nodes -out priv.cer

# Extract the public key
openssl pkcs12 -in wild.pfx -clcerts -nokeys -out pub.cer

# Extract the CA cert chain
openssl pkcs12 -in wild.pfx -cacerts -nokeys -chain -out ca.cer


Comments