Storage Matters!
Note that this guide only applies to virtual disk files in Qemu image format (qcow2)!
After creating a new virtual machine in Proxmox or KVM, the disk we virtual created for the machine uses up as much space as we set during provisioning.
This means a 50GB large virtual disk will sit in our filesystem, using up 50GB space.
As we likely not use that much disk space on the VM, it would be wise to use only that much scape the virtual machine actually occupies on its virtual disk. This means a fresh basic Windows installation only uses up around 20GB space, so our virtual drive will start its life with a nearly 0 size, then expands as more and more data is written on it (max 50GB as that's the provisioned size).
This process is called thin-provisioning.
To accomplish this on Proxmox we use the command line. Don't worry, it's gong to be very simple.
Recreate Disk as Thin-Provisioned
As usual we follow through an example scenario to see how this thin-provisioning happens in practice.
1. First, create a new VM in Proxmox called NewVM. Don't start it up just yet!
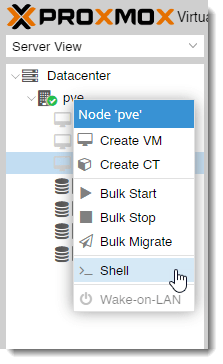
2. Open a shell to Proxmox. Right-click on the Proxmox hostname in the WebUI and select Shell.

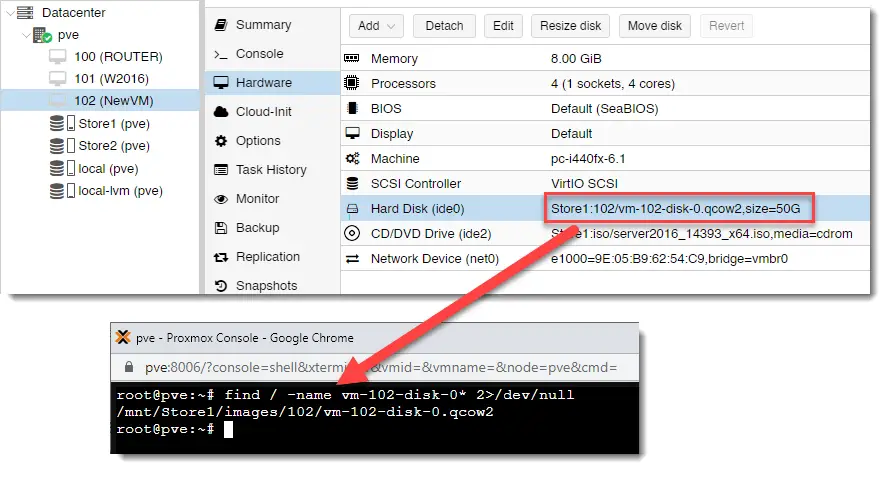
3. Locate the disk file in the shell. You can find the name of the virtual disk on the Hardware tab of your VM, then use find to get the location.
find / -name [disk name]* 2>/dev/null

4. Jump to the containing folder, and there use the qemu-img command to re-create the same disk with thin-provisioning logic.
# Re-create image
qemu-img create -f qcow2 [file name.qcow2] [disk size]

# Example
qemu-img create -f qcow2 vm-102-disk-0.qcow2 50G

The actual size the virtual disk uses is less than 200kb after the re-creation process!
Power up your VM and enjoy!

Comments