Always Hot Café needs a fast and cheap way to set up a VPN solution for it's workers. They don't want to invest in expensive hardware, or software. Also, the employees have Windows laptops and they want to use the built-in VPN client capability, the Windows computers already have. SSTP is the Microsoft proprietary flavor of SSL VPN protocols. It uses SSL channels just like OpenVPN to build up the VPN tunnel between the client and the server. This way the connection is likely won't be blocked by strict firewalls when users are away, staying in hotels, etc. As data transmission happens on port 443/tcp, the firewall will not be able to distinguish between VPN traffic or simple web browsing, unlike in case of PPTP or L2TP where dedicated ports need to be used to form the VPN tunnel.
We'll use SoftEther, a very versatile VPN server created by the University of Tsukuba, Japan. Not only it is free, but are able to configure it with auto-renewing Let's Encrypt SSL certificates, so we don’t need to care about SSL renewals. We pretty much install the server, then we can forget about it!
Before You Begin
After CentOS basic install:
# Installing prerequisites
yum update -y
yum install -y wget tar
yum groupinstall -y "Development Tools"
Download SoftEther:
wget -P /usr/local https://github.com/SoftEtherVPN/SoftEtherVPN_Stable/releases/download/v4.34-9745-beta/softether-vpnserver-v4.34-9745-beta-2020.04.05-linux-x64-64bit.tar.gz
Extract SoftEther to /usr/local
tar -C /usr/local -xzf /usr/local/softether-vpnserver-v4.34-9745-beta-2020.04.05-linux-x64-64bit.tar.gz
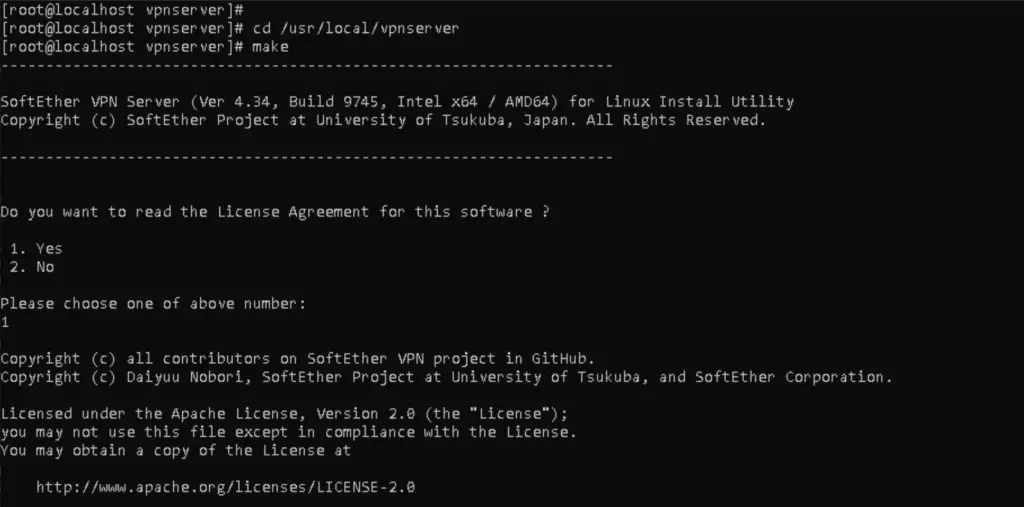
1. Install SoftEther
We are ready to install SoftEther. This means we extract it, set the right permissions on the config files and set the service to start. Compile the executables first:
cd /usr/local/vpnserver
make
Now we change the permission on the files inside the vpnserver directory so unauthorized users won't be able to access them
cd /usr/local/vpnserver/
chmod -R 600 *
chmod 700 vpncmd
chmod 700 vpnserver
2. Create the Startup Script
Use your favorite text editor or the command line to create the /etc/init.d/vpnserver file as per https://www.softether.org/4-docs/1-manual/7._Installing_SoftEther_VPN_Server/7.3_Install_on_Linux_and_Initial_Configurations with the following content:
/etc/init.d/vpnserver
#!/bin/sh
# chkconfig: 2345 99 01
# description: SoftEther VPN Server
DAEMON=/usr/local/vpnserver/vpnserver
LOCK=/var/lock/subsys/vpnserver
test -x $DAEMON || exit 0
case "$1" in
start)
$DAEMON start
touch $LOCK
;;
stop)
$DAEMON stop
rm $LOCK
;;
restart)
$DAEMON stop
sleep 3
$DAEMON start
;;
*)
echo "Usage: $0 {start|stop|restart}"
exit 1
esac
exit 0
Now change the permissions on the file so only the owner can write it:
chmod 755 /etc/init.d/vpnserver
Run the script to start the server
/etc/init.d/vpnserver start
Lastly run the script and set it to run automatically at boot:
systemctl enable vpnserver
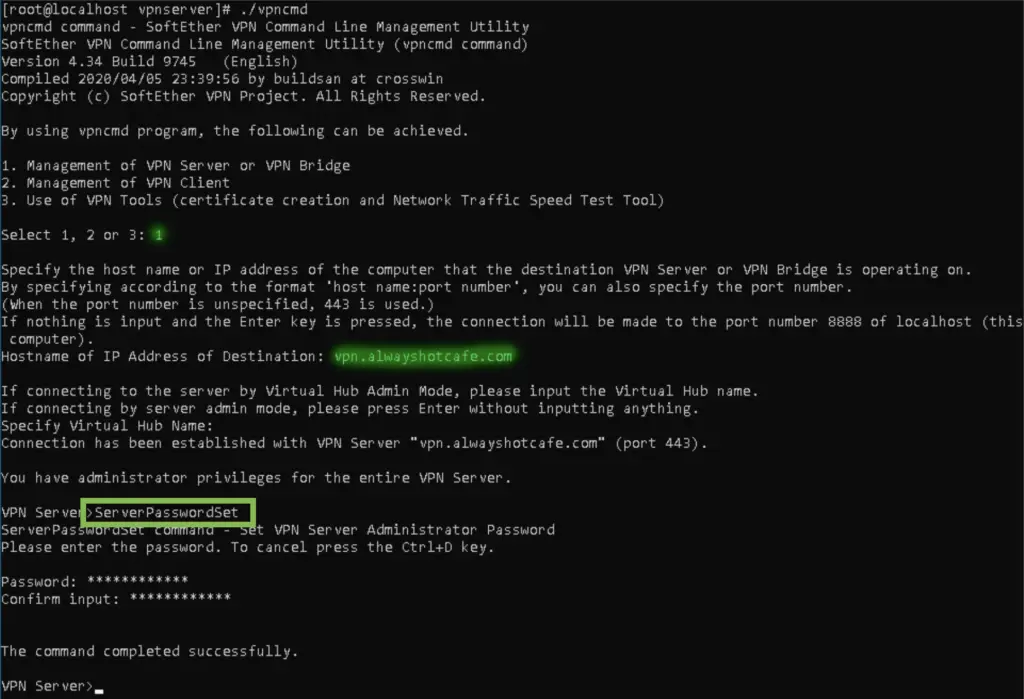
3. Change the admin password
It's time to set the admin password on the vpn service. Whenever we'll need to make amendments to the server configuration, we'll need to provide these credentials to the application.
[root@vpn ~]# /usr/local/vpnserver/vpncmd
VPN Server> ServerPasswordSet
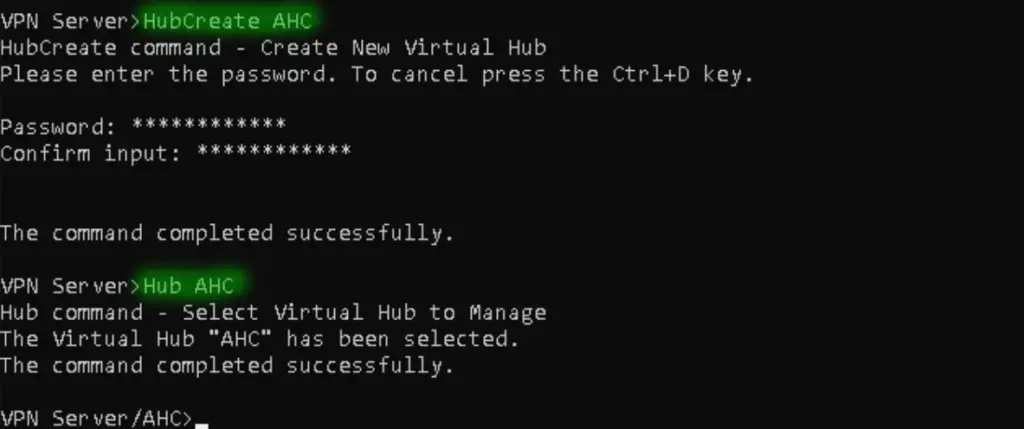
4. Create Virtual Hub
A virtual hub is a pool of users and accepted protocols. We need to have at least one hub configured. We go with the name of AHC, where we'll set up a test user called Alice and enable SSTP and IPSec protocols.
VPN Server/AHC>HubCreate AHC
VPN Server/AHC>Hub AHC
5. Enable SecureNAT
We can use the server with SecureNAT or with Local Bridge that requires DHCP to be set separately. We don't want the VPN clients to use up IP addresses in our DHCP pool, so we go with SecureNAT for simplicity. This way the VPN server will create a separate subnet for them and they will be NAT-ted through the single IP of the VPN server.
VPN Server/AHC>SecureNatEnable
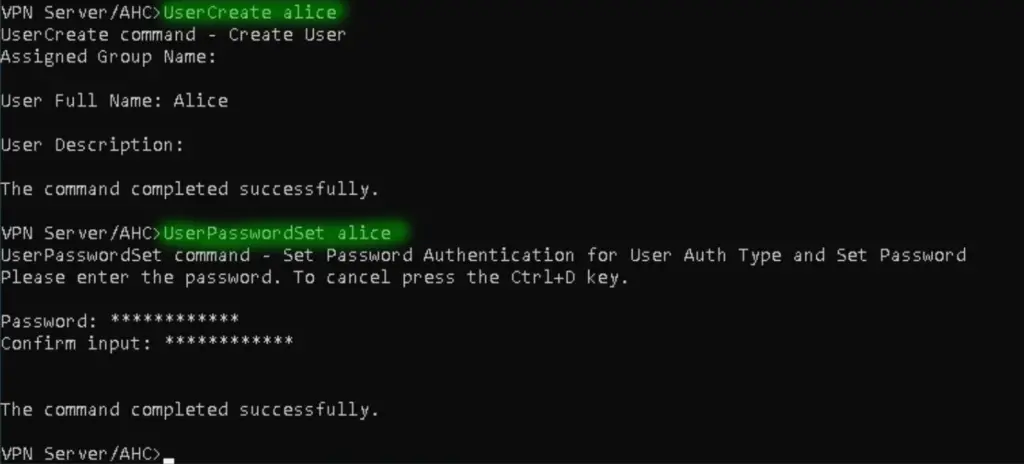
6. Create a vpn user for the Windows 10 client to make the SSTP connection
VPN Server/AHC>UserCreate alice
VPN Server/AHC>UserPasswordSet alice
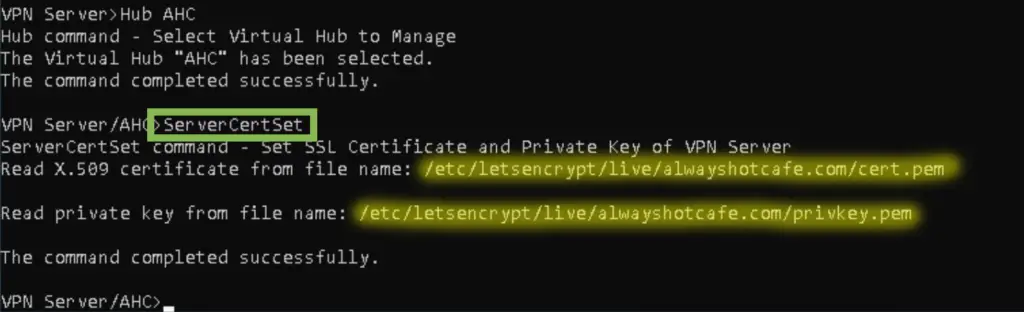
7. Set up the SSL certificate for SSTP
SSTP will not work (at least out of the box) without a valid SSL certificate that is signed by a public CA. We acquire a Let's Encrypt wildcard certificate for this purpose. For the whole LetsEncrypt SSL cert guide, click here.
The certificate files are located under /etc/letsencrypt/live/alwayshotcafe.com. After checking they are there, we proceed.

To install the certificate, we connect to our AHC hub again (/usr/local/vpnserver/vpncmd), and issue the following command that will ask for the public and private key files:
VPN Server/AHC>ServerCertSet

# Public key:
/etc/letsencrypt/live/alwayshotcafe.com/cert.pem

# Private key:
/etc/letsencrypt/live/alwayshotcafe.com/privkey.pem
Finally, we can enable SSTP on the server:
VPN Server/AHC>SstpEnable yes

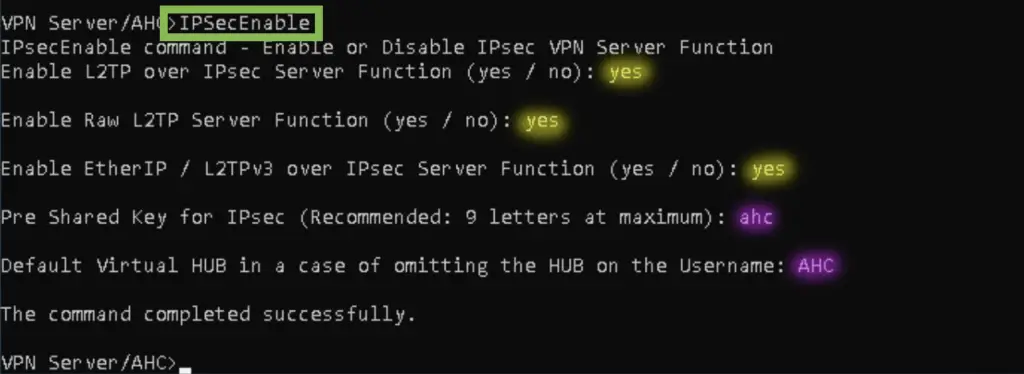
Enable IPSec as well, also set the default HUB to the newly created AHC hub. This way single usernames will be accepted. Otherwise the client needs to use the [Hub name]\[username] format when connecting (AHC\alice in this example)
8. Enable the SSTP port on the firewall
It is important to allow incoming connections on port 443/tcp, otherwise clients will not be able to connect:
[root@vpn ~]# firewall-cmd --permanent --zone=public --add-port=443/tcp
[root@vpn ~]# firewall-cmd --reload
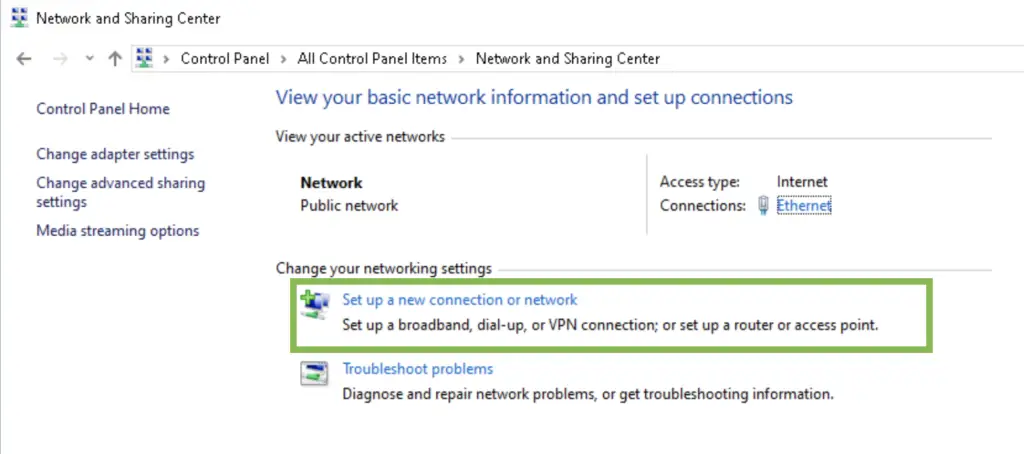
Connect with a client
1. Open Network and Sharing Center on the Windows 10 client. Select the "New Connection" option.
2. After selecting the VPN connection type, we add the server name which is vpn.alwayshotcafe.com, and an arbitrary name that helps us to identify the connection later. Here we call it simply "AHC VPN"

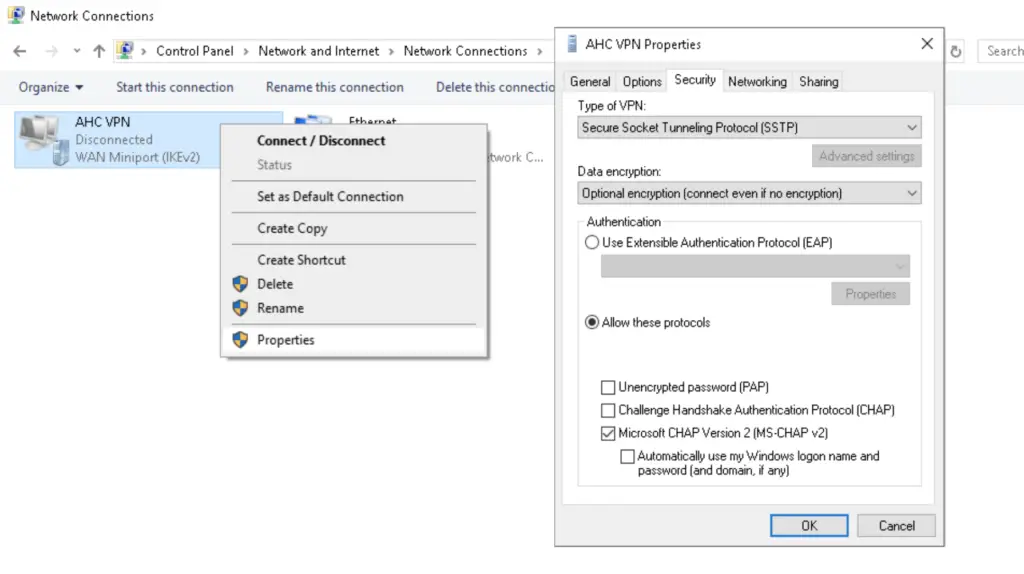
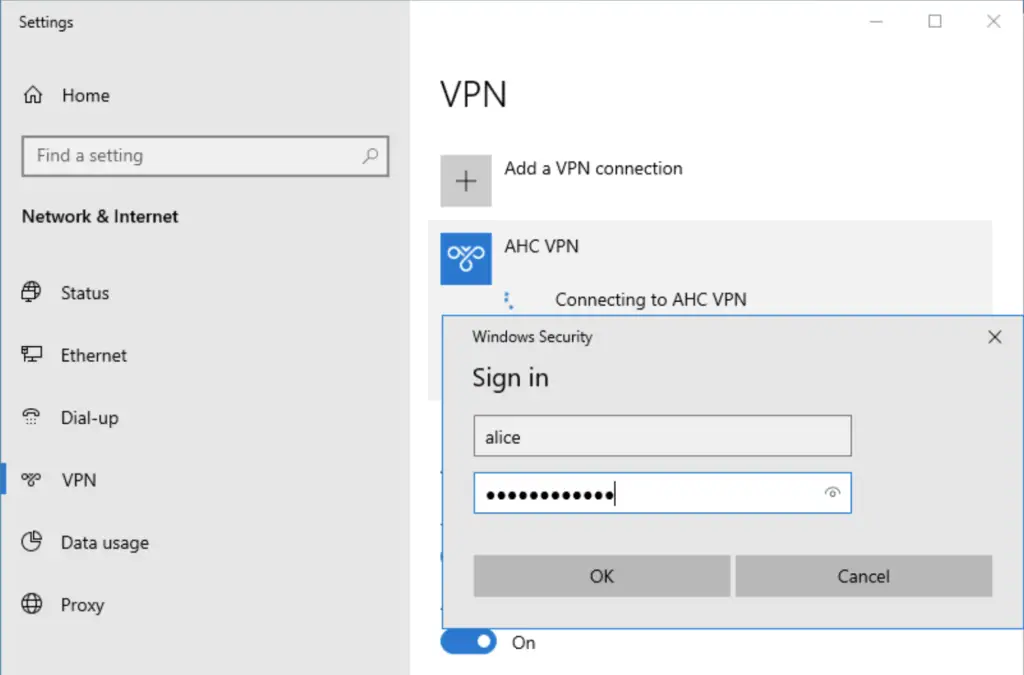
Now Alice is ready to connect!

Hi, can I use this software from Mac computer?