Recently I came across a situation where a small office needed a direct IPSec tunnel between two offices temporarily, but they only had a router from their ISP which was not configurable, or at least not by them and they did not have any money to spend on the project. They had a spare PC though, with a single NIC - and we had a limited time to set up the connection.
So, what can we do? Their only network switch was luckily a managed switch, with VLANs available we had the obvious solution: pfSense - the swiss army knife of firewalls/routers to the rescue!
The plan is: dividing the LAN into two VLANs, one for the DMZ (connected with the ISP router), and one for the inside LAN. As an extra challenge, we could not touch the ISP router to add static routes to it, so we needed to configure NAT-ing on the ISP router-facing pfSense interface, but that was the least of our concerns 🙂
Here is the planned network:
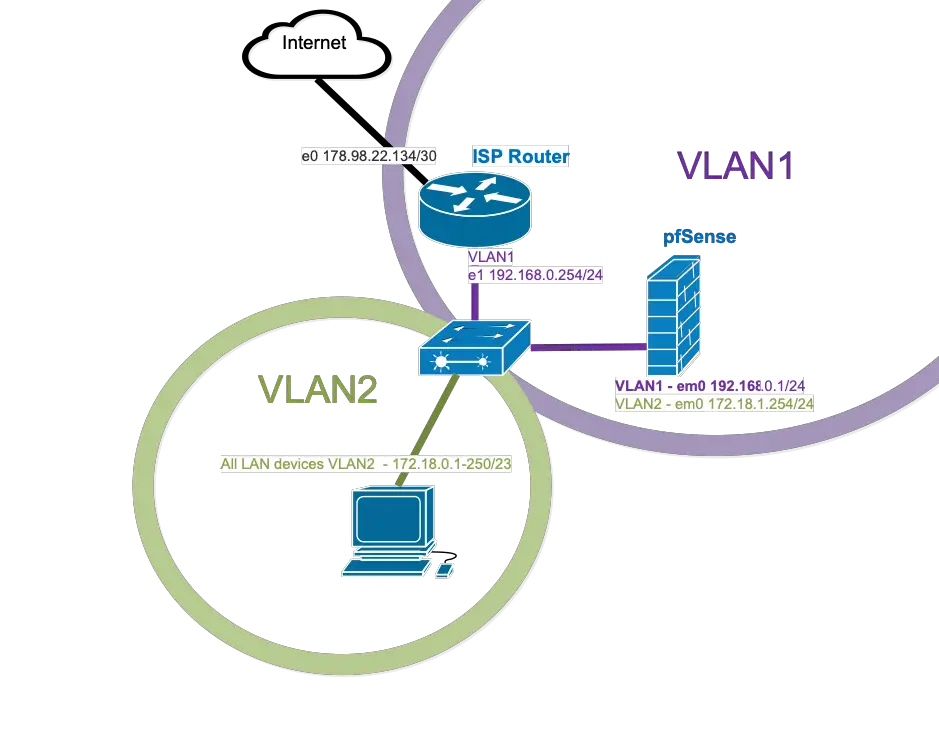
Here, the ISP router has a LAN interface configured in the very common 192.168.0.0/24 private subnet. The last usable host is the ISP router, the first part is used for the DHCP pool, so to be on the safe side we use the next available highest IP address for our firewall. The default VLAN1 is used with no tagging on the only available NIC (em0).
We treat the 192.168.0.0/24 subnet as our DMZ.
The actual LAN will be configured on VLAN2. We use the 172.18.0.0/23 subnet with 510 usable hosts as they had a fair number of nodes, the last available address is assigned to the firewall. Some like to use the first, I always stick with the last, usually that gives less room for clashes when DHCP is involved. We tag VLAN2 on the firewall facing interface of the switch, all other switch interfaces will access VLAN2 which means no tagging.
Configuring pfSense
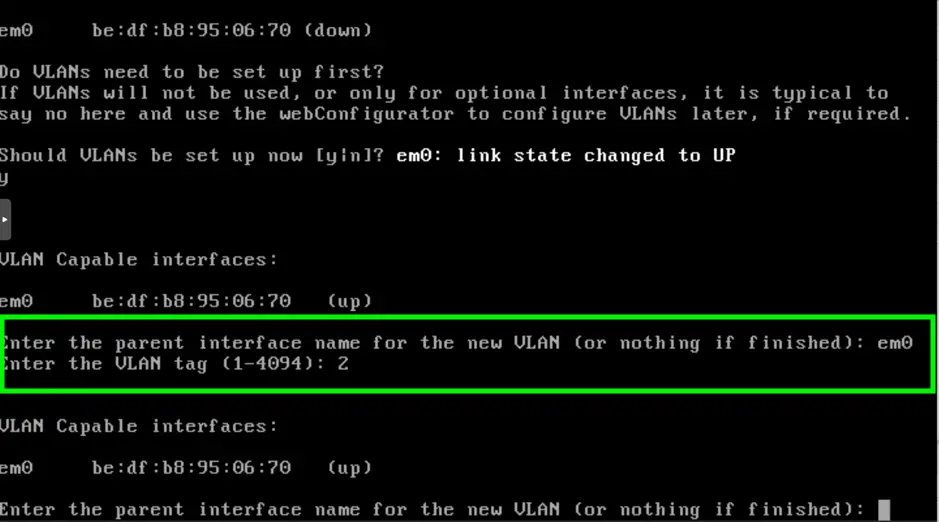
We start with a vanilla installation, until this point everything is usual, default settings are used during the setup. When we get to the interface configuration, we say Yes for VLAN setup. The parent interface is obviously our only ”em0” interface, we add VLAN2 here as seen in the illustration.
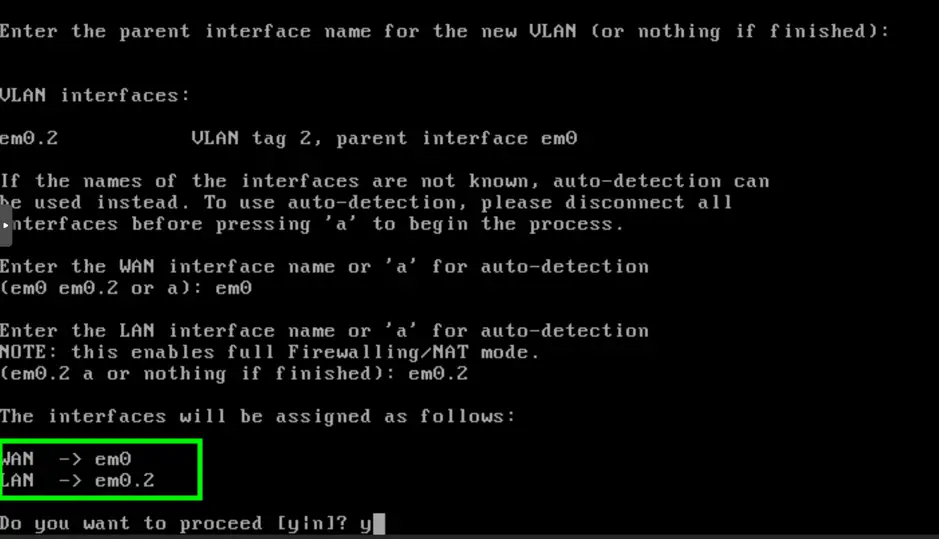
On the next step we set “em0” to be the WAN, “em0.2” as the LAN interface.
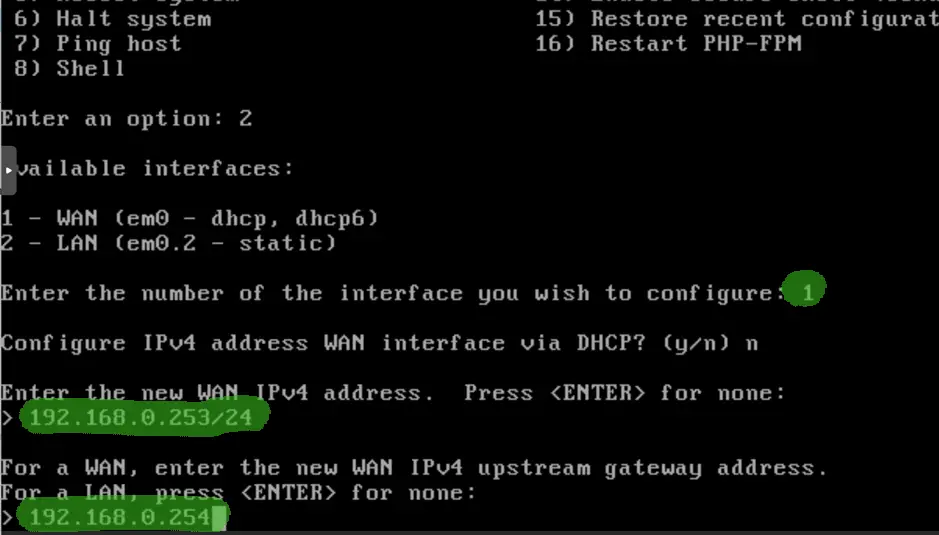
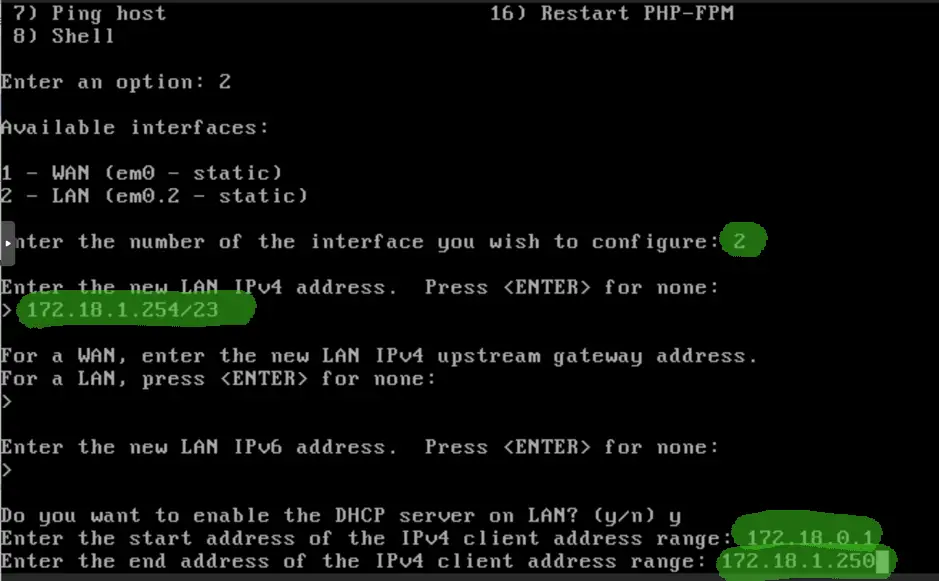
The WAN IP address is 192.168.0.253, this way even if DHCP devices are still active on the network they won’t try to allocate the same IP causing duplicate addresses which would be a problem. Some don’t care as duplicate IP detection is usually the part of the DHCP process, but that only uses ICMP echo tests, if pings are blocked by the static host, DHCP will lease the address to a second node. This way we are on the safe side. The default gateway is obviously the ISP router 🙂
Now we set the LAN interface, we go with 172.18.0.0/23 subnet, 172.18.1.254 is the last host, we assign it to the pfSense box. As it will be the LAN side, where we don’t have a DHCP server yet, we agree on activating, allocating the pool between 172.18.0.15-172.18.1.250, so they will have 507 free IPs for their devices.
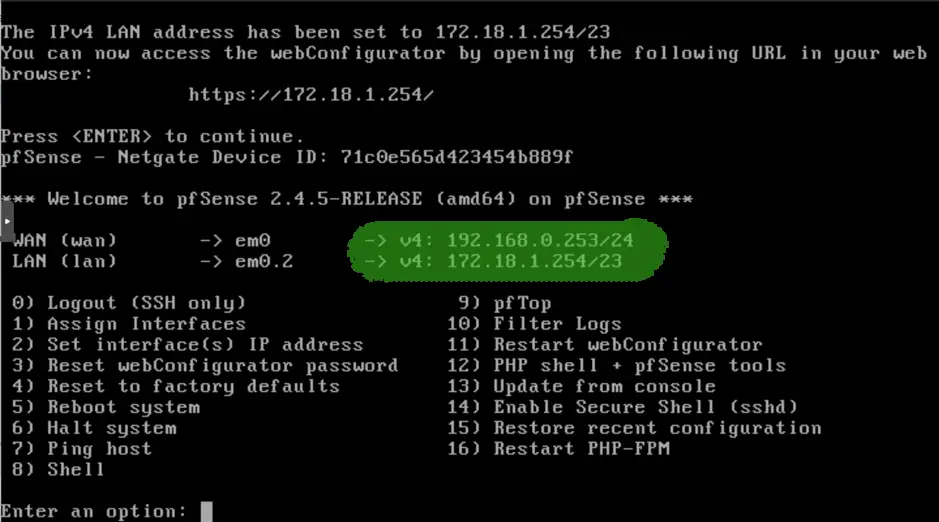
After all set, we check the summary screen on the console, all looks fine, time to fire up a client on the LAN side and we navigate to the https://172.18.1.254 pfSense console
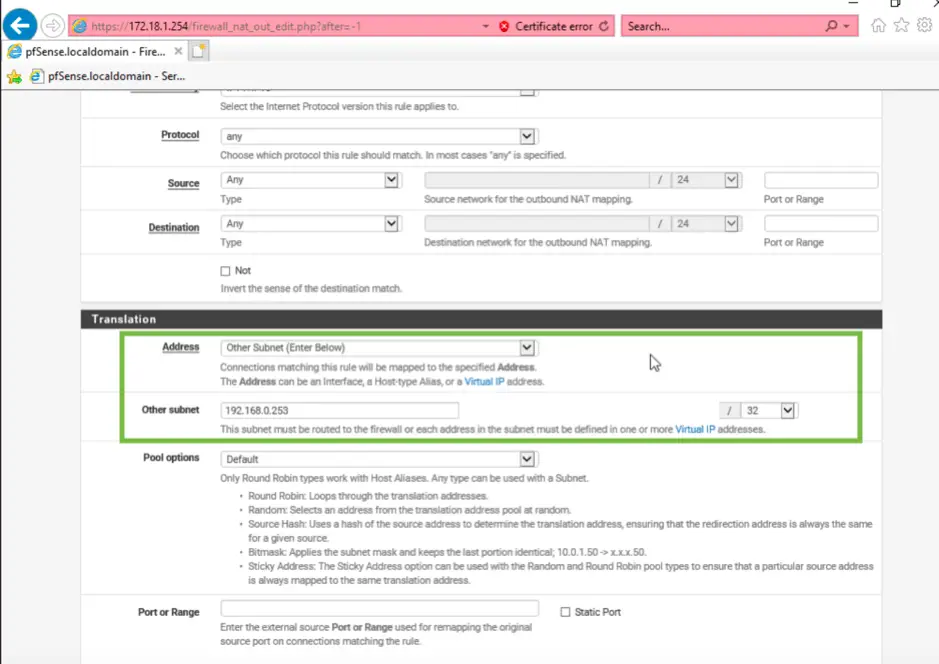
After going through the initial setup we navigate to the Firewall/NAT/Outbound page and add the SNAT rule to masquerade our internal network, translating all queries’ source address to the external address of the pfSense box, using PAT. Otherwise the ISP router would never find the return route for incoming packets which would mean no internet for the LAN nodes. We only set all traffic to be translated to 192.168.0.253/32 which is the custom address of the external IP of the pfSense box. It is important to use the /32 notation, that will tell the box to use that single IP with stateful, dynamic ports (PAT).
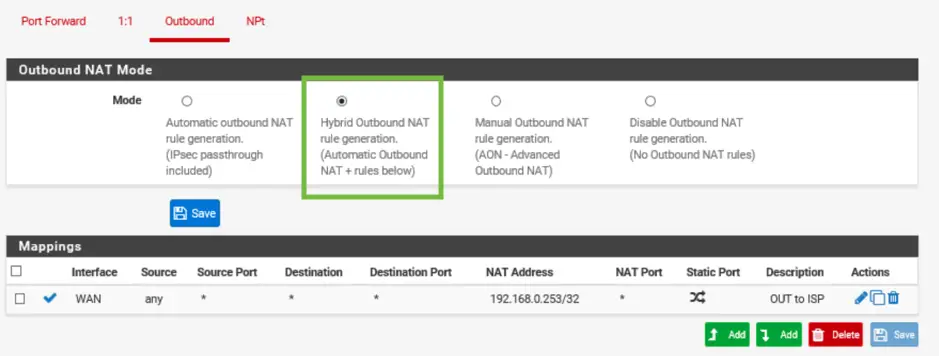
Don’t forget, we either need hybrid or manual NAT mode, I prefer hybrid as with IPSec, the necessary rules are automatically added to the list.
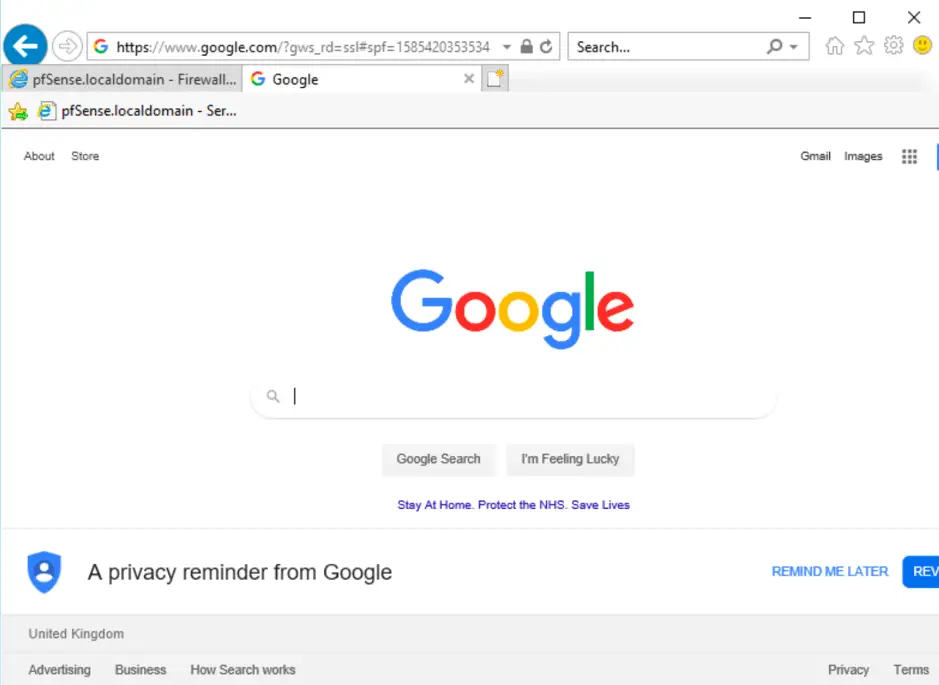
The only thing is left is to see if we can access the internet! As seen below our new network works perfectly, we are ready to configure any number of IPSec or OpenVPN site-to-site tunnels through the internet, which we’ll see in a different tutorial soon 🙂

Comments