1. What is PTA?
The abbreviation stands for Pass-through Authentication and it is the newest authentication method that Office 365 provides. When cloud integration is configured we have three authentication methods for users to choose from: PHS (Password Hash Synchronization), PTA (Pass-through Authentication) and ADFS (Active Directory Federation Services). Hash synchronization is the simplest to configure, but at the same time it is the least convenient for users. When PHS is set, password hashes of all synchronized user accounts are stored in the cloud, and when users authenticate they need to provide their actual AD passwords on either the Azure portal, or Outlook, etc. It provides no single sign-on features.
The most robust option is ADFS when SSO is needed, as it gives the most control to admins. With ADFS user authentication is passed to an on-prem authenticator server, so domain joined users will enjoy full SSO while authentication requests from the internet can be fully filtered by the on-prem firewall. For instance, if you want to ban connection requests from certain countries, known malicious IP addresses, filter suspicious behaviours, etc. To supplement that, ADFS External Smart Lockout is a new feature as well to block unwanted logon attempts without locking the on-prem AD accounts. More of that feature is detailed here.
However, ADFS requires at least two dedicated extra servers on-prem, and it is more complex to configure. Here comes PTA in the picture: it is somewhat in between the other two options when it comes to configurability. While it is so much simpler to configure than ADFS (same steps are followed when setting up PHA), however the same seamless SSO is provided for domain users as Kerberos tickets are validate by the Azure environment thanks to a special agent, that is installed as a part of the Azure AD Connect package.
2. Configure Pass-through Authentication
For brevity, we use the Office 365 migration guide linked here and include just the small differences to configure PTA instead of PHS.
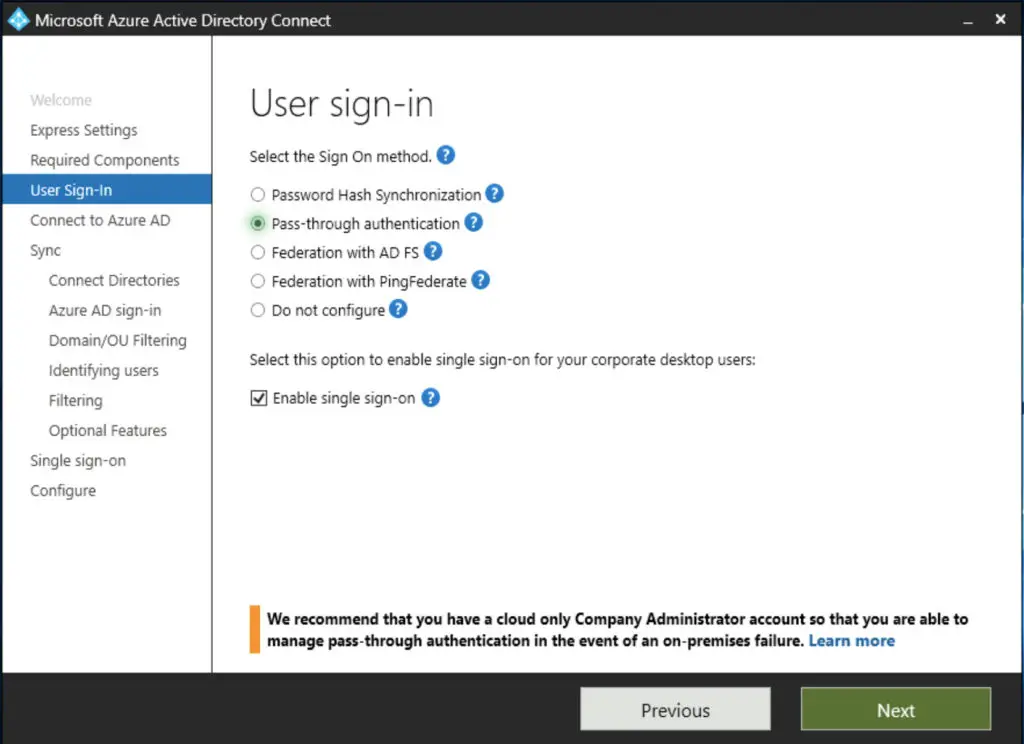
In step 4 in our earlier guide, when the User sign-in method is selected, we make sure we check the "Pass-through authentication" option. All the other steps are virtually the same.

3. Second Agent Deployment (optional)
Microsoft recommends to install at least one more PTA agent on a different server for high availability.
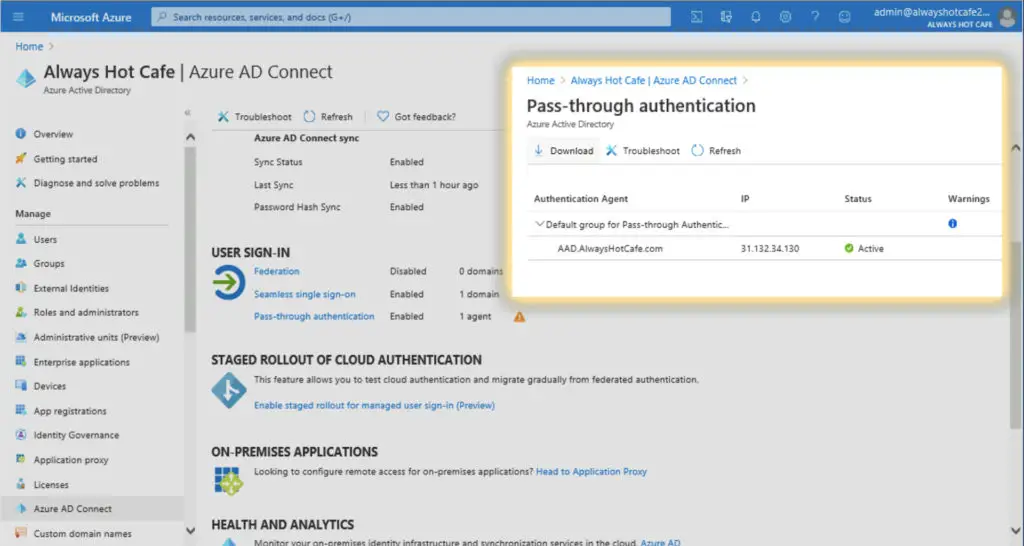
In the Azure portal (https://portal.azure.com) under "Home/Azure Active Directory" select the "Azure AD Connect" option. There the "Pass-through authentication" feature comes up with an orange exclamation sing. Opening that will show us the reason why: we have the agent installed only the AAD.alwayshotcafe.com server.

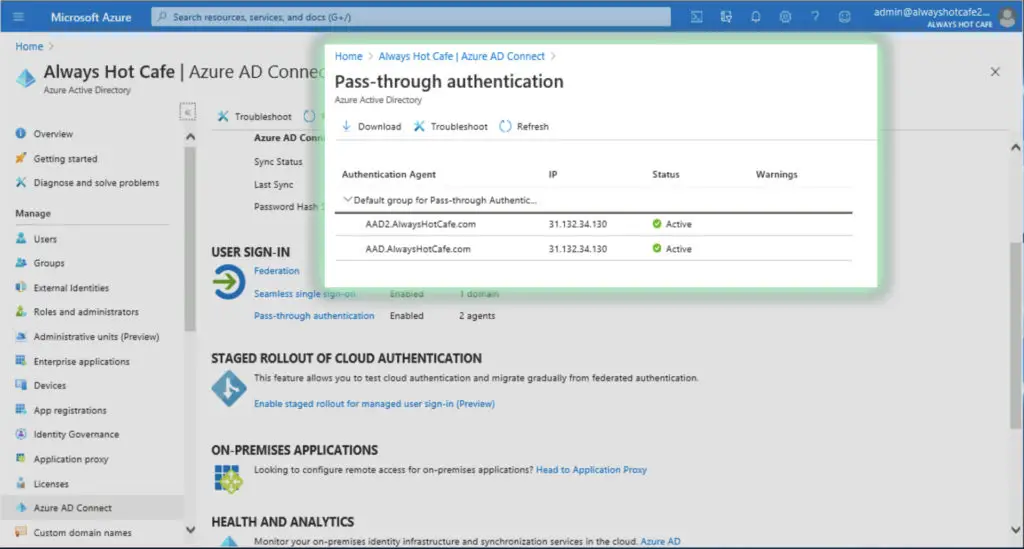
To fix this HA issue, we deploy a new, plain domain joined server called AAD2, open this same portal on it, then click on the "Download" button and configure the second agent following the installer's instructions. After the installation we confirm on the portal that we have both marked as Active.

4. Adding to trusted Sites
The last step is to add the Microsoft Azure SSO site to the trusted sites in Internet Explorer. Without this step, IE would be asking for the user credentials which defeats the whole purpose of having SSO.
The single entry to be added to the "Trusted sites":
autologon.microsoftazuread-sso.com
5. Verify User SSO
Now users should be able to use Office 365 resources from domain joined servers and clients with seamless SSO.

Comments