In this article we follow the main direction of our earlier guide where we detailed a proper Exchange 2019 to Office 365 migration, but without PTA or ADFS (so without proper single sign-on) configured. This time we go through the whole procedure and set up on-prem authentication for even better user experience. With SSO being available, the AlwaysHotCafe.com users won't need to type their passwords in when accessing Outlook or any of the web-based Microsoft 365 portal pages from a domain computer.
If you are interested how was the on-prem email system built, check out the article here: How to Install a new Microsoft Exchange 2019 Server – Step by Step shows how we originally built the on-prem Exchange 2019 environment.
Basics
This time we start with an environment with only Exchange 2016 on-prem email servers. Our goal is to migrate the whole email system, with public folders, etc to the Microsoft365 cloud. Our selected method is hybrid migration. This way we can do the process in as small batches as we want, proper mail flow and client access will be maintained between the users still on-prem and those that are already moved to the cloud. If needed, longer coexistence can be easily maintained.
You might ask: we already have a proper documentation on how to migrate to Office 365, how is this different? The procedure is largely the same, however this time we use two more servers in the process: and ADFS server and a WAP (web application proxy) box. Both of them will serve one thing: providing users with seamless single sign-on experience. In our earlier example user password hashes were synchronized to the cloud so when users tried to access Office365 portals or open Outlook, they could use their domain credentials. However they had to type those credentials in each time they wanted to access the cloud accounts. Of course, Outlook and web browsers both have options to cache credentials, but even that case, when the password is changed, users are prompted for the new password again.
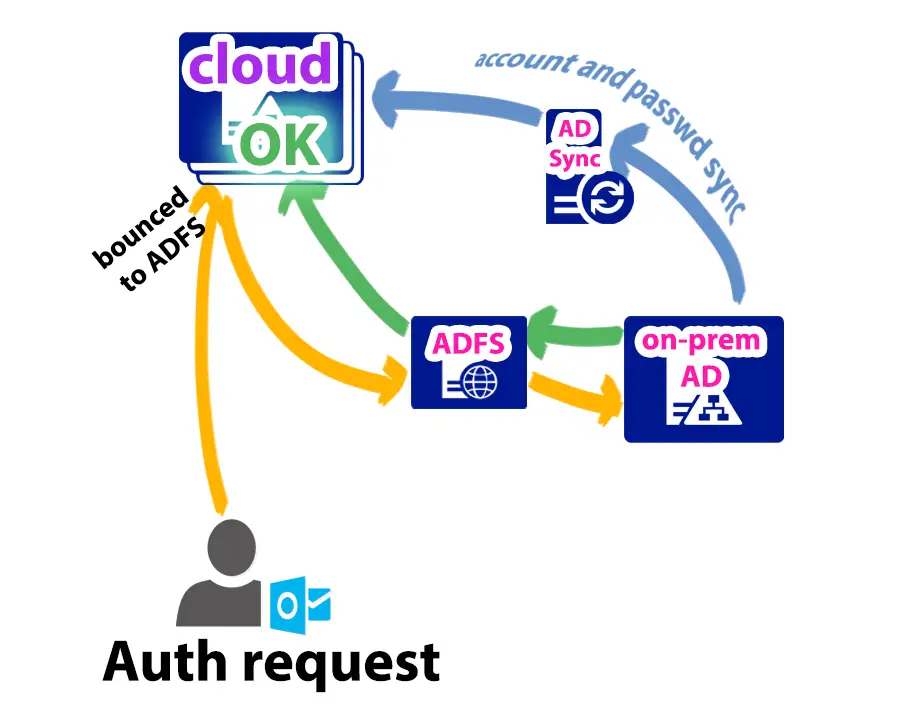
This is where ADFS comes handy: it handles user authentication, so users are authenticated on the on-prem authentication server, not in the cloud. This means if they are using a domain computer they experience seamless SSO. Recently Microsoft developed a new method called PTA (Pass-Through Authentication), where on-prem AD Kerberos tickets are accepted in the cloud thanks to a component built in the Azure AD Sync Connector. Details will follow here later
As with user accounts in the cloud the principal is the same: the Azure tenant will have a proper, separate active directory running remotely. With Azure AD Connect, the (selected) user accounts are effectively "mirrored" to the cloud, keeping their UPN, email addresses, location, phone number, office information, etc. After the mailboxes are transferred to the cloud, they will be able to access them from the on-prem domain seamlessly, thanks to ADFS.
For more details of the basic concepts how the hybrid setup works, please visit the Exchange2019 to Office365 guide.
Starting Scenario
In this lab we have a slightly different set of servers. We use Exchange 2016, because it is the highest version of Exchange that is supported with EOL as of July 2020.
On-prem: 1x Domain Controller (DC.alwayshotcafe.com) 1x Exchange 2016 Mailbox servers (MB1.alwayshotcafe.com) To be configured: 1xAAD (AAD.alwayshotcafe.com) 1x ADFS (ADFS.alwayshotcafe.com) 1xWAP (WAP)
1. Create Office365 tenant
2. Deploy ADFS
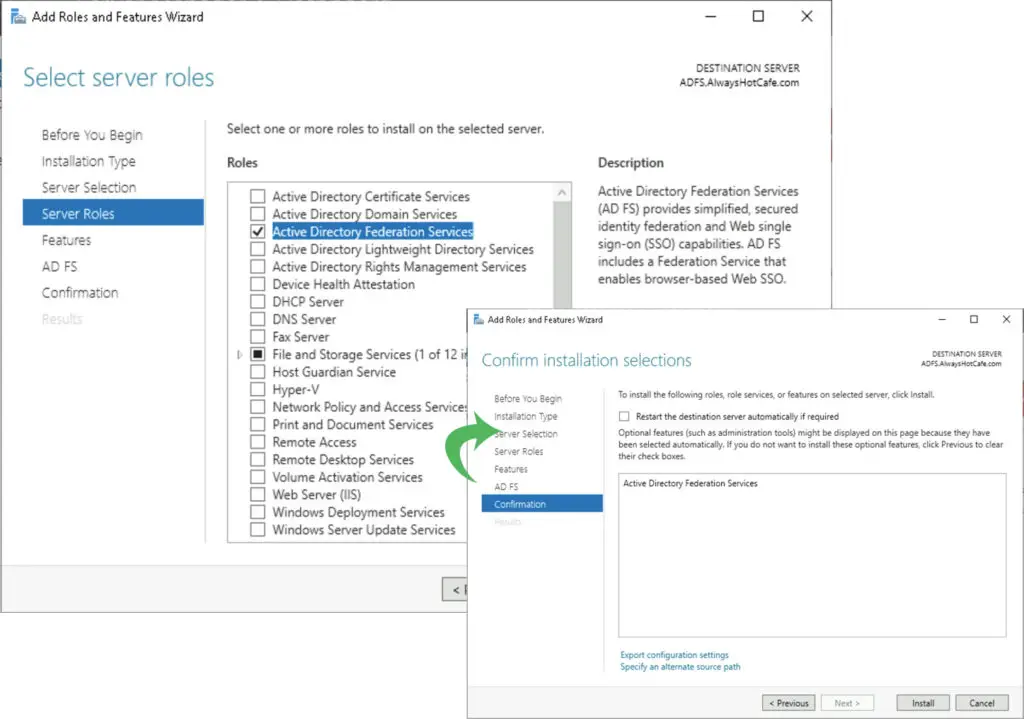
The ADFS server will be used to authenticate users both locally (on-prem, and remotely from the internet). ADFS will differentiate between local and remote users by checking the authentication source: if the authentication request comes through the WAP server, it is considered a remote authentication attempt. If it arrives straight to the ADFS server, it is handled as local, where SSO is provided. We start off by adding the Active Directory Federation Services role to the freshly built and domain joined ADFS.alwayshotcafe.com server.
a. Install the ADFS role
Or via PowerShell:
PS C:\ > Install-WindowsFeature adfs-federation –IncludeManagementTools
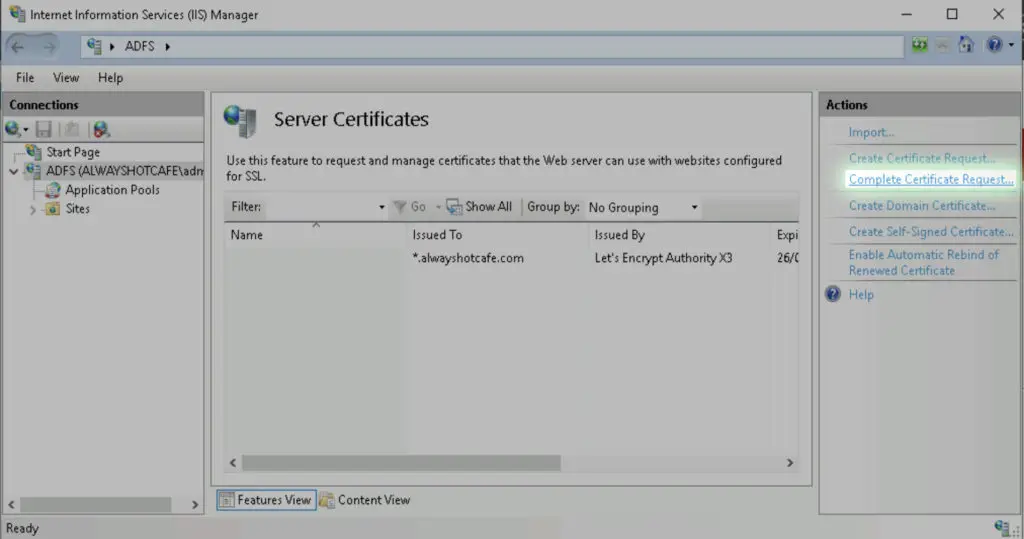
b. Generate the SSL certificate for ADFS
As ADFS has issues with wildcard certificates, we generate a new SSL for ADFS with the subject name of auth.alwayshotcafe.com.
In IIS/Server Certificates we click on "Create Certificate Request"
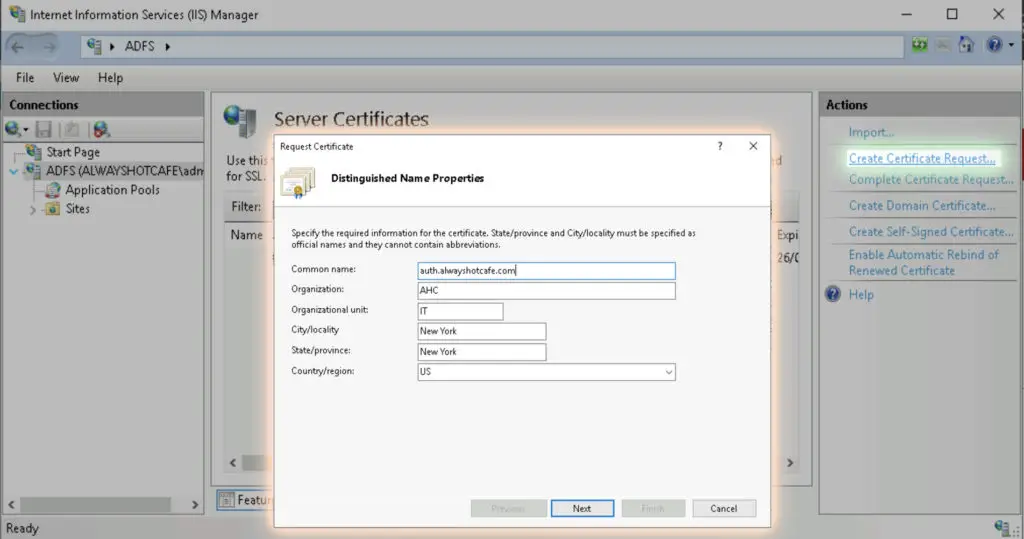
Key length is 2048 bit. Then save the base64 encoded request.
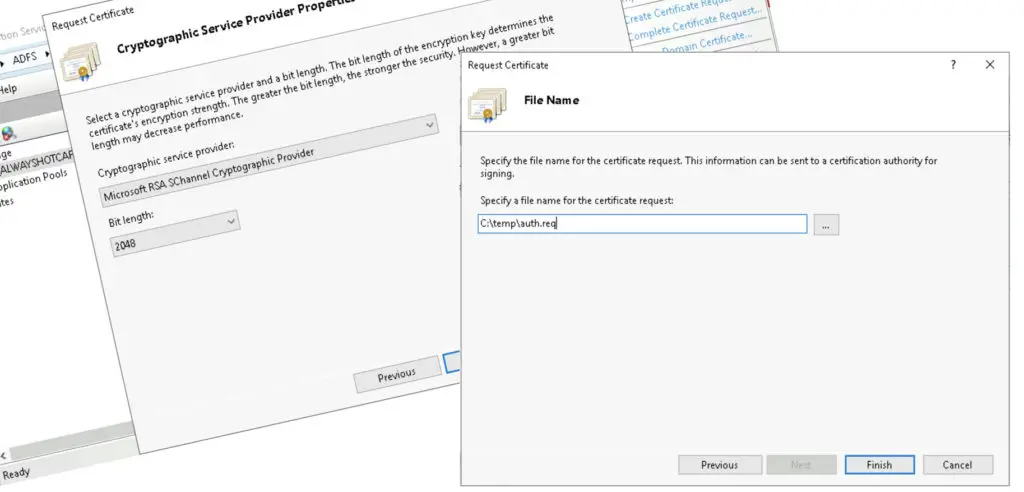
After signed by a public CA, we import the signed public key, completing the SSL process.
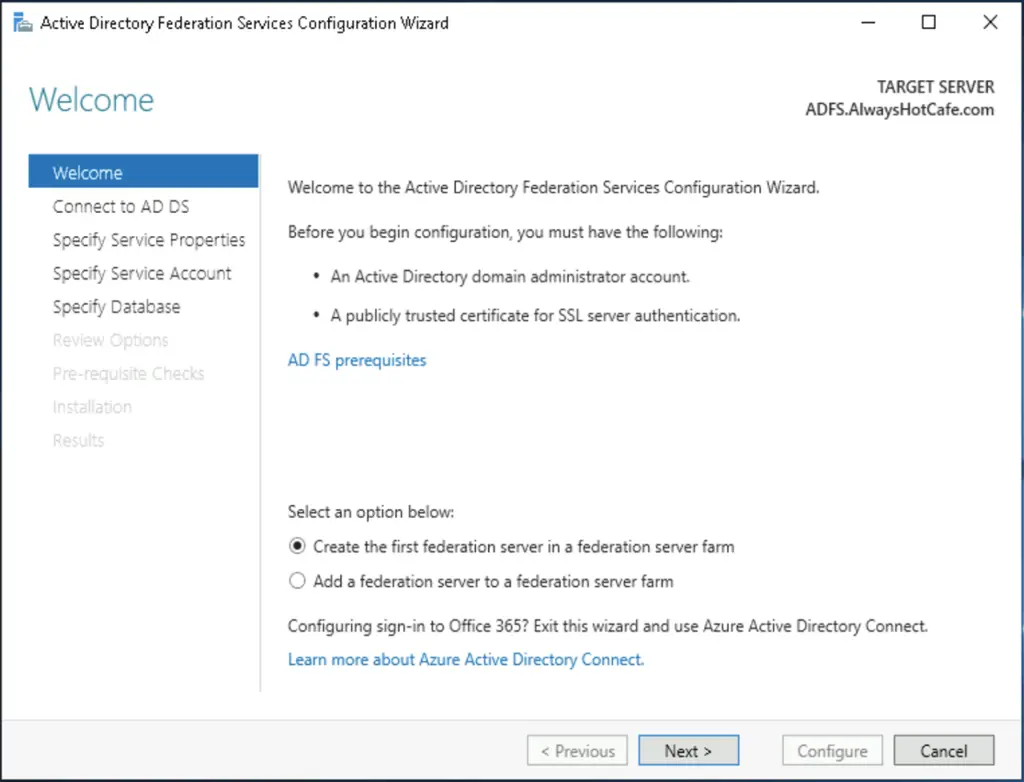
c. Configure ADFS
Open the AFDS wizard, and start with creating a new federation farm
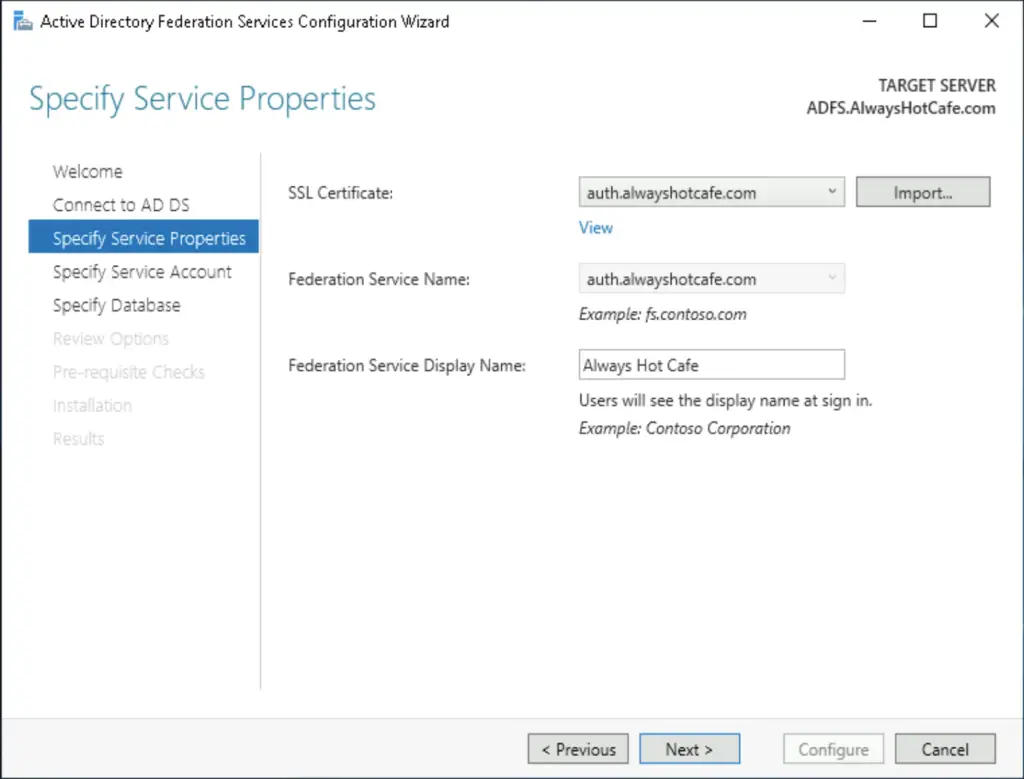
Select the SSL certificate that contains the hostname we'll be using for the service: auth.alwayshotface.com (STS stands for secure token service).
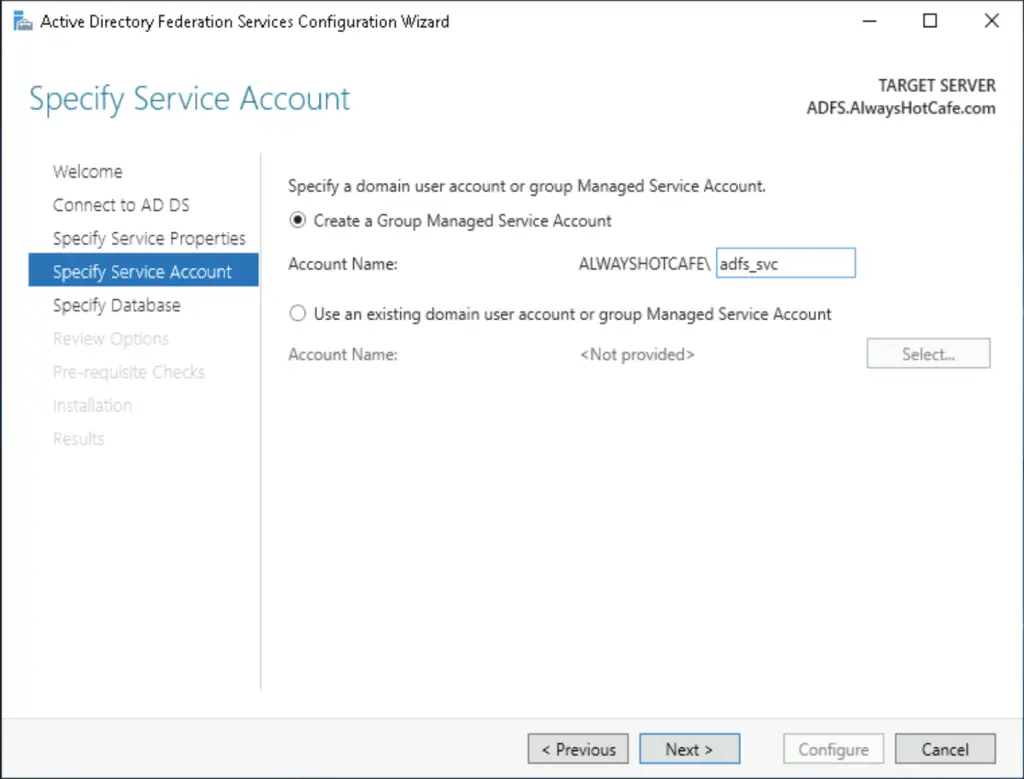
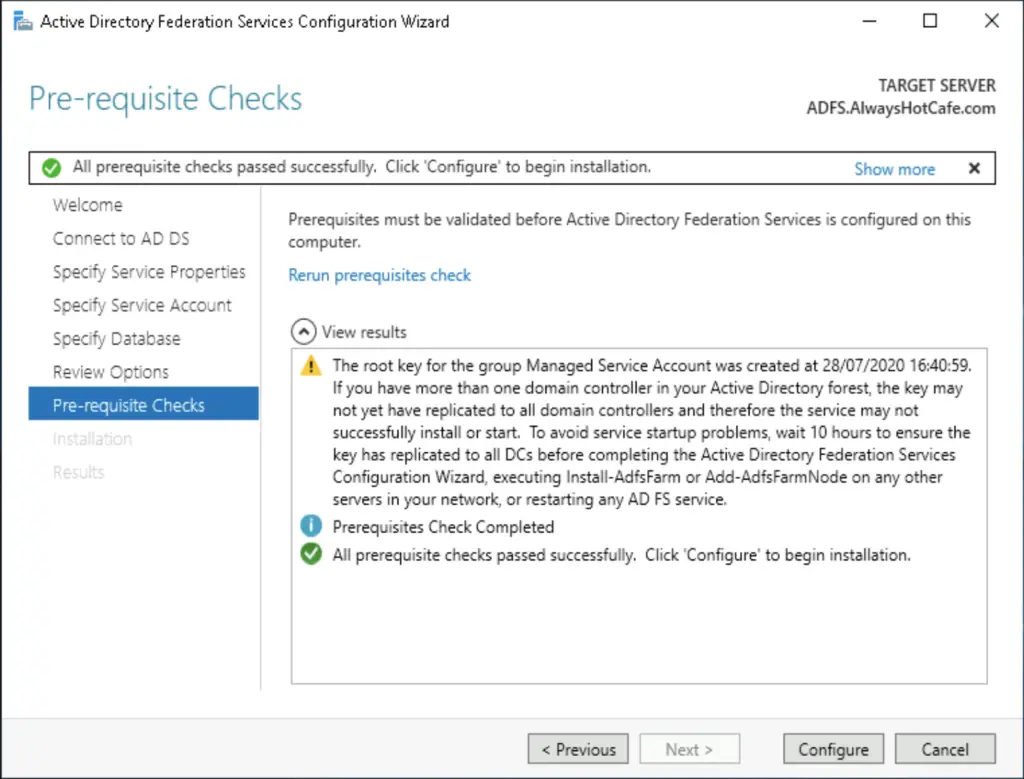
In the next step we'll need to configure (ideally) a group managed service account for the ADFS service. This is secure, as the password is generated and frequently updated by the system without any admin intervention.
To generate the key, open powershell and run the following command:
PS C:\ > Add-KdsRootKey -EffectiveTime (Get-Date).AddDays(-10)
Next, we let the system create a new gMSA called: adfs_svc
We go with the Windows Internal Database option and configure the service
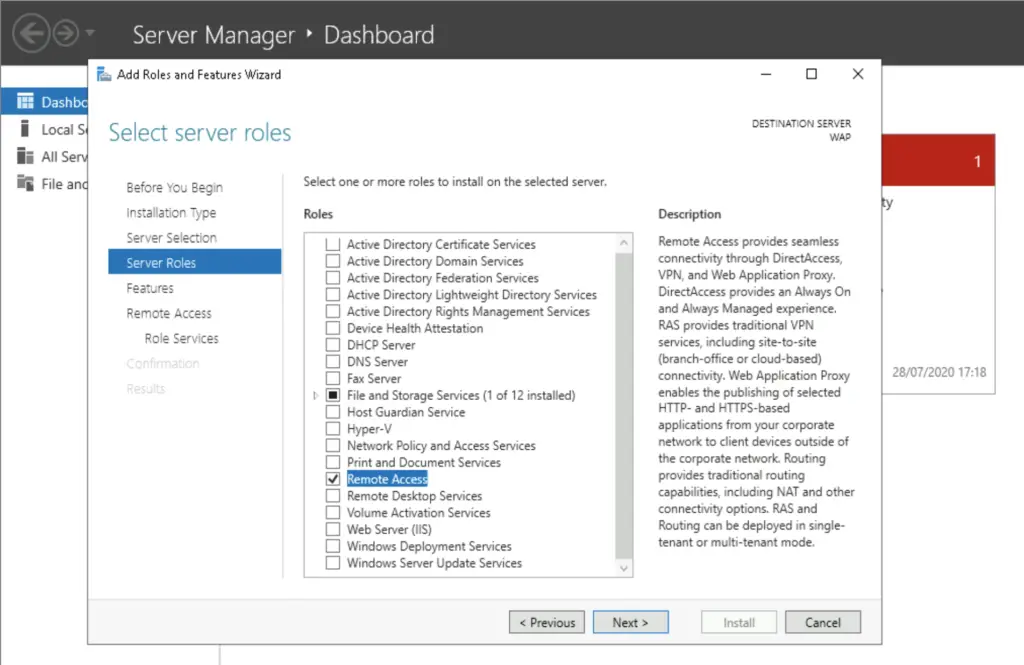
3. Install WAP
Time for installing the Web Application Server. This server is basically a first-line web server, receiving authentication requests directly from the internet and forwarding them to the ADFS server. Technically this server is a safety feature, a filter between the public domain and the ADFS server. We could omit it and use the ADFS server straight as public facing server, but that is never a good idea to leave a domain-joined web server accessible publicly.
a. Import the SSL cert in the WAP server
Before we begin, we export the auth.alwayshotcafe.com SSL certificate from the ADFS server and import in to the Computer/Private store on the WAP server. For a guide, click here
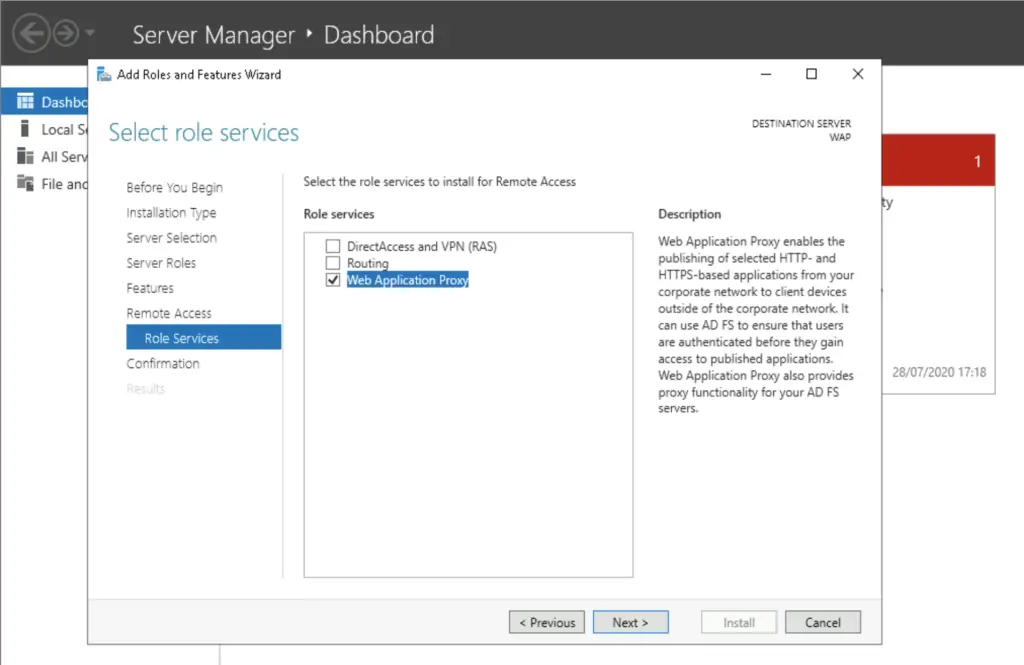
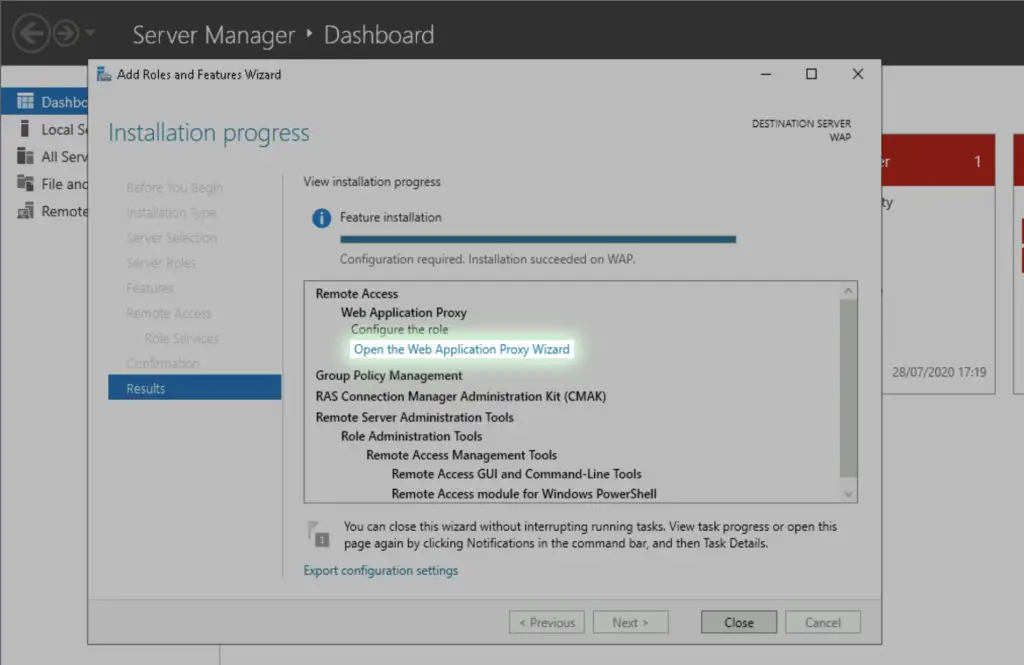
b. Install the WAP role
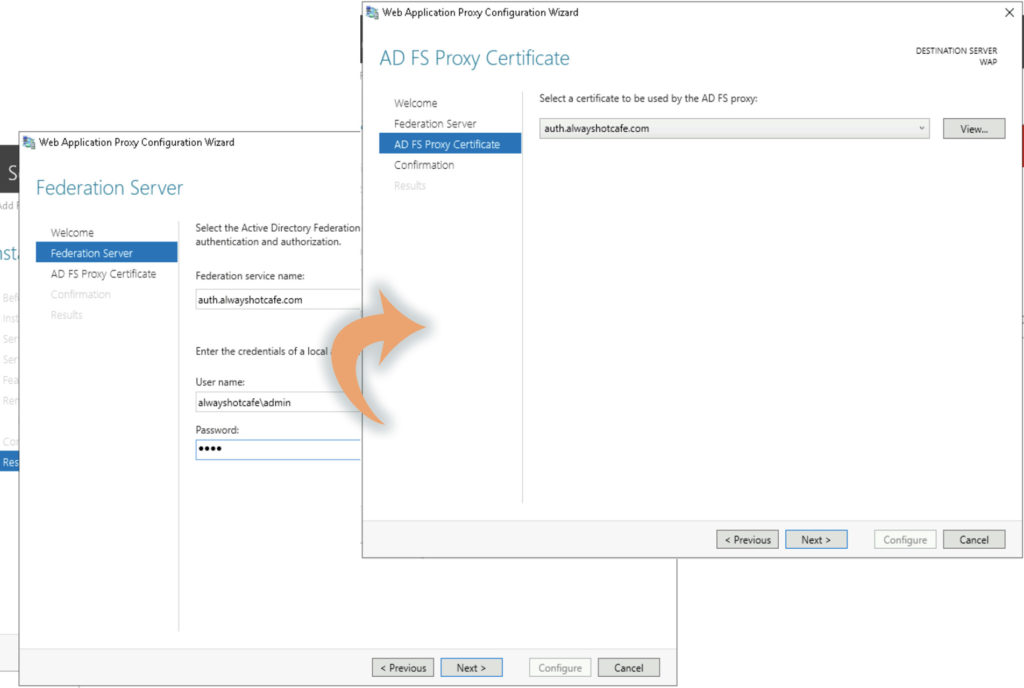
c. Configure WAP
We start the WAP wizard from Server Manager.
Federation service name is auth.alwayshotcafe.com
Make sure the AUTH A record pointing to the ADFS server is present in the AD DNS!
We select the imported SSL cert on next page
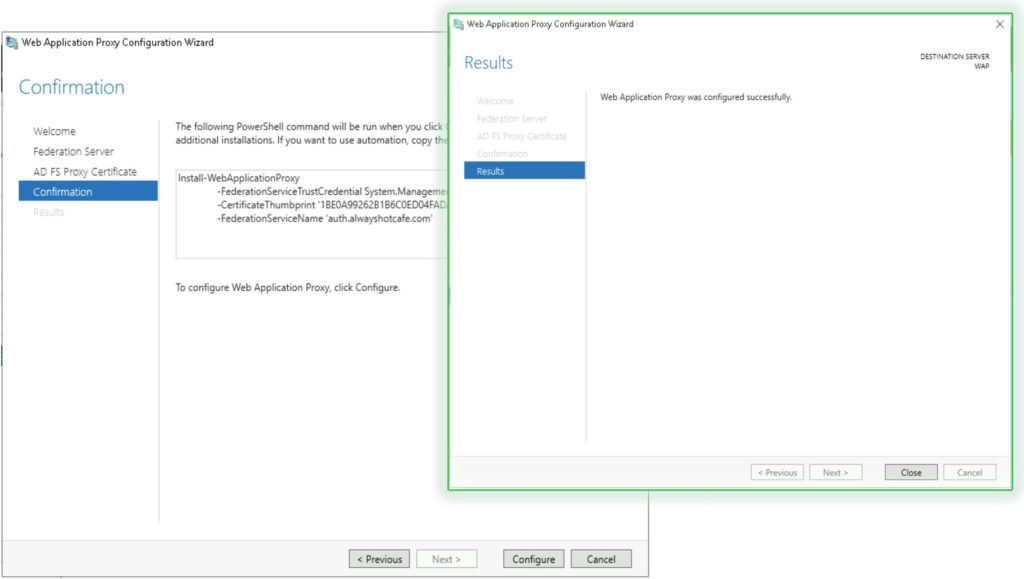
Finish setup.
4. Create Federation
To make the cloud environment aware of our on-prem ADFS system, we do the following:
# Connect to MsOnline
PS C:\> $cr = Get-Credential -Message "hi" -UserName admin@alwayshotcafe2020.onmicrosoft.com
PS C:\> Connect-MsolService -Credential $cr
# Make the federation. Connect to the adfs server using it's hostname, not the ADFS service name!
PS C:\> Set-MsolADFSContext -Computer adfs.alwayshotcafe.com
PS C:\> Convert-MsolDomainToFederated -DomainName alwayshotcafe.com
Successfully updated 'alwayshotcafe.com' domain.
# Verify federation
PS C:\> Get-MsolFederationProperty -DomainName alwayshotcafe.com


Source                          : ADFS Server
ActiveClientSignInUrl           : https://auth.alwayshotcafe.com/adfs/services/trust/2005/usernamemixed
FederationServiceDisplayName    : Always Hot Cafe
FederationServiceIdentifier     : http://auth.alwayshotcafe.com/adfs/services/trust
FederationMetadataUrl           : https://auth.alwayshotcafe.com/adfs/services/trust/mex
PassiveClientSignInUrl          : https://auth.alwayshotcafe.com/adfs/ls/
PassiveClientSignOutUrl         : https://auth.alwayshotcafe.com/adfs/ls/
TokenSigningCertificate         : [Subject]
                                    CN=ADFS Signing - auth.alwayshotcafe.com

                                  [Issuer]
                                    CN=ADFS Signing - auth.alwayshotcafe.com

                                  [Serial Number]
                                    5AB0F172C68DA0914B59C05F88C5E39E

                                  [Not Before]
                                    28/07/2020 16:50:41

                                  [Not After]
                                    28/07/2021 16:50:41

                                  [Thumbprint]
                                    6499C52ACE5BCBAE24FACD52C45156D26BCCA280

NextTokenSigningCertificate     :
PreferredAuthenticationProtocol :

Source                          : Microsoft Office 365
ActiveClientSignInUrl           : https://auth.alwayshotcafe.com/adfs/services/trust/2005/usernamemixed
FederationServiceDisplayName    : Always Hot Cafe
FederationServiceIdentifier     : http://auth.alwayshotcafe.com/adfs/services/trust
FederationMetadataUrl           : https://auth.alwayshotcafe.com/adfs/services/trust/mex
PassiveClientSignInUrl          : https://auth.alwayshotcafe.com/adfs/ls/
PassiveClientSignOutUrl         : https://auth.alwayshotcafe.com/adfs/ls/
TokenSigningCertificate         : [Subject]
                                    CN=ADFS Signing - auth.alwayshotcafe.com

                                  [Issuer]
                                    CN=ADFS Signing - auth.alwayshotcafe.com

                                  [Serial Number]
                                    5AB0F172C68DA0914B59C05F88C5E39E

                                  [Not Before]
                                    28/07/2020 16:50:41

                                  [Not After]
                                    28/07/2021 16:50:41

                                  [Thumbprint]
                                    6499C52ACE5BCBAE24FACD52C45156D26BCCA280

NextTokenSigningCertificate     :
PreferredAuthenticationProtocol : WsFed
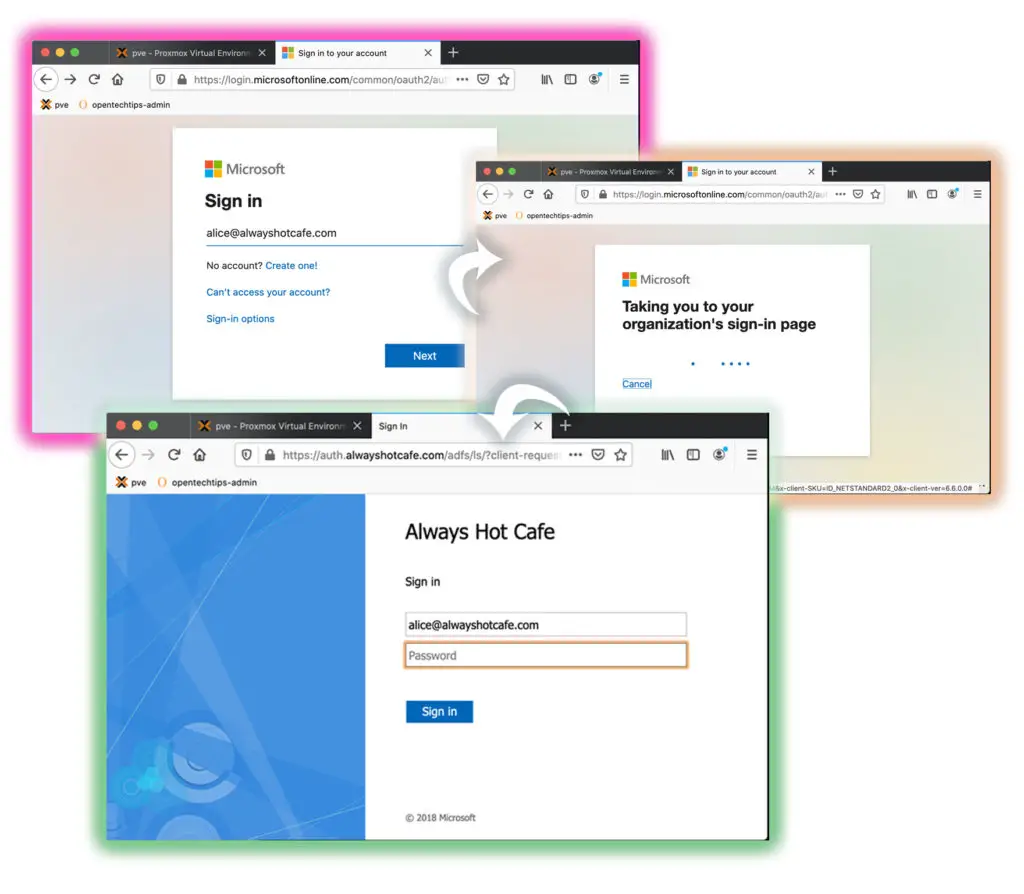
After the setup is complete, user authentication will be directed to the adfs server instead of authenticating on the cloud portal.
5. Run Microsoft IDFix tool for errors before Sync
Before proceeding with AD sync we need to make sure our domain is ready for the synchronization procedure. The IDFix tool was built just for this purpose. Navigate to this link and download the tool:
https://www.microsoft.com/en-gb/download/details.aspx?id=36832
Note: a newer version of the tool is uploaded to the Microsoft Github area:
https://github.com/microsoft/idfix
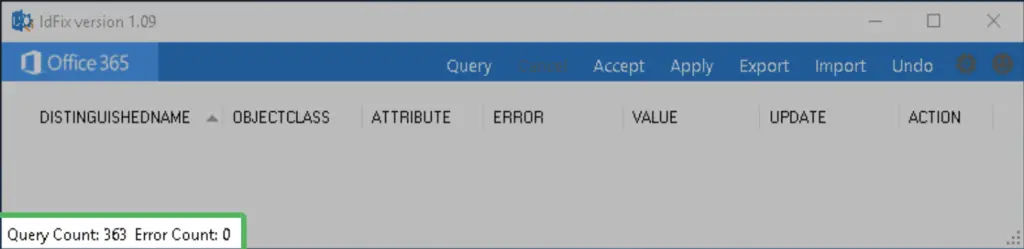
Follow the instructions on each error to fix all if there are issues the tool found. In our case we have 0 errors and we are ready to proceed finally with the sync tool.
6. Deploy Azure AD Sync (DirSync)
On our dedicated AAD server we download and run the Azure AD Connect installer from:
https://www.microsoft.com/en-us/download/details.aspx?id=47594
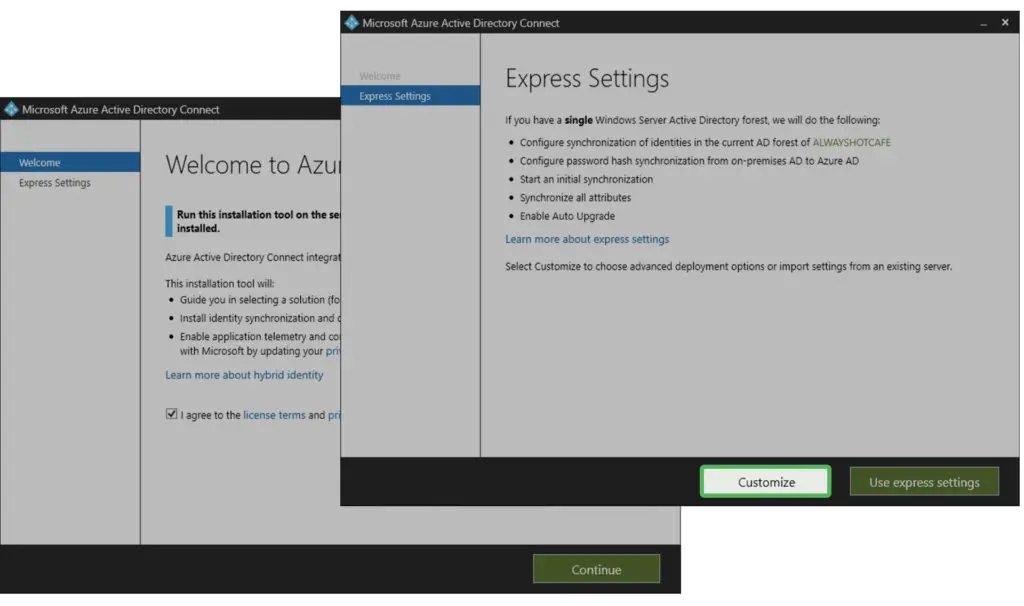
Once the setup has started, agree with the license conditions, then in the next step select the custom setup option.
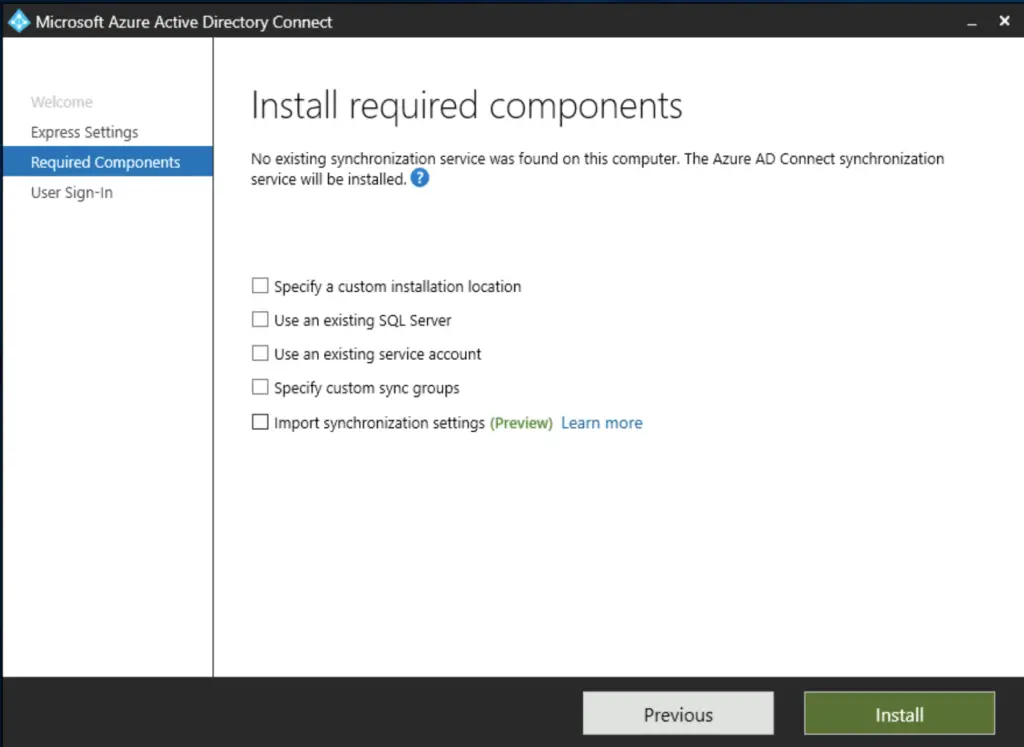
On the next page we go with the defaults: nothing is checked.
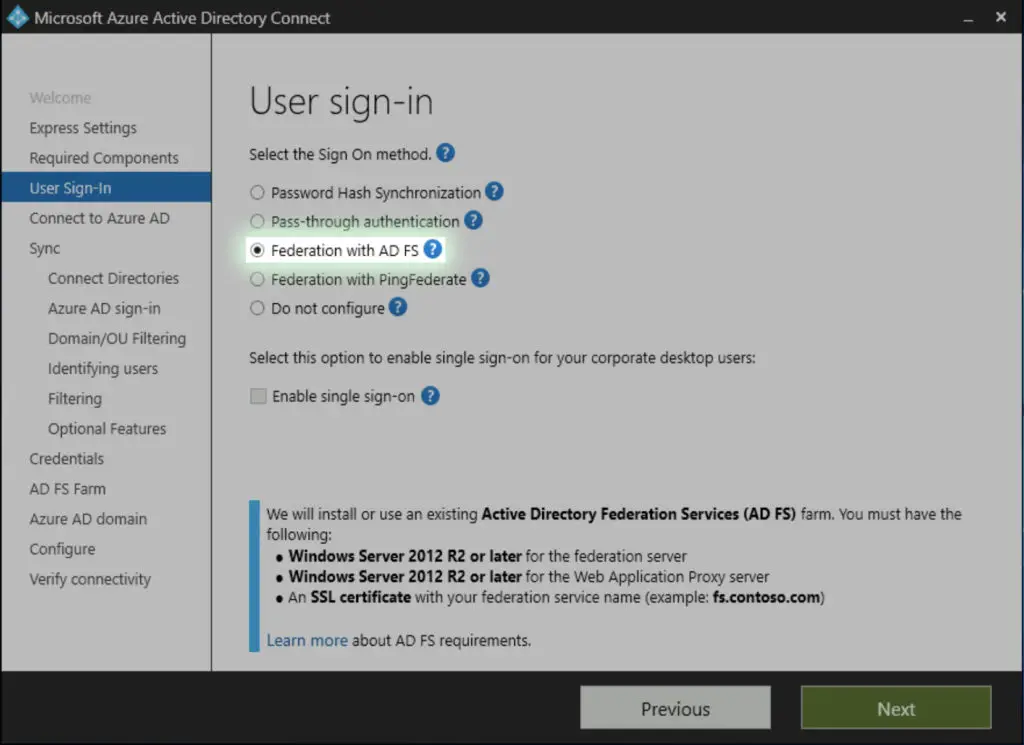
The user sign-in method is "federation with ADFS"
Then connect to Azure AD with the existing global admin credentials

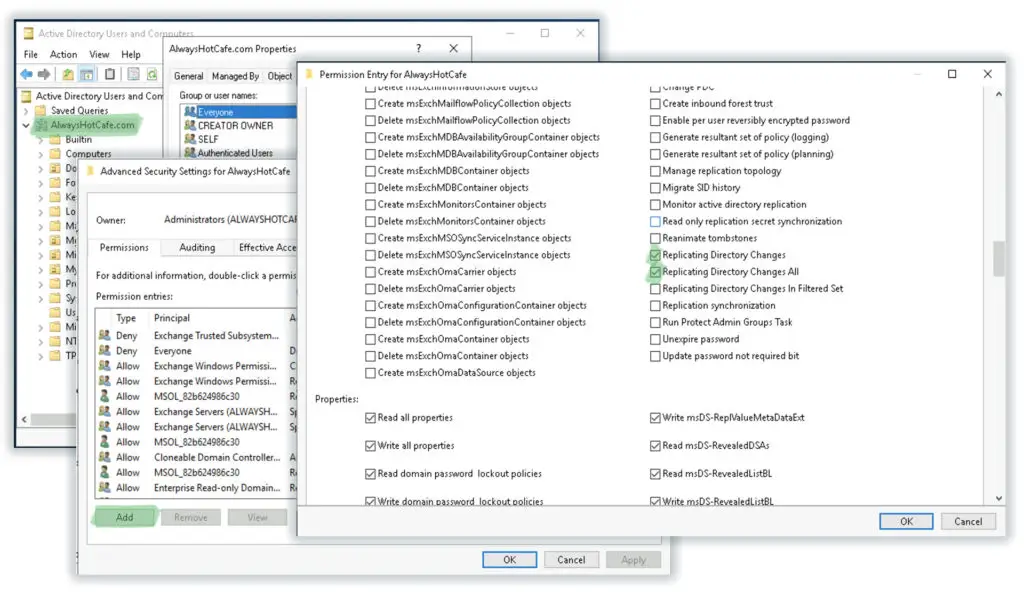
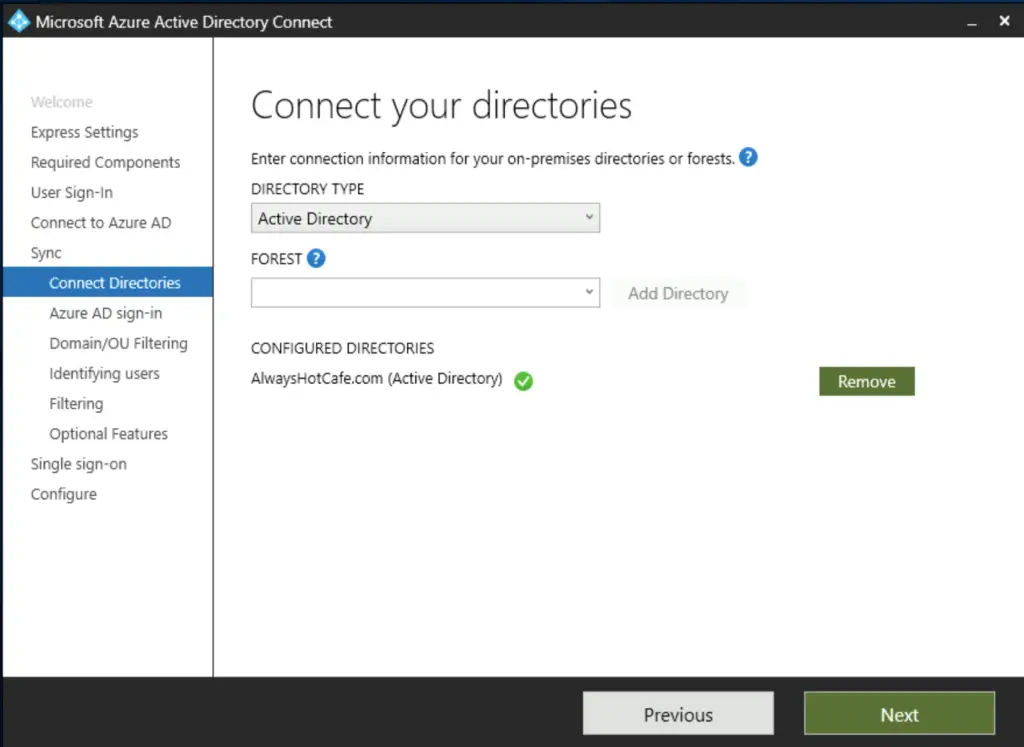
Next, we add the AlwaysHotCafe.com forest to the sync scope. We use an existing user account called alwayshotcafe.com\aad, which the sync tool will use to query our AD for user accounts.
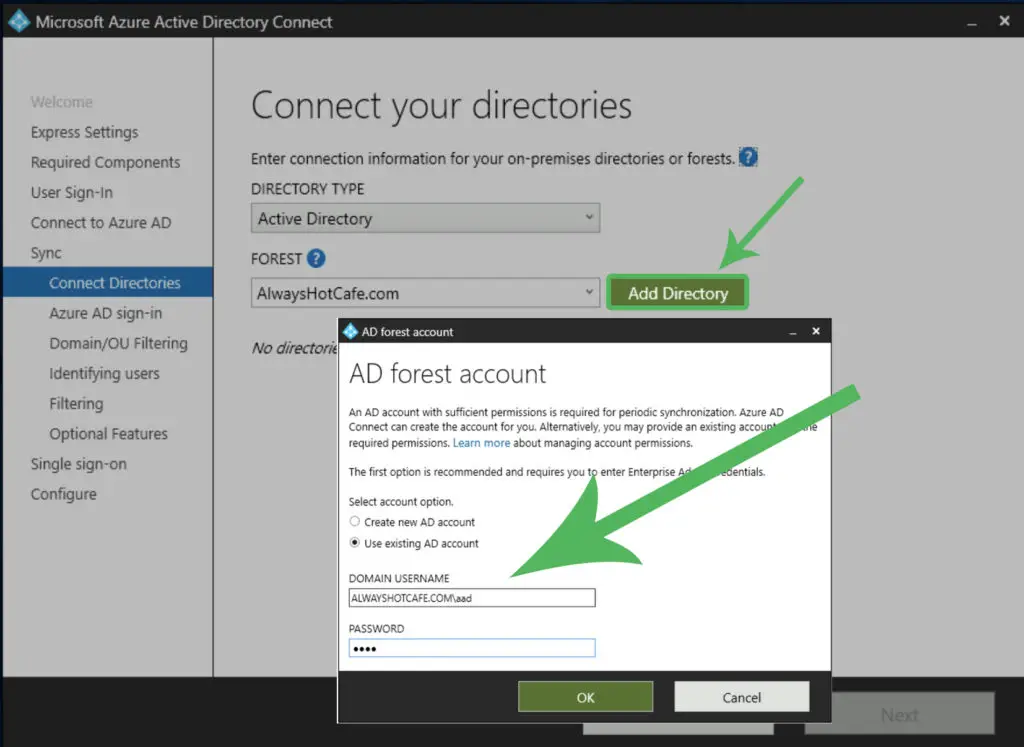
We click on "Next"
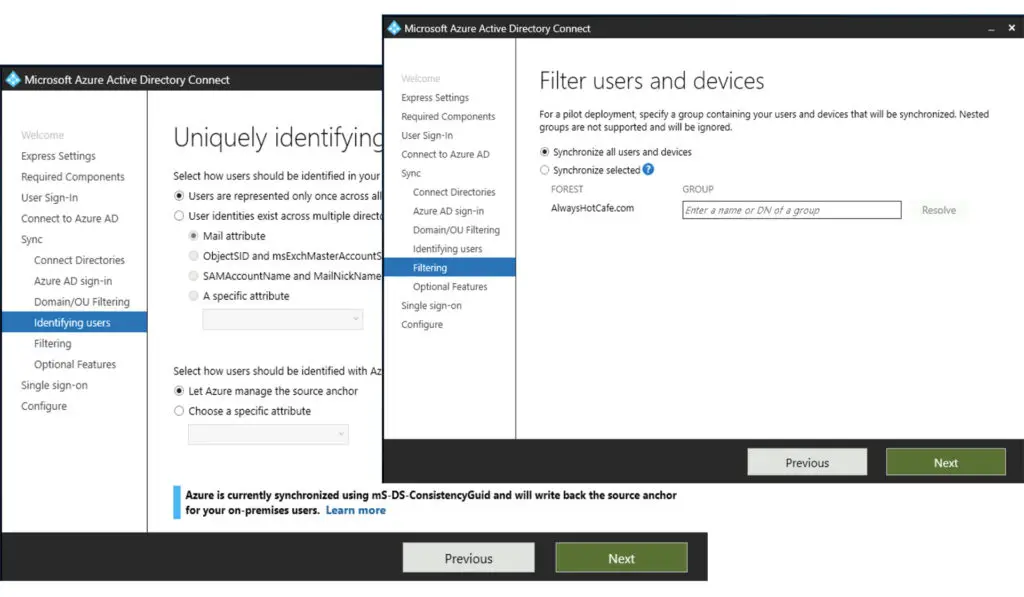
The on-prem attribute for the cloud username is the UPN by default, which is perfect for us, so we leave it as it is.

We select only the "My Business\Users" OU, as this container has all the users we need to appear in Azure AD.
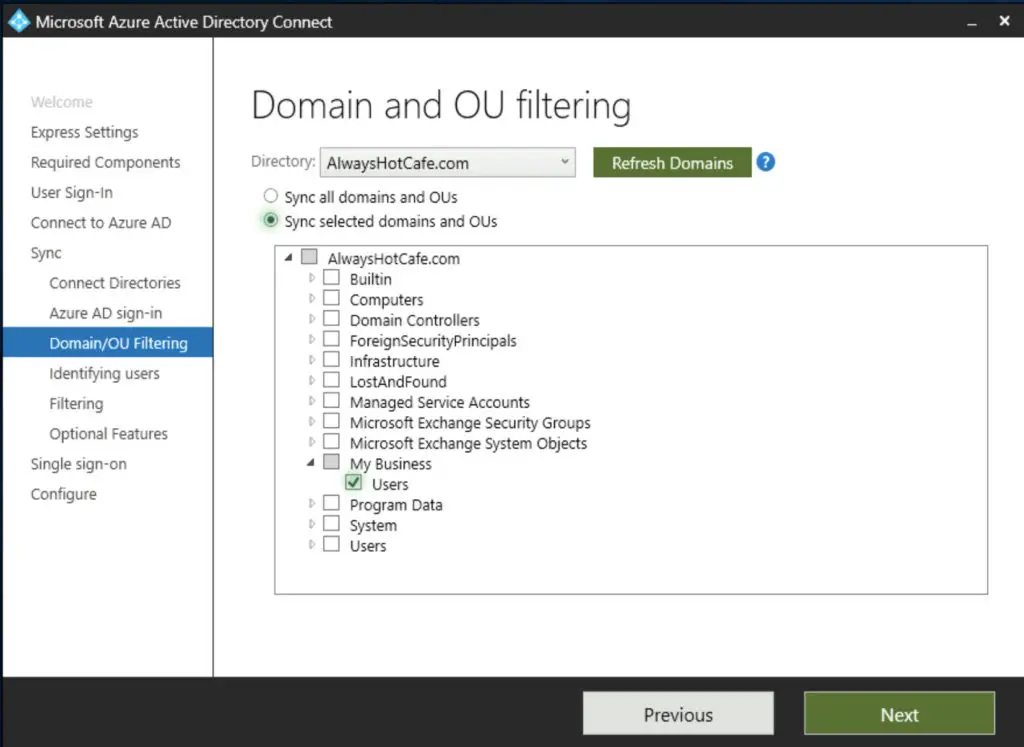
We leave the default values on the next two pages.
We select the hybrid environment, and password writeback options as we run a hybrid environment, and password writeback allows us to change user passwords from O365 which is then written back to the on-prem AD DS system. It is not critical this time as we use AD FS on-prem for user authentication, but if that fails for some reason and the fastest way to restore the service is by cutting AD FS, password hashes already in the cloud will speed up the process tremendously.
Note: ADFS is a single point of failure: if it is not working, let's say the on-prem ADFS servers are not accessible for some reason, users won't be able to authenticate and access their emails! Worth to mention that mail flow stays intact though. This is a reason why it's a good idea to have at least two ADFS servers in the farm, with two WAP servers servicing them to ensure high availability.

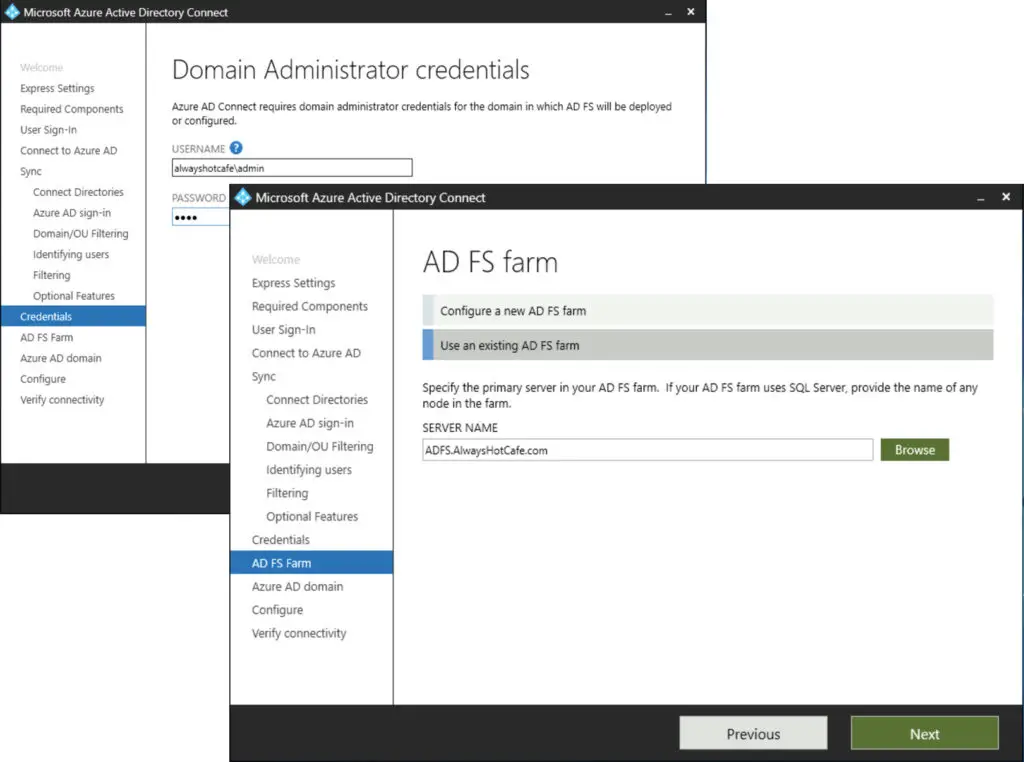
Next, we add our domain admin credentials. As the AD FS farm server we type in the FQDN of our main (and only) ADFS server. Note: we use the hostname, not the "auth" service name.
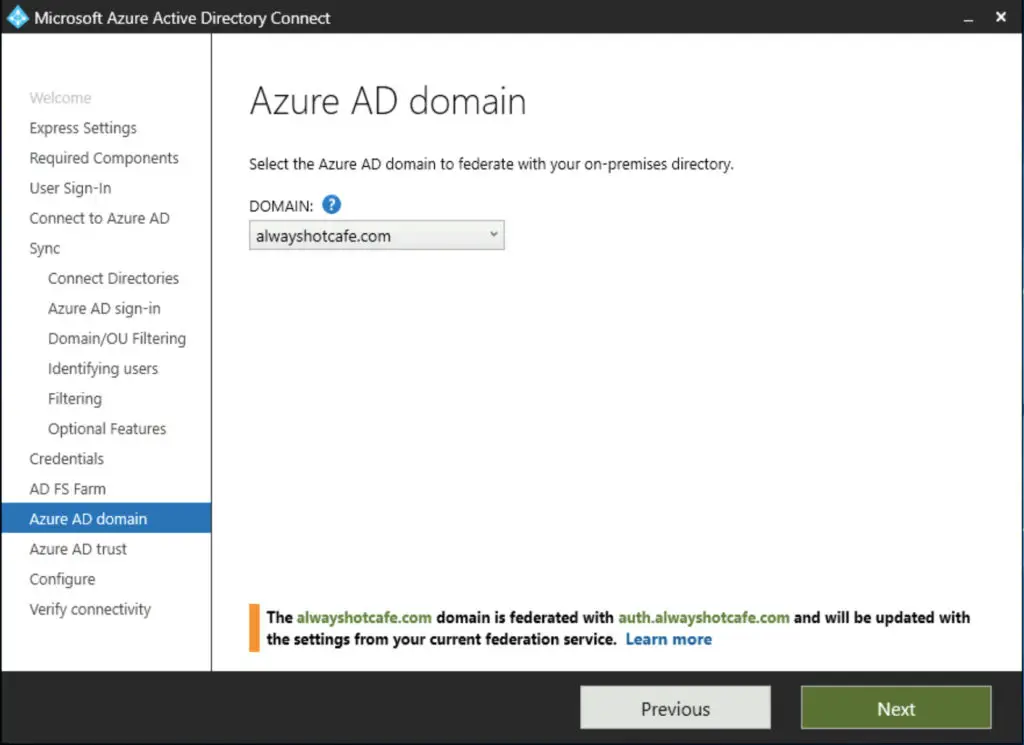
We select our alwayshotcafe.com domain for federation
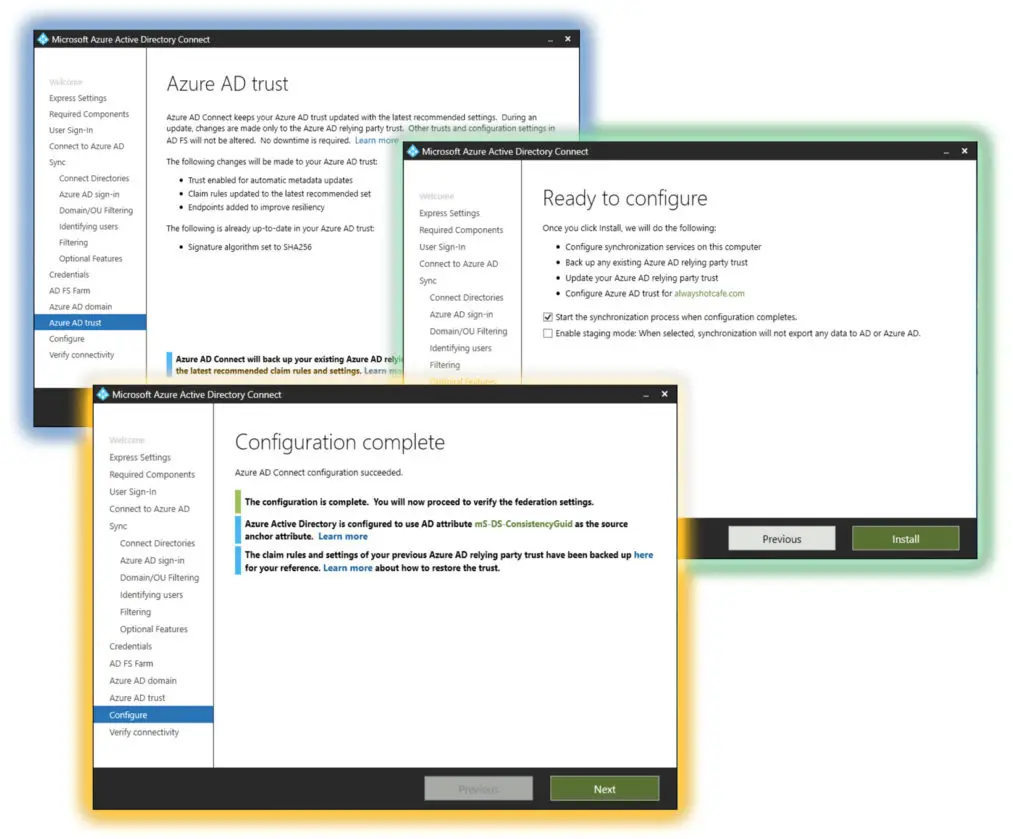
All is left to confirm the configuration and let the wizard sort the rest.
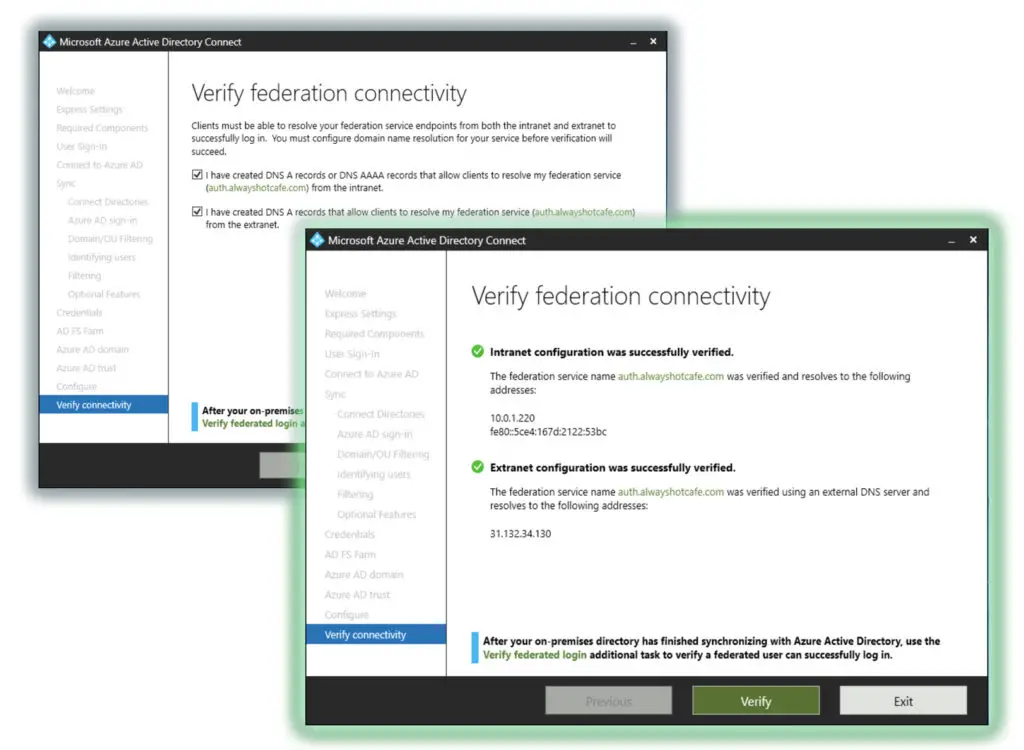
In the last step we verify that the federation connection is working
7. Create the hybrid environment
To allow the on-premises servers and the cloud system to work together as an organic whole, the hybrid configurator will help us setting up everything. After it runs, data sharing (like free-busy information), CAS services (autodiscover) and mail flow will be properly set up between the two locations. That means if an email arrives to either the cloud or on-prem (depending where the MX records are pointing to), the message will find it's way to the proper mailbox, no matter if it's hosted in the other side of the hybrid setup. Also, Autodiscover can point to either the cloud or on-prem, the user experience won't suffer.
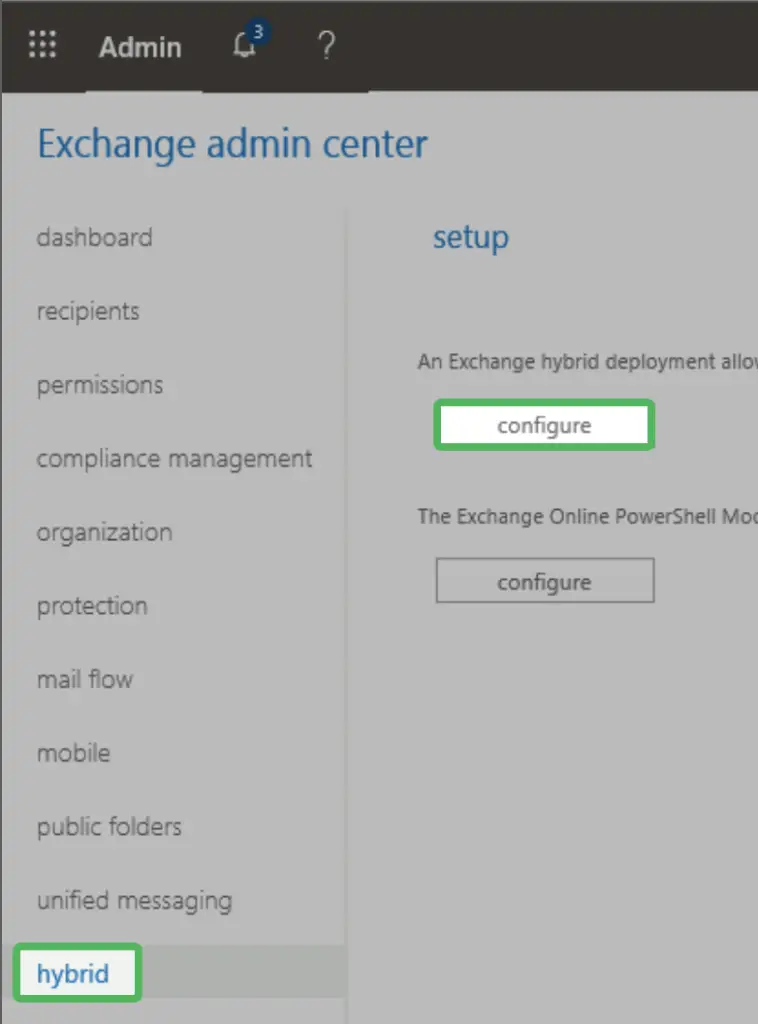
We open the Exchange Online portal (https://outlook.office365.com/ecp) on our MB1 mailbox server, and under the hybrid tab select the Configure Exchange Hybrid Deployment option.
a. Open the Exchange Online ecp: https://outlook.office365.com/ecp. Under the "hybrid" tab start the hybrid deployment wizard.
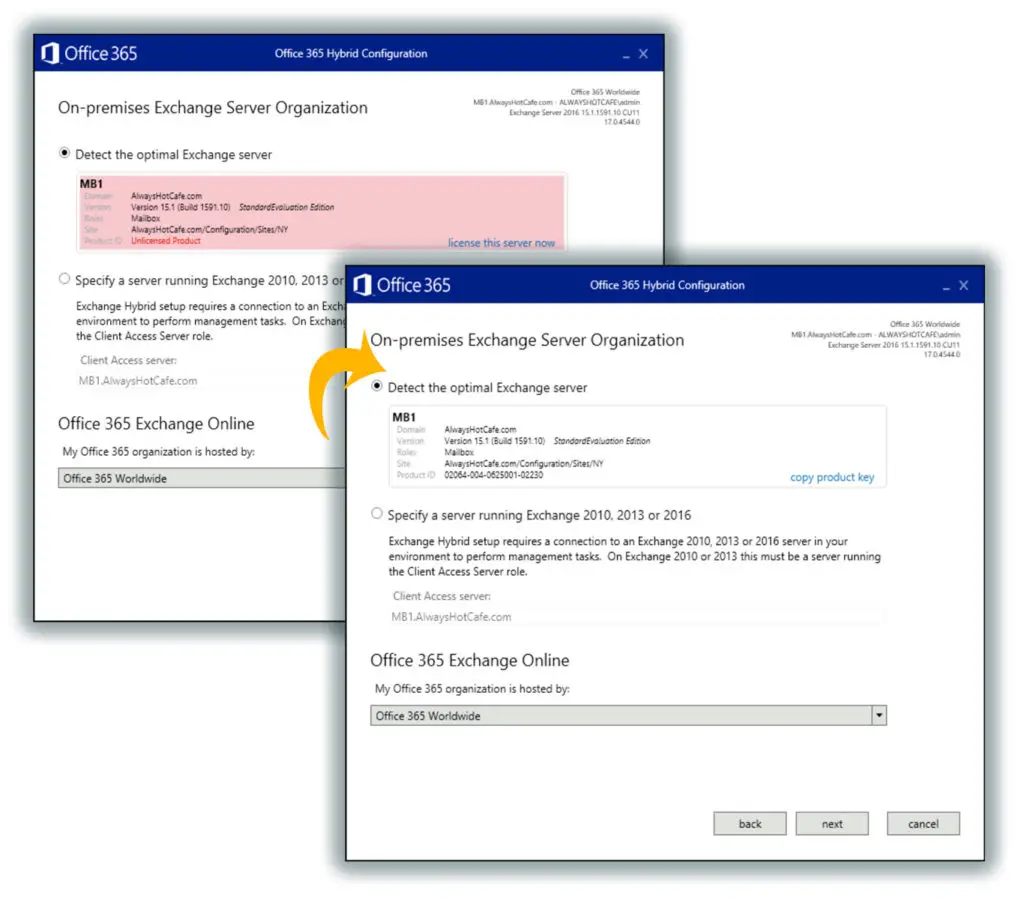
In the second page, the wizard will automatically find our only Exchange 2016 box. It is a lab environment so the server is not licensed, we let the wizard do the licensing.
Next, we specify both of our on-prem and cloud admin credentials for the wizard. It performs the necessary configuration steps on both ends.
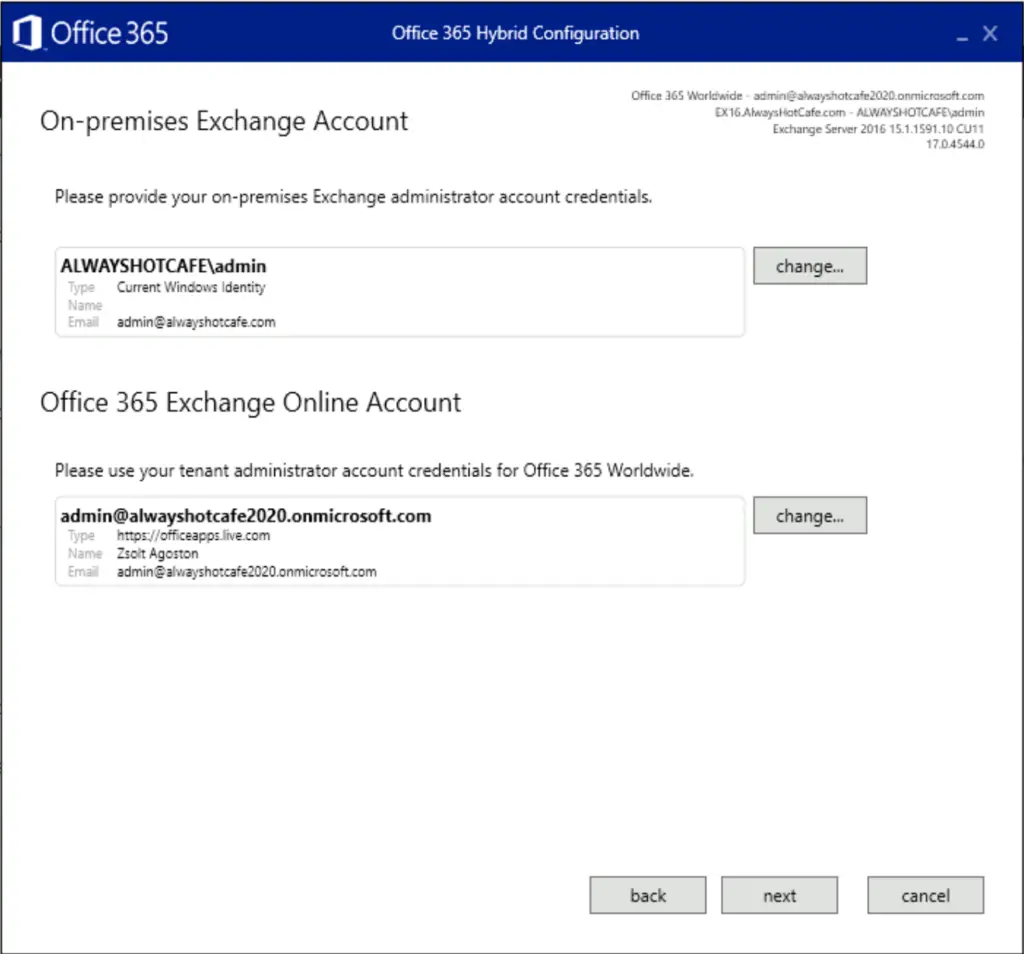
Make sure checks succeed on both sides.

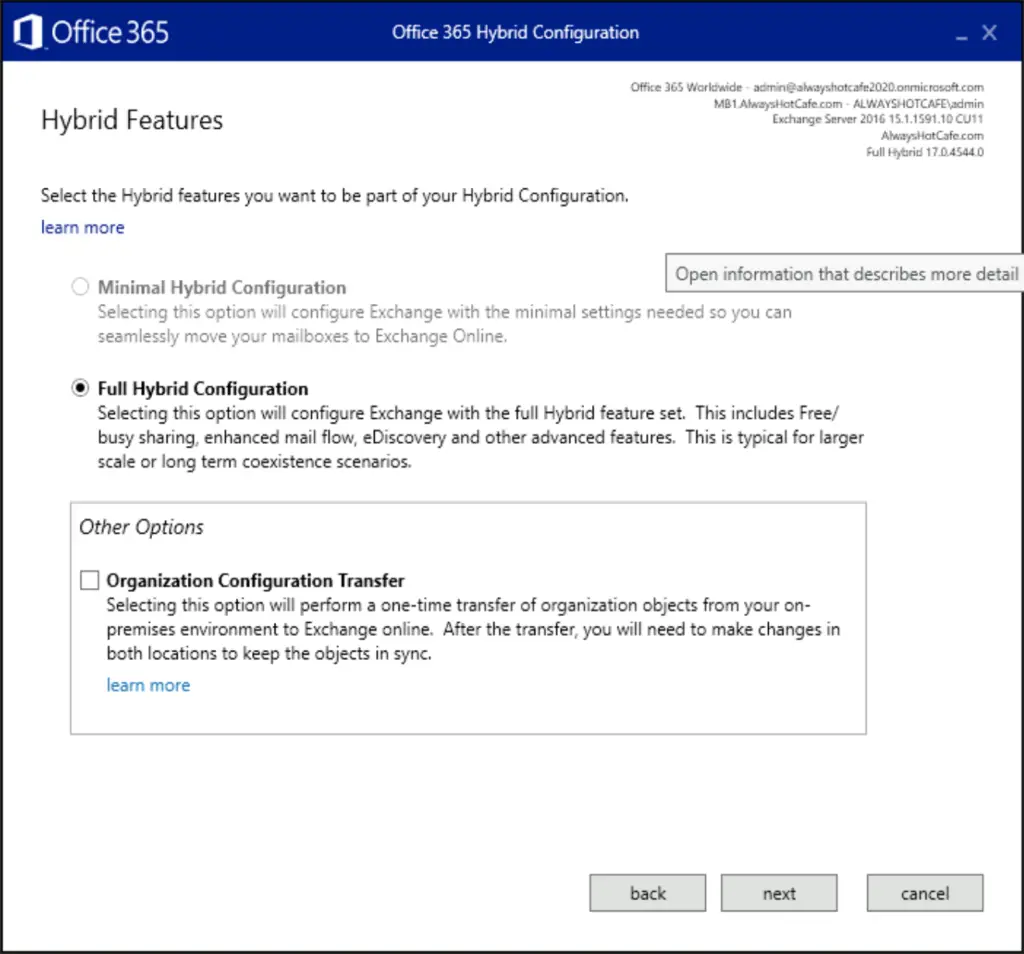
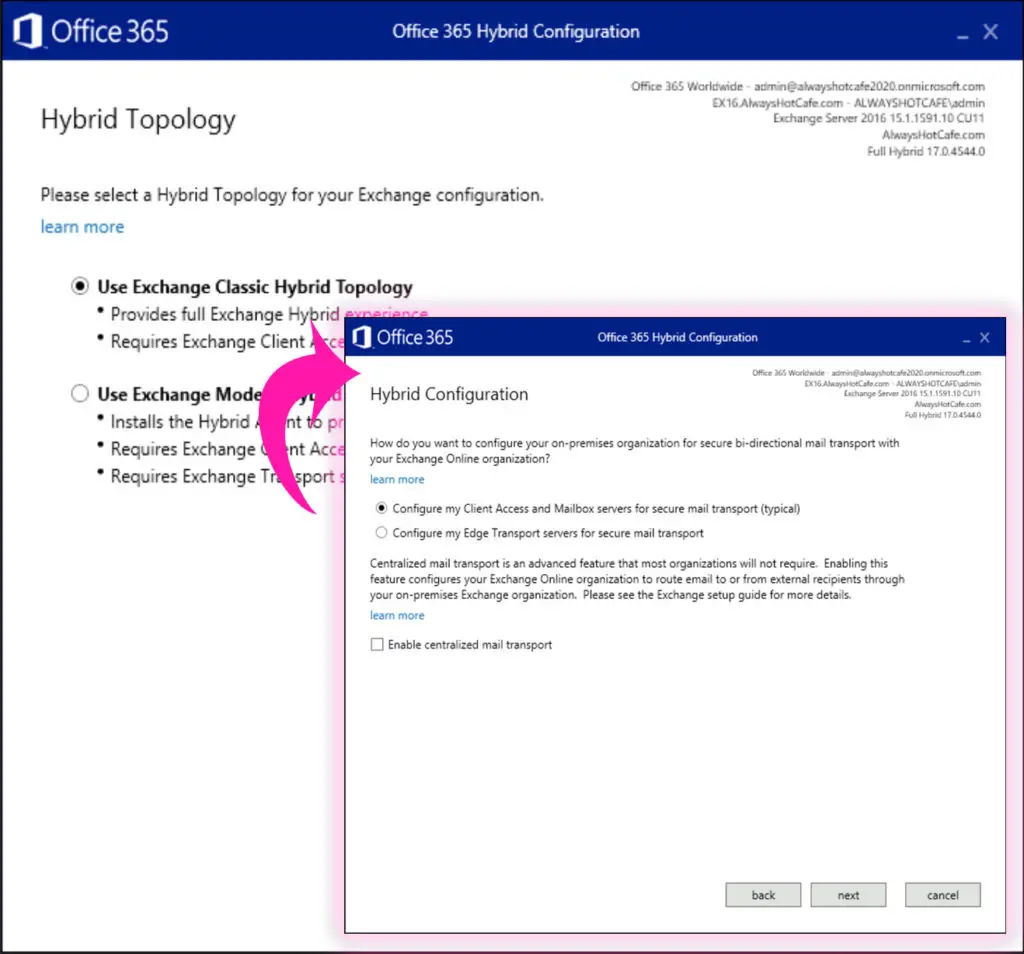
We select the full-hybrid configuration as ADFS makes it available for us.
We go with the defaults on the next pages and choose to configure the CAS and MB services, as Edge Transport server is not deployed in this lab.
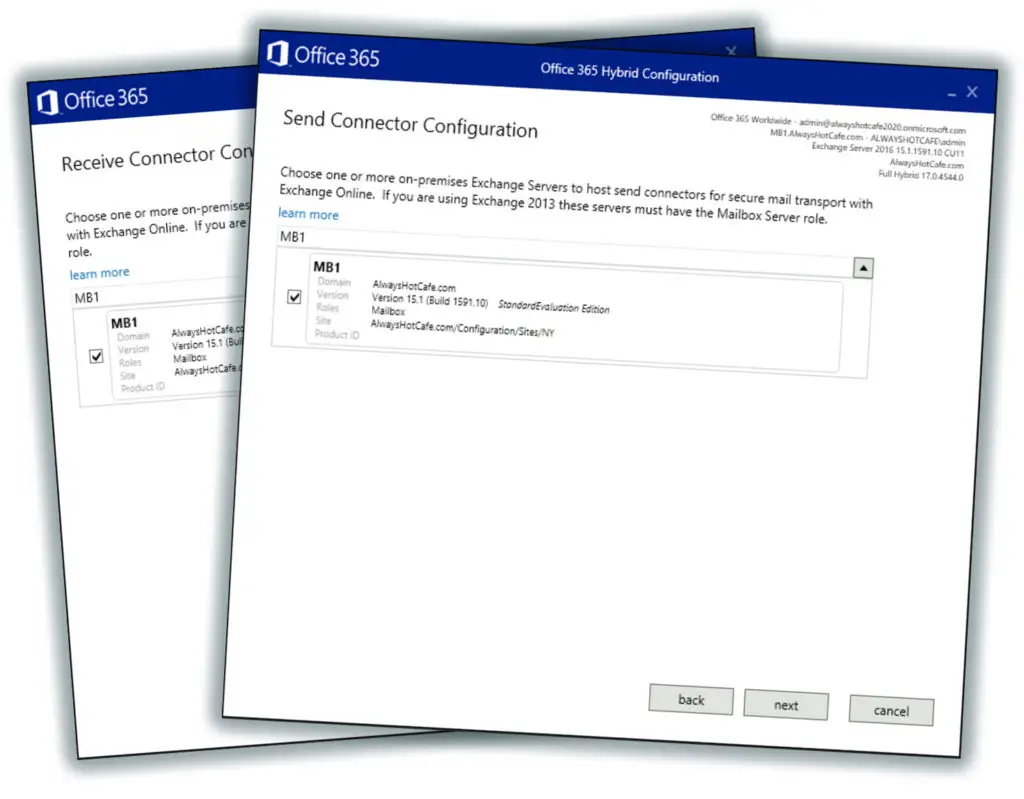
Our Exchange 2016 server is selected as both send receive connectors
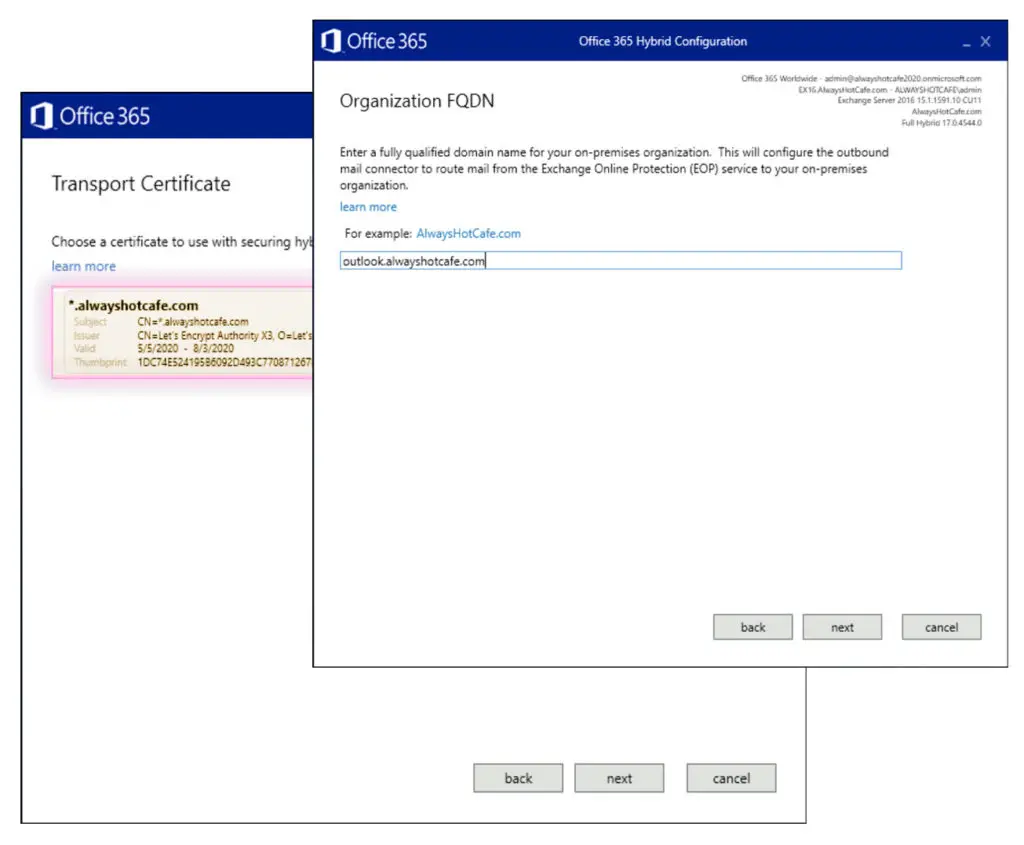
The certificate is our wildcard SSL, but if you have a multi-SAN certificate set up for the ADFS service, use that here. Also, the FQDN of the endpoint is our external EWS FQDN: outlook.alwayshotcafe.com.
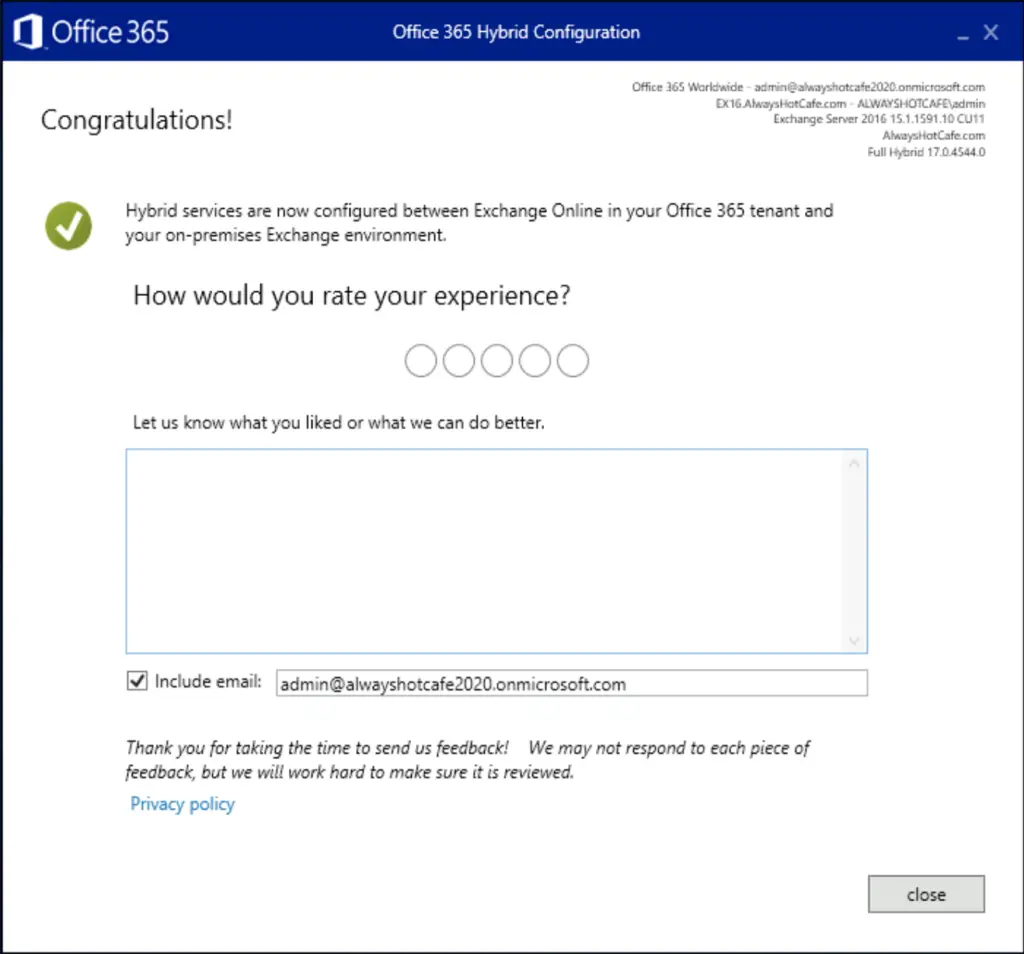
Confirm the settings in the next steps and the wizard finishes the rest for us.
8. Enable the MRS Endpoint on-prem
Before we begin with the actual mailbox migration, we make sure that the "MRS Endpoint" in the EWS virtual directory is enabled on the server that will be connected to the cloud servers.
Enable MRS Proxy Endpoint in EWS virtual directory
PS C:\> Get-WebServicesVirtualDirectory | Set-WebServicesVirtualDirectory -MRSProxyEnabled:$true
9. Verify Migration Endpoint in EOL
This step is automatically done by the AD Sync Connection Wizard. The endpoint for the on-prem server is created under the name: "Hybrid Migration Endpoint - EWS (Default Web Site)". We can verify that by checking the EWS virtual directory on the designated on-prem Exchange server MB1.
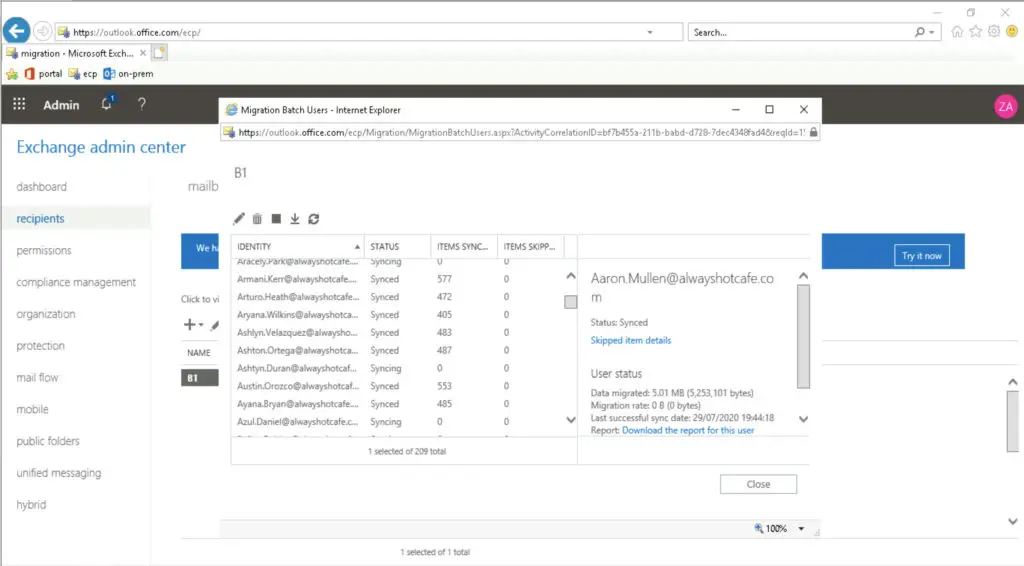
10. Create Migration Batches
We have 209 mailboxes in the AlwaysHotCafe.com mail servers, this time we create one migration batch that contains all mailboxes.
The b1.csv file contains the mailboxes in a format as shown here:
TIP: The following command exports the list of email addresses in the organization. Run it on one of the on-prem mailbox servers. Just don't forget to rename the "UserPrincipalName" to "Emailaddress" in the first line of the csv file:
PS C:\temp> Get-Mailbox | Select UserPrincipalName | Export-Csv b1.csv -NoTypeInformation
In EOL also issue the following commands to create the batch(es):
PS C:\temp> New-MigrationBatch -Name "B1" -SourceEndpoint "Hybrid Migration Endpoint - EWS (Default Web Site)" -CSVData ([System.IO.File]::ReadAllBytes("C:\temp\b1.csv")) -BadItemLimit 100 -LargeItemLimit 100 -TargetDeliveryDomain alwayshotcafe2020.onmicrosoft.com

Identity Status  Type               TotalCount
-------- ------  ----               ----------
B1       Stopped ExchangeRemoteMove 209
Start the batches:
PS C:\> "B1" | Start-MigrationBatch
Lastly completing the migration batches when they finished syncing
PS C:\> "B1" | Complete-MigrationBatch -Confirm:$false
11. Set Autodiscover
The best practice in a hybrid deployment is to change our public MX records to point to the cloud:
MX alwayshotcafe-com.mail.protection.outlook.com
Also, set the Autodiscover CNAME record both publicly and on-prem to:
CNAME autodiscover.outlook.com
In the domain, this DNS record is ignored if the default Autodiscover SCP record is still set, which is pointing to our on-prem CAS servers. We remove it with the following command:
# Check the SCP record, it should return the Autodiscover XML file locations on each client access servers we have in the domain
PS C:\> Get-ClientAccessService | Select AutoDiscoverServiceInternalUri

AutoDiscoverServiceInternalUri
------------------------------
https://mb1.alwayshotcafe.com/Autodiscover/Autodiscover.xml

# Remove the SCP records for all domain CAS servers
PS C:\> Get-ClientAccessService | Set-ClientAccessService -AutoDiscoverServiceInternalUri $null
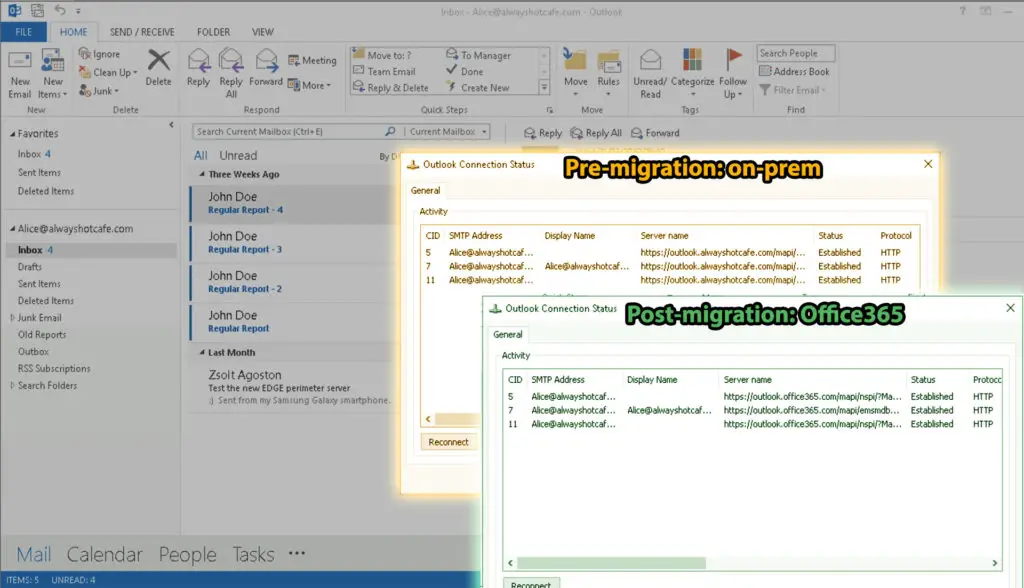
12. Verify user access
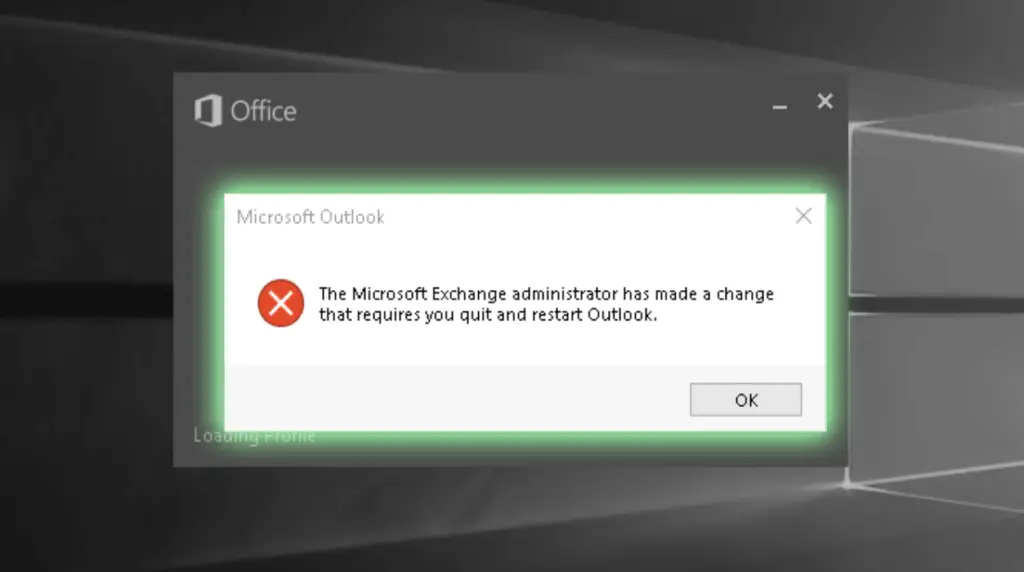
After the successful migration our test user, Alice receives a message in Outlook that the admin has made changes to her mailbox and asks her to re-open Outlook. The same message appears either if she was logged in during the migration process, or next time she logs in if she was offline when the switching to cloud happened.
Comments