Always Hot Café wants extra security on the perimeter of it's network. They asks us to deploy an Exchange Transport server in their organization.
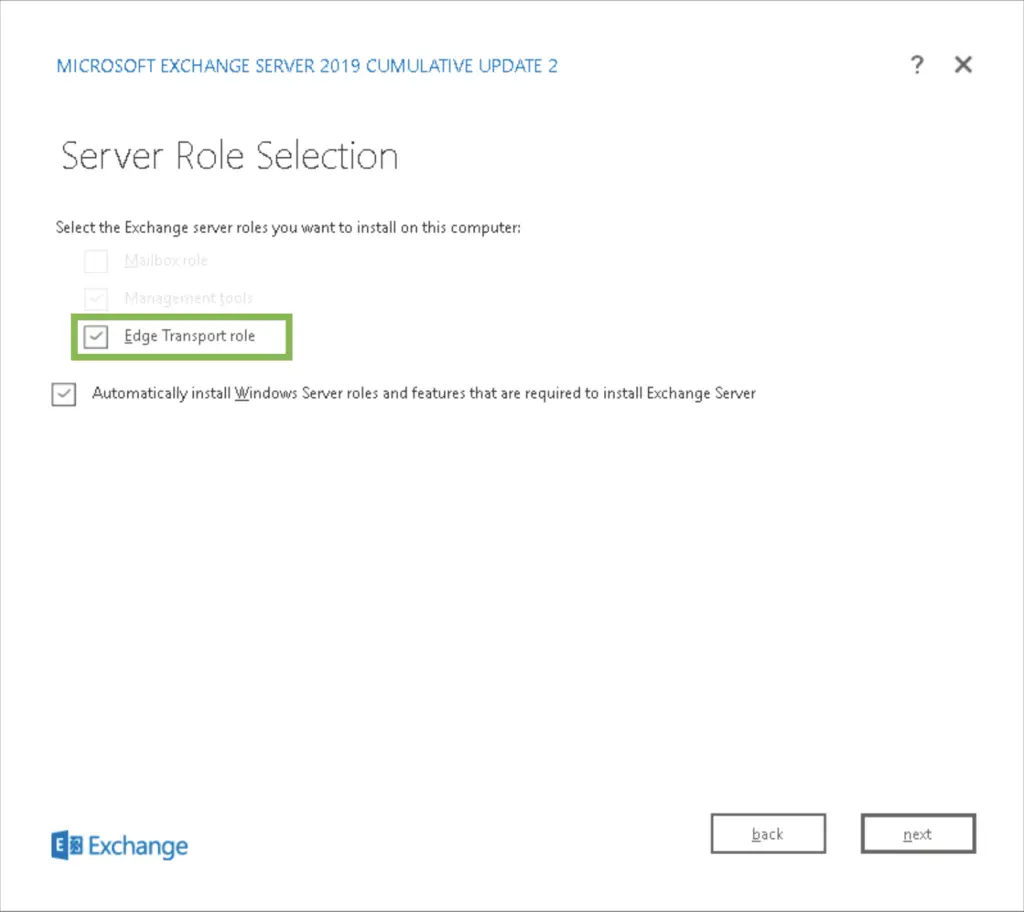
When installing and Exchange server we need to specify the type of the server which can be two and only two: either a Mailbox server, or an Edge Transport server.
Mailbox servers are the "classic" email servers: they are integrated with the domain of the organization. They send, receive and store email messages, and they provide access for clients with many types of devices to reach their mailboxes.
Edge transport servers have one function: they are on the network perimeter, receiving SMTP email messages from external servers on the internet. They filter and forward them to the mailbox servers afterwards.
1. Before We Begin
We start off with a fresh deployment of a Windows 2019 server. It has the following specifications:
CPU: 4 cores
RAM: 8GB
HDD: 60GB
NIC: 192.168.0.250
For the initial steps, please check the Exchange Installation guide here. Assuming that guide is followed, I just highlight the differences between that guide (installing a Mailbox server), and an Edge Transport server deployment.
Install Prerequisites
We need three things to be installed before we start:
- "Media Foundation" feature in Windows
- Microsoft Unified Communications API 4.0
- Visual C++ 2013 Redistributable
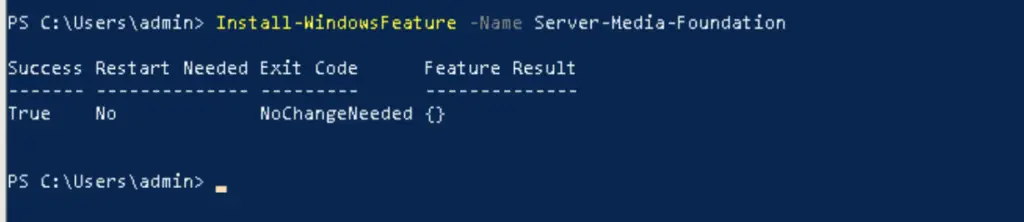
We install media foundation with a quick powershell command
Install-WindowsFeature -Name Server-Media-Foundation
Download and install the other two from the official locations:
Unified Comms 4.0: https://go.microsoft.com/fwlink/?LinkId=260990
Visual C++ 2013 re: https://www.microsoft.com/download/details.aspx?id=40784
2.1 Configure DNS
For Edge to work both the Edge server needs to be able to resolve domain computer names, also the domain computers need to resolve the IP address of the Edge server.
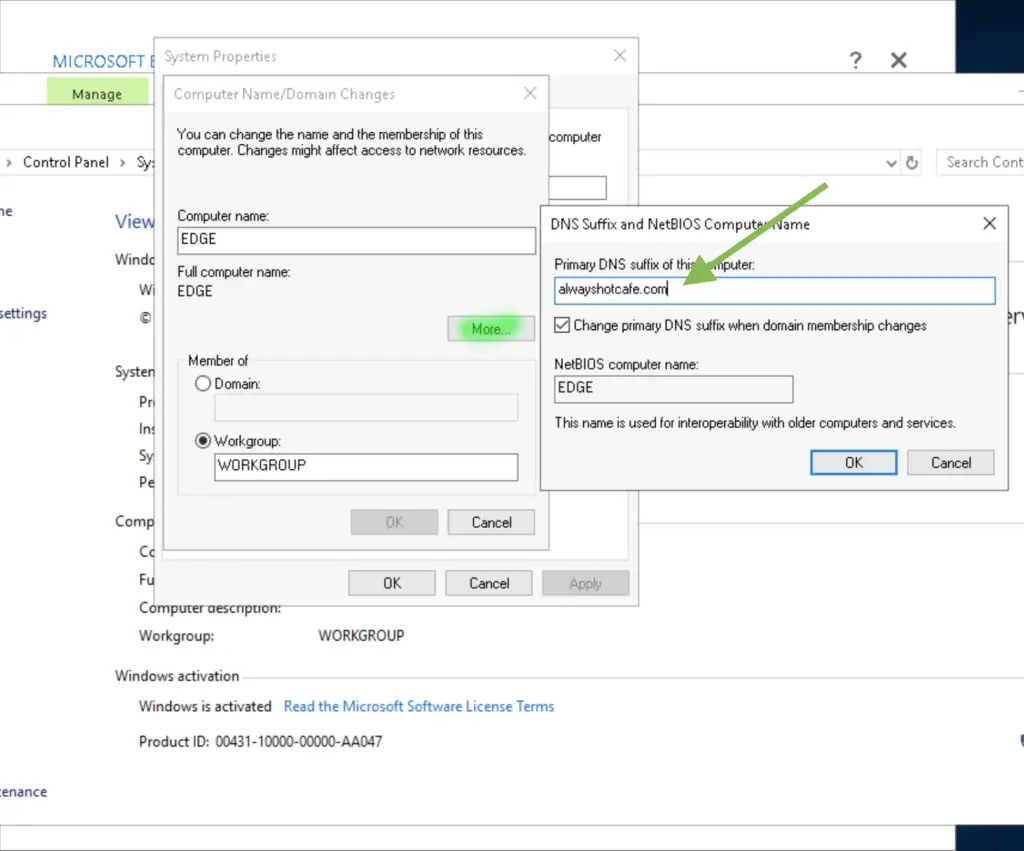
2.1.1 Edge DNS setup
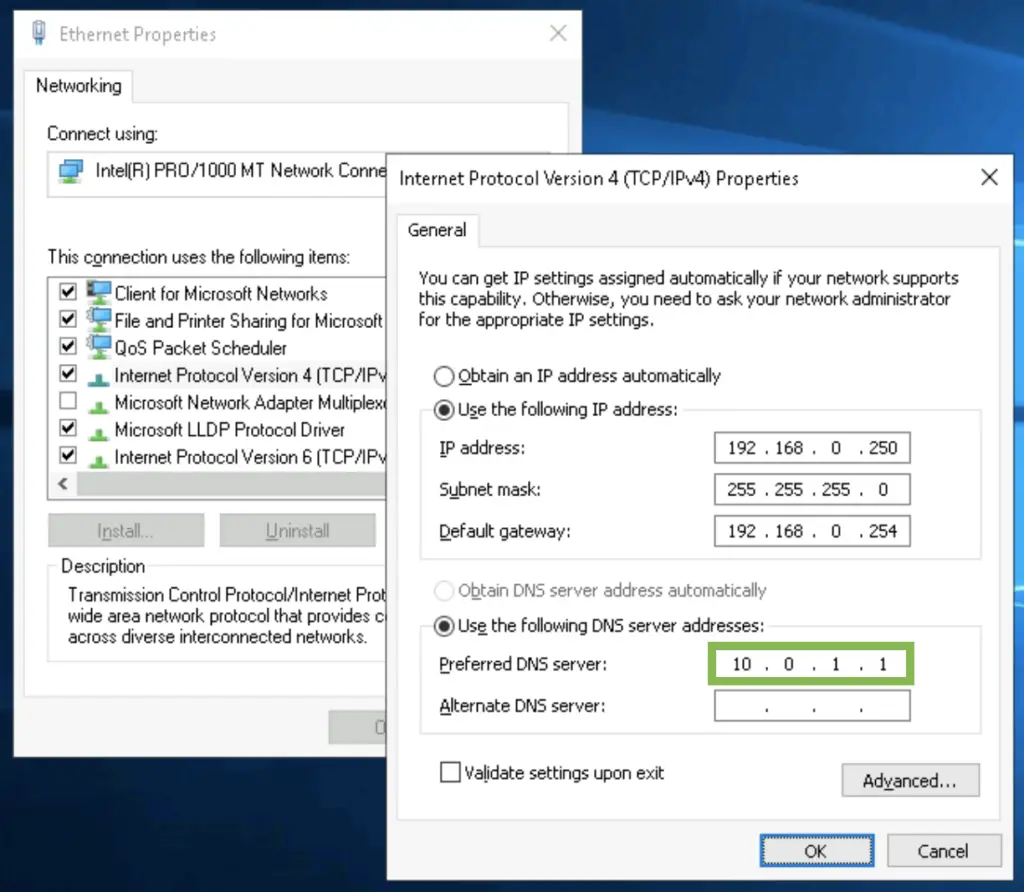
On the Edge server we configure the DNS suffix as our domain name, and set the DNS server to the domain controllers
Set the DNS on the NIC:
2.1.2 Domain DNS setup
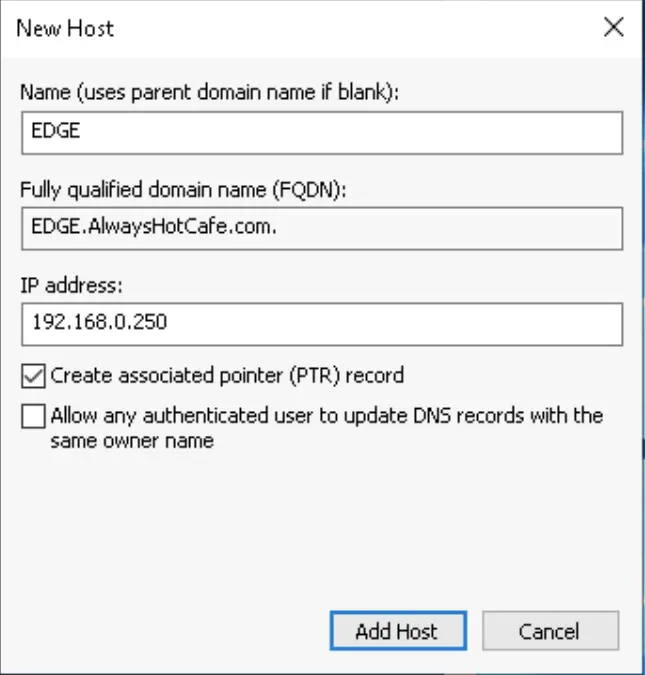
Next, we create a static A record for the Edge server so the domain members will be able to resolve it by it's FQDN.
3. Install Exchange with Edge Transport Roles
Install Exchange following the guide here. Assuming that guide is followed, except for selecting the Edge role this time.
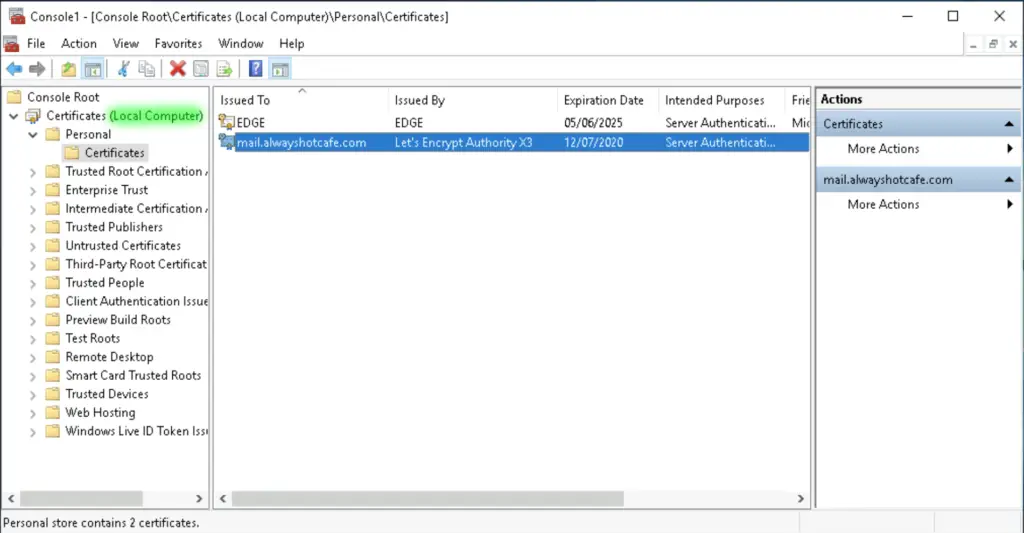
4. Install SSL certificate for encryption
For TLS encryption we need to deploy the SSL certificate that has the FQDN as a SAN that matches our public MX record. Also, the certificate must be signed by a publicly trusted Certificate Authority.
In our example our MX record is mail.alwayshotcafe.com, we use the certificate that we installed on the Mailbox server earlier.
Set the SSL certificate
To get the thumbprint of the new SSL we open the Shell and view the certificates already present on the system.
PS C:\> Get-ExchangeCertificate | Select Subject, Services, Thumbprint

Subject                   Services Thumbprint
-------                   -------- ----------
CN=EDGE                       SMTP 99260DEB5E56126A6B3CA38CF58B257B3DB8FF75
CN=mail.alwayshotcafe.com     None 955A6C1C35A46C07B1E1F031E60B6B2D38E1941A


PS C:\>
We see that the self-signed EDGE certificate is set for the SMTP services. Issue the following command to associate the public certificate with the STMP service:
PS C:\> Enable-ExchangeCertificate -Thumbprint "955A6C1C35A46C07B1E1F031E60B6B2D38E1941A" -Services SMTP

Confirm
Overwrite the existing default SMTP certificate?

Current certificate: '99260DEB5E56126A6B3CA38CF58B257B3DB8FF75' (expires 05/06/2025 10:59:16)
Replace it with certificate: '955A6C1C35A46C07B1E1F031E60B6B2D38E1941A' (expires 12/07/2020 11:30:09)
[Y] Yes  [A] Yes to All  [N] No  [L] No to All  [S] Suspend  [?] Help (default is "Y"): y
WARNING: The internal transport certificate attribute for the local Edge Transport server has been updated. If this
Edge Transport server is subscribed to an Active Directory site, you must  subscribe it again by using the
New-EdgeSubscription cmdlet in the Shell, and then restart AD LDS.
PS C:\>
5. Create the Edge subscription
To set up the relationship between the mailbox servers and the edge box we need to create a subscription on the Edge server and import it on a mailbox server at a selected AD site.
First, import the Exchange cmdlets on the Edge server
# Import Exchange cmdlets
PS C:\> Add-PSSnapin microsoft.exchange.management.powershell.snapin
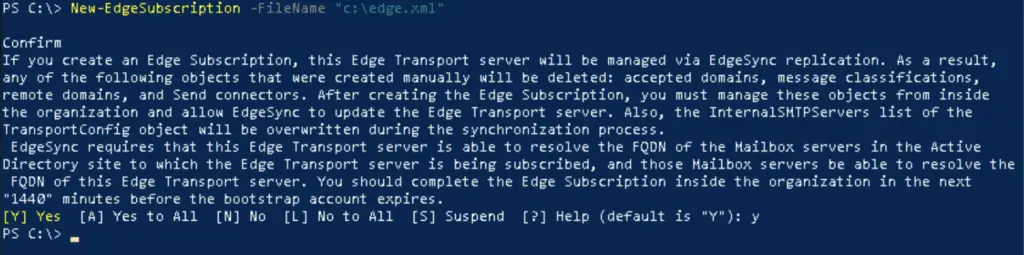
Then create the subscription XML file.
PS C:\> New-EdgeSubscription -FileName "c:\edge.xml"
We copy the XML file over to the Mailbox server, and run the following command to create the edge connection at AD site "NY":
PS C:\> New-EdgeSubscription -FileData ([byte[]]$(Get-Content "C:\edge.xml" -Encoding byte -ReadCount 0)) -Site "NY"

We are ready! 🙂
6. Verify Edge Synchronization
To check if Edge sync is healthy, use the Test-EdgeSynchronization cmdlet.
PS C:\> Test-EdgeSynchronization


RunspaceId                  : 722ac503-e392-4e03-b2da-92d5643c8355
SyncStatus                  : Normal
UtcNow                      : 06/06/2020 13:46:14
Name                        : EDGE
LeaseHolder                 : CN=MB1,CN=Servers,CN=Exchange Administrative Group (FYDIBOHF23SPDLT),CN=Administrative
                              Groups,CN=AlwaysHotCafe,CN=Microsoft
                              Exchange,CN=Services,CN=Configuration,DC=AlwaysHotCafe,DC=com
LeaseType                   : Option
FailureDetail               :
LeaseExpiryUtc              : 06/06/2020 14:15:54
LastSynchronizedUtc         : 06/06/2020 13:45:54
TransportServerStatus       : Skipped
TransportConfigStatus       : Skipped
AcceptedDomainStatus        : Skipped
RemoteDomainStatus          : Skipped
SendConnectorStatus         : Skipped
MessageClassificationStatus : Skipped
RecipientStatus             : Skipped
CredentialRecords           : Number of credentials 3
CookieRecords               : Number of cookies 2
To re-initiate the Edge sync process, use this cmdlet:
PS C:\> Start-EdgeSynchronization


RunspaceId     : 722ac503-e392-4e03-b2da-92d5643c8355
Result         : Success
Type           : Recipients
Name           : EDGE
FailureDetails :
StartUTC       : 06/06/2020 13:46:36
EndUTC         : 06/06/2020 13:46:36
Added          : 0
Deleted        : 0
Updated        : 0
Scanned        : 0
TargetScanned  : 0

RunspaceId     : 722ac503-e392-4e03-b2da-92d5643c8355
Result         : Success
Type           : Configuration
Name           : EDGE
FailureDetails :
StartUTC       : 06/06/2020 13:46:36
EndUTC         : 06/06/2020 13:46:37
Added          : 0
Deleted        : 0
Updated        : 0
Scanned        : 0
TargetScanned  : 0
7. Set FQDN on the Receive connector (optional)
This step is necessary when the FQDN of the Edge server does not match the FQDN the MX record points to. Here, the Edge server is called EDGE.alwayshotcafe.com, but the MX record for alwayshotcafe.com is mail.alwayshotcafe.com.
If we leave the receive connector on the Edge server intact, TLS will work but will throw a warning to the partner server as the server name and MX record does not match.
To sort this we simply need to change the "Fqdn" property of the Receive connector on the Edge server, as follows:
PS C:\> Get-ReceiveConnector

Identity                                     Bindings     Enabled
--------                                     --------     -------
EDGE\Default internal receive connector EDGE {0.0.0.0:25} True


PS C:\> Set-ReceiveConnector "EDGE\Default internal receive connector EDGE" -Fqdn mail.alwayshotcafe.com
PS C:\>
https://checktls.com is a great website to check TLS encryption readiness of a domain
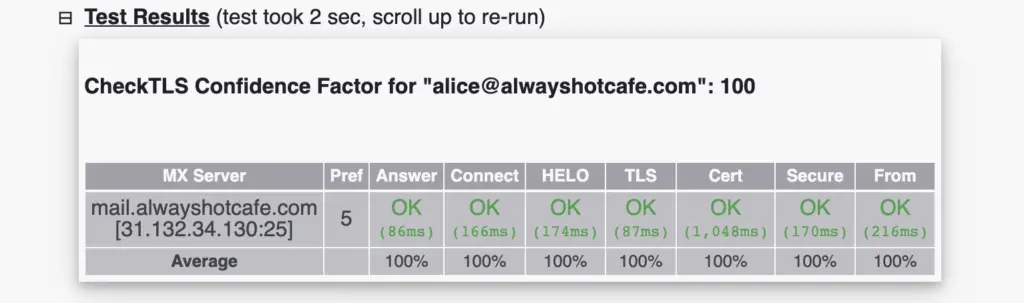
8. Test email flow to alwayshotcafe.com
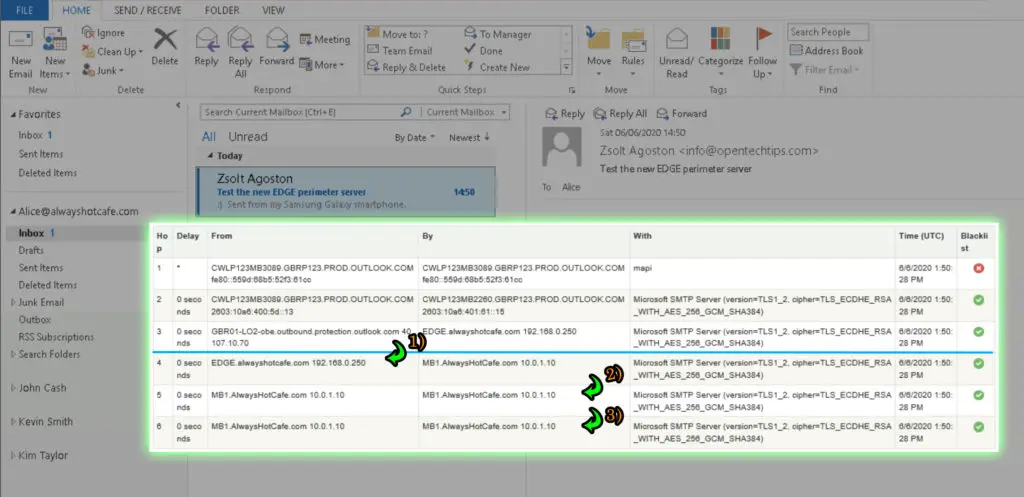
Our test email to alice@alwayshotcafe.com arrives successfully. As seen, the Edge server receives the SMTP message from the internet. Then the transport service on Edge passes the message to the frontend transport service on MB1. Then the frontend transport service passes forwards to the transport service on the same mailbox server. Finally, the transport service on the MB1 mailbox machine hands the message over to the mailbox transport delivery service which writes it in the right mailbox database that stores Alice's mailbox.
🙂
Thank you, it worked!! A bit confusing some times if the screenshot was from the Mailbox server or the Edge, but after figuring out, all good!
Thanks
Glad it helped you, I’ll update the screenshots shortly to reflect which servers they are showing.
Regards
Z.
Thanks for posting this information. Very informative and extremely helpful.
One note about certificates. It is true, each edge server must have its own unique certificate assigned to SMTP but it does not need to be a public certificate. Edge provides opportunistic TLS encryption so any properly created self-signed certificate will work. As long as it’s not expired of course. The default certificate created during the install of the edge role is perfectly fine here for all scenarios.
For Hybrid setups with M365, one additional step is needed. The public certificate used for the hybrid must be manually installed on the edge server and enabled on SMTP but cannot be the active certificate. The self-signed certificate is still fine in this scenario but be careful not to overwrite the self-signed certificate when enabling the public certificate on the SMTP protocol.