• Skip to primary navigation
  • Skip to main content
  • Skip to primary sidebar
  • Skip to secondary sidebar
OpenTechTips

OpenTechTips

Comprehensive IT Guides for Pros and Enthusiasts

MENUMENU
  • HOME
  • ALL TOPICS
    • Exchange
    • InfoSec
    • Linux
    • Networking
    • Scripting
      • PowerShell
    • SSL
    • Tools
    • Virtualization
    • Web
    • Windows
  • ABOUT
  • SUBSCRIBE
Home » How to Set Up Multiple Apache Virtual Hosts on CentOS 8

How to Set Up Multiple Apache Virtual Hosts on CentOS 8

April 10, 2020 - by Zsolt Agoston - last edited on April 15, 2020


So what are Virtual Hosts and what are they for?

John has a web server, connected to the internet with a single IP address. He has a website, called JohnBlog.com which is pointing to this web server. He creates a blog site, everything works fine, he is happy. Suddenly he realizes he needs another website for his new website, ExoticFoods.com.

He does not want to buy another webserver, a new public IP, etc. So what can he do?

Luckily this is where virtual hosts can help. When a client computer loads a website, it looks up the iP address of the domain first, and then sends a query to the webserver with the requested domain name. That means John’s existing webserver even though has only one single IP address, John can have as many websites hosted on his server as long as he sets up virtual hosts for each domain. Technically saying, he tells the webserver if someone queries JohnBlog.com, then load the files form /var/www/JohnBlog.com, if ExoticFoos.com is requested load the /var/www/ExoticFoods.com files, and so on.

Let’s see how it is configured.

Before You Begin

We need a working CentOS box as a start. You can find a detailed guide of setting one up HERE, although we don’t need to have a full LAMP stack. The bare minimum we need is Apache installed and running on the server, and open the firewall of course to allow the web traffic in.

# Install apache
sudo yum install httpd

# Start apache at boot automatically
sudo systemctl start httpd

# Start apache now
sudo systemctl enable httpd

# Allow the http and https incoming ports on the firewall
firewall-cmd --zone=public --permanent --add-port=80/tcp
firewall-cmd --zone=public --permanent --add-port=443/tcp
firewall-cmd --reload

1. Set up Folders for the website files

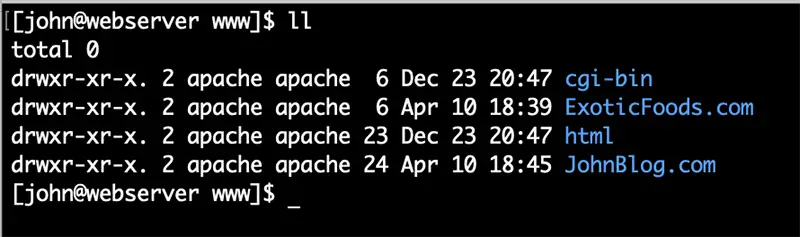
We need to create folders where the website files can be stored. By default they are stored in the /var/www/html directory, we create two new folders, and change the owner to the apache user so the apache service will have full access to the files.

# Create the folders for the two sites
sudo mkdir -p /var/www/JohnBlog.com
sudo mkdir -p /var/www/ExoticFoods.com

# Create a simple webpage to display in both:
sudo sh -c "echo John\'s website! > /var/www/JohnBlog.com/index.html"
sudo sh -c "echo Welcome to ExoticFoods! > /var/www/ExoticFoods.com/index.html"

# Change owner of the website directories to the apache service user
sudo chown apache:apache -R /var/www

How to Set Up Multiple Apache Virtual Hosts on CentOS 8

2. Virtual Hosts config directories

We will need to create separate config files for both websites which are stored in the /etc/httpd/conf.d directory. All configuration files in that directory will be imported by apache at startup time, as configured in /etc/httpd/conf/httpd.conf by default

3. Create the Virtual Hosts config files for the webserver

In the /etc/httpd/conf.d directory we create a separate config file for both JohnBlog.com and ExoticFoods.com as follows:

sudo vi /etc/httpd/conf.d/JohnBlog.com.conf

<VirtualHost *:80>
  ServerName JohnBlog.com
  ServerAlias www.JohnBlog.com
  DocumentRoot /var/www/JohnBlog.com
</VirtualHost>

sudo vi /etc/httpd/conf.d/ExoticFoods.com.conf

<VirtualHost *:80>
  ServerName ExoticFoods.com
  ServerAlias www.ExoticFoods.com
  DocumentRoot /var/www/ExoticFoods.com
</VirtualHost>

4. Restart the Apache Service and Ready to Go!

sudo systemctl restart httpd

Let’s browse to the sites  🙂

How to Set Up Multiple Apache Virtual Hosts on CentOS 8

Reader Interactions

Comments Cancel reply

Your email address will not be published. Required fields are marked *

Primary Sidebar

Tools

Secondary Sidebar

CONTENTS

  •  
  •  
  • So what are Virtual Hosts and what are they for?
  • Before You Begin
  • 1. Set up Folders for the website files
  • 2. Virtual Hosts config directories
  • 3. Create the Virtual Hosts config files for the webserver
  • 4. Restart the Apache Service and Ready to Go!

  • Terms of Use
  • Disclaimer
  • Privacy Policy
Manage your privacy

To provide the best experiences, we and our partners use technologies like cookies to store and/or access device information. Consenting to these technologies will allow us and our partners to process personal data such as browsing behavior or unique IDs on this site and show (non-) personalized ads. Not consenting or withdrawing consent, may adversely affect certain features and functions.

Click below to consent to the above or make granular choices. Your choices will be applied to this site only. You can change your settings at any time, including withdrawing your consent, by using the toggles on the Cookie Policy, or by clicking on the manage consent button at the bottom of the screen.

Functional Always active
The technical storage or access is strictly necessary for the legitimate purpose of enabling the use of a specific service explicitly requested by the subscriber or user, or for the sole purpose of carrying out the transmission of a communication over an electronic communications network.
Preferences
The technical storage or access is necessary for the legitimate purpose of storing preferences that are not requested by the subscriber or user.
Statistics
The technical storage or access that is used exclusively for statistical purposes. The technical storage or access that is used exclusively for anonymous statistical purposes. Without a subpoena, voluntary compliance on the part of your Internet Service Provider, or additional records from a third party, information stored or retrieved for this purpose alone cannot usually be used to identify you.
Marketing
The technical storage or access is required to create user profiles to send advertising, or to track the user on a website or across several websites for similar marketing purposes.
Statistics

Marketing

Features
Always active

Always active
Manage options Manage services Manage {vendor_count} vendors Read more about these purposes
Manage options
{title} {title} {title}
Manage your privacy
To provide the best experiences, we use technologies like cookies to store and/or access device information. Consenting to these technologies will allow us to process data such as browsing behavior or unique IDs on this site. Not consenting or withdrawing consent, may adversely affect certain features and functions.
Functional Always active
The technical storage or access is strictly necessary for the legitimate purpose of enabling the use of a specific service explicitly requested by the subscriber or user, or for the sole purpose of carrying out the transmission of a communication over an electronic communications network.
Preferences
The technical storage or access is necessary for the legitimate purpose of storing preferences that are not requested by the subscriber or user.
Statistics
The technical storage or access that is used exclusively for statistical purposes. The technical storage or access that is used exclusively for anonymous statistical purposes. Without a subpoena, voluntary compliance on the part of your Internet Service Provider, or additional records from a third party, information stored or retrieved for this purpose alone cannot usually be used to identify you.
Marketing
The technical storage or access is required to create user profiles to send advertising, or to track the user on a website or across several websites for similar marketing purposes.
Statistics

Marketing

Features
Always active

Always active
Manage options Manage services Manage {vendor_count} vendors Read more about these purposes
Manage options
{title} {title} {title}