This article shows you how to partially or fully export the Global Address List using Outlook.
Contact lists can be either exported or printed, the GAL can only be queried. So, the idea is to copy the contents of the GAL to a custom contact list in Outlook, with which we can do whatever we want later on.
Step 1 – Create Custom Contact list
Outlook will save the GAL contacts in the default Contacts folder. To avoid mixing our existing contacts we create a new folder, move the existing contacts there and we proceed from there.
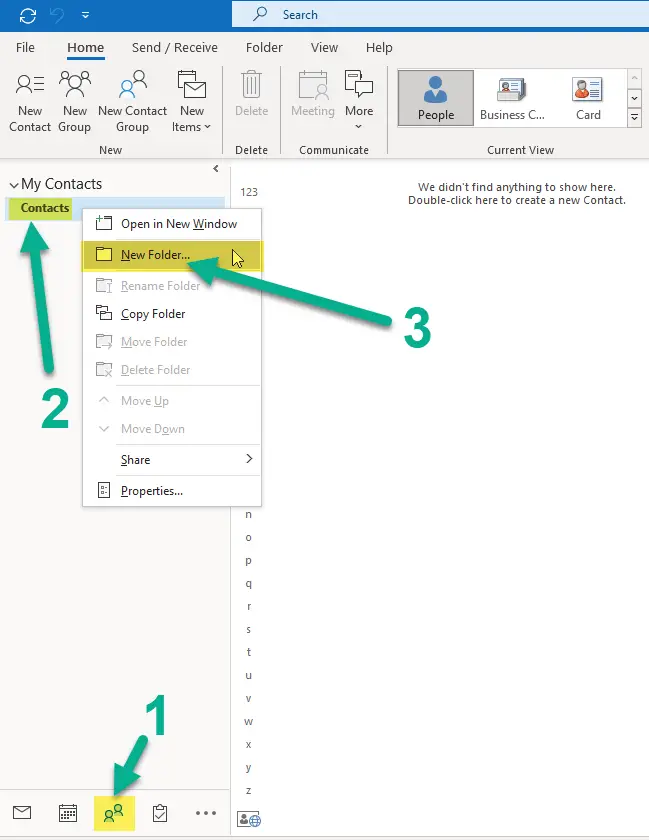
a. Open Outlook, click on the contact icon on the bottom of the left-side menu (or simply hit [CTRL + 3]). Right click on the Contacts folder and select New Folder…
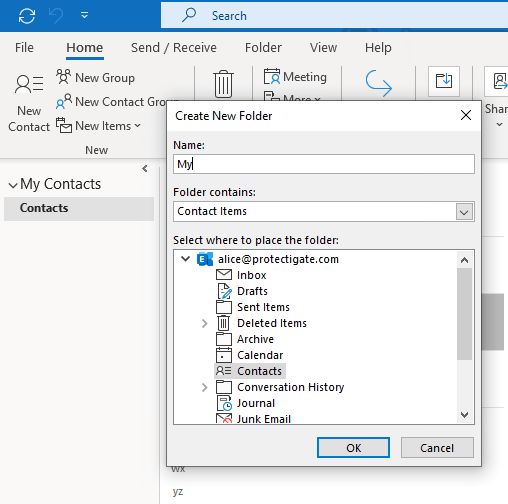
b. Add My as the name, leave all other fields as they are. Hit OK
You’ll see the My container appears under the My Contacts list.
c. (optional) Move the existing contacts to avoid mixing them with the GAL contact copies: highlight the Contacts folder, highlight all of its contents by pressing [CTRL + A], finally drag and drop those in the newly created My container.
Step 2 – Copy the contents of the GAL
a. Navigate to the Home tab in the top menu, click on the Address Book button. You’ll find it somewhere closer to the right side.

b. Make sure the Global Address List is selected in the Address Book dropdown list! If you use Outlook in cached mode, the Offline Address Book is selected by default and it only updates once a day, so to get the most up-to-date list always select the online GAL

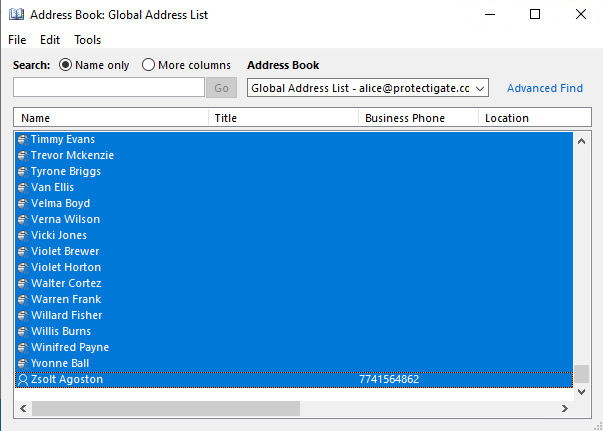
c. Highlight all the contacts. Note that [CTRL + A] doesn’t work here so you need to do the following:
- Highlight the very first entry on the top.
- Then push and hold the SHIFT button on your keyboard.
- Scroll all the way down to the very bottom of the list, and while still holding the SHIFT key pushed, click on the last entry.
Now all the contacts are highlighted. Depending on the number of the entries it might cause the computer to freeze for a little while.
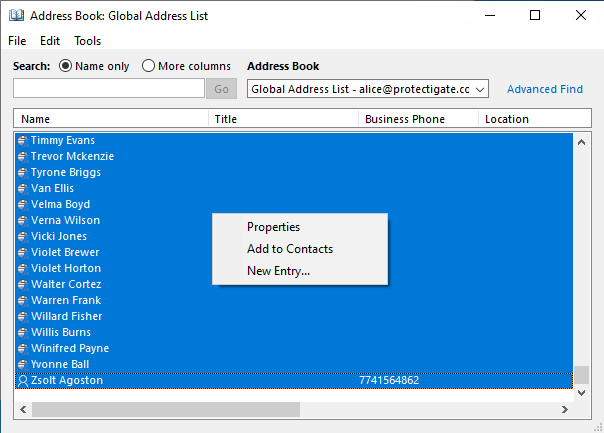
d. Right-click somewhere on the blue area, and choose the Add to Contacts option.
You can close the Address list window now.
Step 3 – Export or Print the contact list
a. Change the view type to list for a nicer, more concise layout. On the View tab click on Change View and select List.
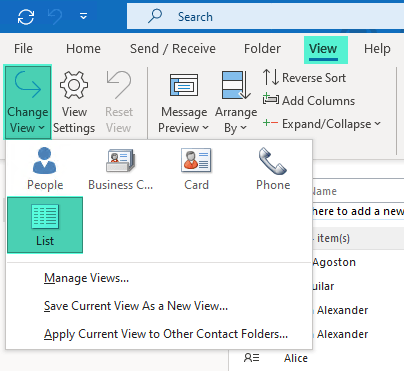
b. Click on File and Print (or press CTRL+P). Select the printer you want to use and hit Print
Export to CSV
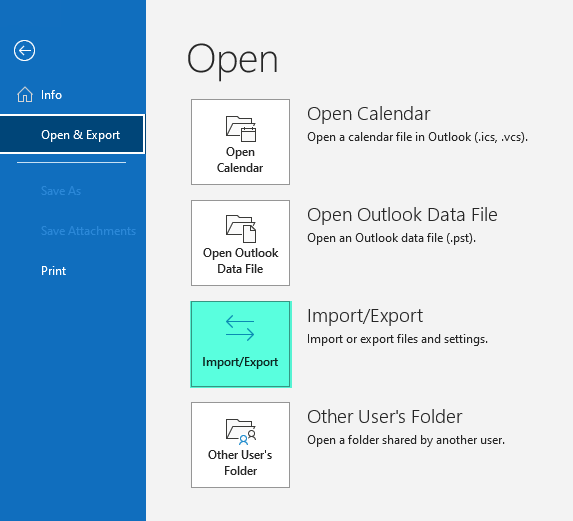
a. Click on File, then Open & Export, then on the Import/Export button.
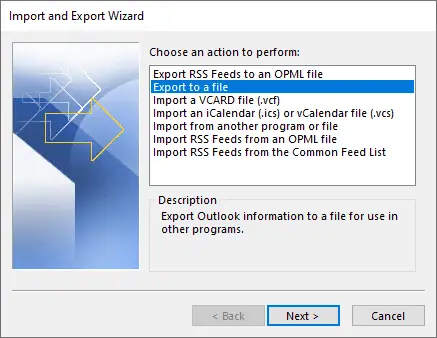
b. Select the Export to a file option.
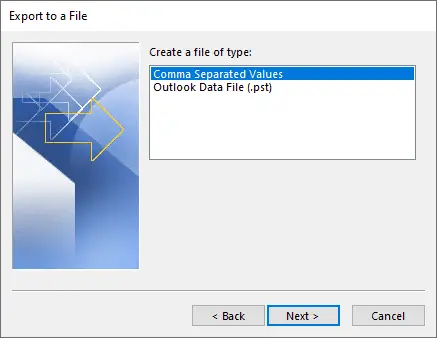
c. Pick the Comma Separated Values format
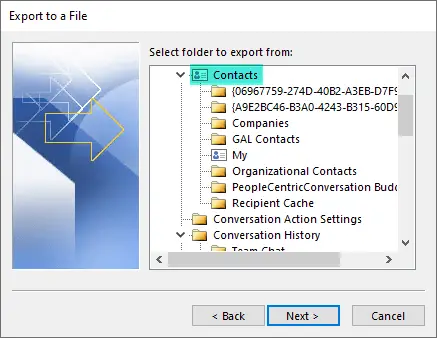
d. In the next window, make sure the Contacts folder is selected. Hit Next
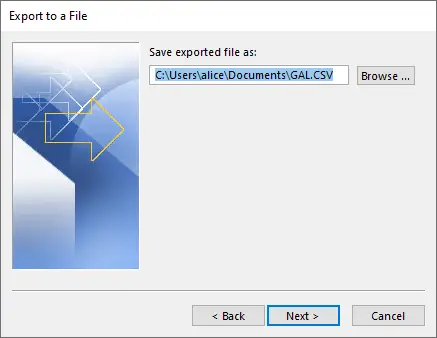
e. Select the export target folder and pick a file name you like.
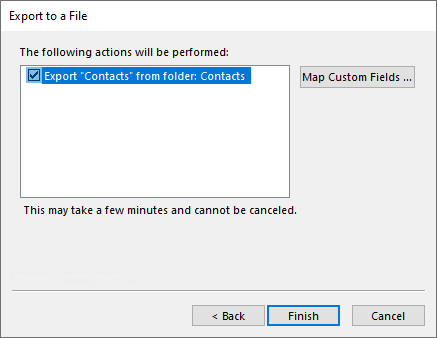
f. In the next window, leave everything as it is. Click on Next, then finish the export.
Any questions please let me know below in the comment section.

Comments