In this exercise we go through the process of setting up a Hyper-V environment on a regular computer, with multiple virtual switches and subnets configured on them.
How to create NAT-ed subnets in Hyper-V
- Install Hyper-V
- Add as many Internal vSwitches as you want
- Configure the management IP address on the virtual switches
- Set up NAT rules to allow the subnets to reach the Internet
1. The Goal
In this example we use a home PC with Windows 10 running on.
Our goal is to set up three new subnets in Hyper-V for our virtual environment as follows:
Subnet1: 10.0.0.0/24
Subnet2: 10.0.1.0/24
Subnet3: 10.0.2.0/24
Then install new servers connected to each subnet and test internet connectivity.
2. Preparation: Install Hyper-V
The first step is to install Hyper-V on the computer.
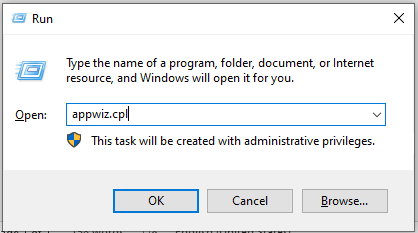
a. Right-click on the Windows button on the taskbar, and select “Run”. Type in “appwiz.cpl” and hit ENTER.
b. Click on the “Turn Windows features on or off” option in the left-hand side menu. Make sure the “Hyper-V” feature is checked, click OK.

c. After installation restart the computer
3. Add subnet(s) to Hyper-V
Now we are ready to install new virtual computers and utilize our Hyper-V host. However, at the moment we only have a single virtual switch called “Default Switch” automatically set up for Hyper-V. All virtual machines that we deploy will be using that switch by default, which has a random IP subnet assigned and NAT-ed for external network access. For instance, we install a new virtual machine and see that it has an IP of 172.28.100.10 assigned that we cannot modify.
We want more control. We want to use the subnet of our choice. In fact, we want to have multiple subnets to simulate a complex network, all running on our single physical machine. For example to build an Active Directory lab with multiple sites that require multiple subnets.
To achieve that we add new internal switches to the mix, configure their IP settings (using the subnets 10.0.0.0/24, 10.0.1.0/24, 10.0.2.0/24 in this example but they can be whatever you want).
We can repeat this process with as many subnets as needed.
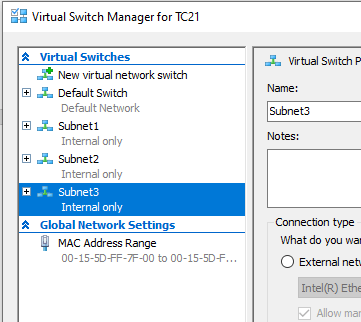
a. Open the Hyper-V Management console from the Start menu.
b. Right-click on the computer name (here it’s TC21, but you might have a different name on your computer)
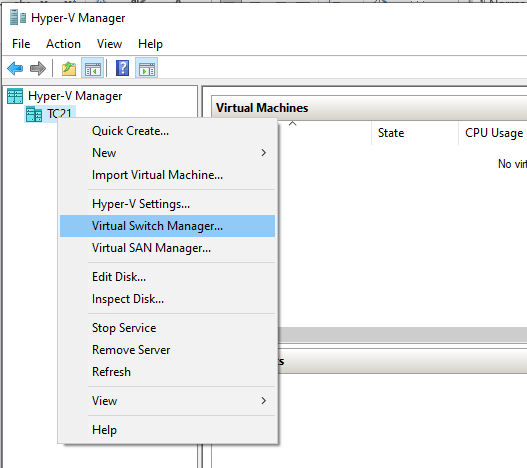
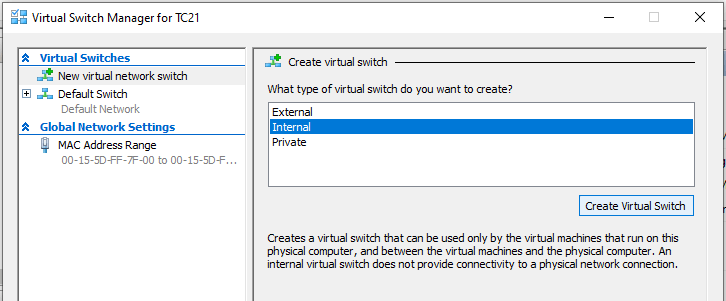
c. Select the “New virtual network switch”, highlight the “Internal” type and hit the “Create Virtual Switch” button.
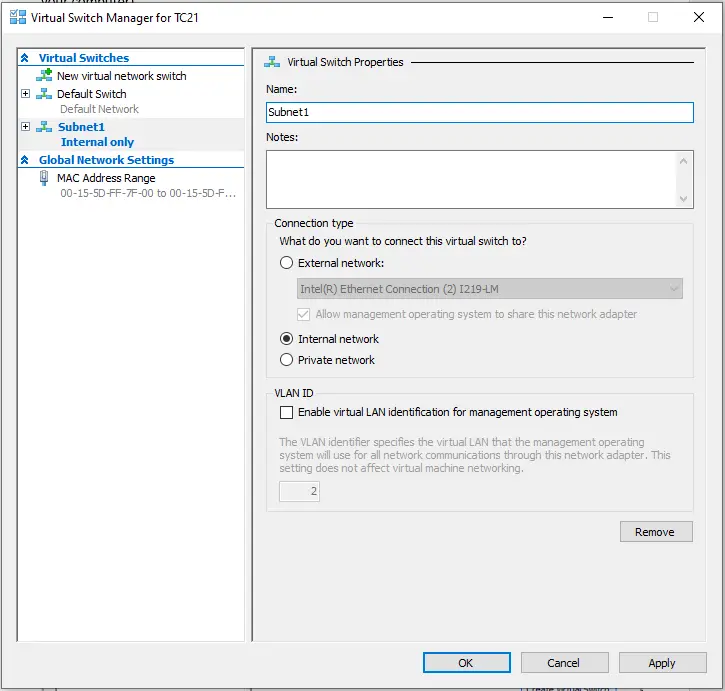
d. Put in the name: “Subnet1”, leave all setting as they are and hit “Apply”
e. Repeat the process as many times as you want. We need three subnets thus three new switches.
4. Configure IP addresses on the virtual switch interfaces
After creating the new switches all of them will have a management interface created automatically. We can check that opening the “Network and Sharing Center” window, and browsing for adapter settings.
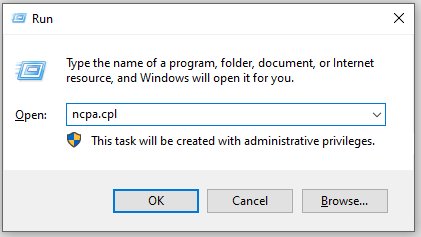
a. The easiest way is to right-click on the Windows button and select “Run” (or alternatively hit the [Windows] + [R] keys simultaneously on the keyboard), and type in: ncpa.cpl, then hit ENTER.
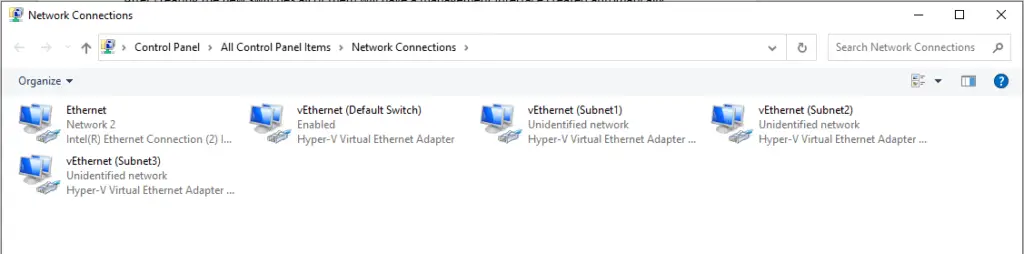
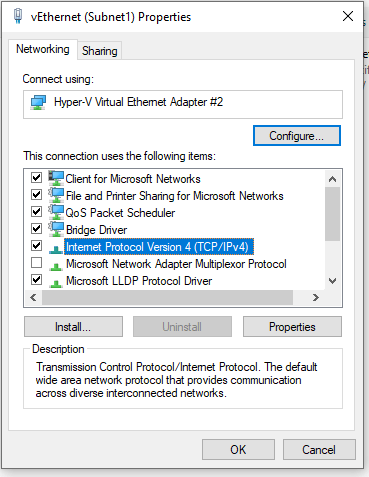
b. We can see all of our management interfaces there. They are all called "vEthernet ([virtual switch name])". To configure the IP settings for Subnet1, right-click on “vEthernet (Subnet1)” and choose “Properties”
c. There highlight “Internet Protocol Version 4”, and click on “Properties”
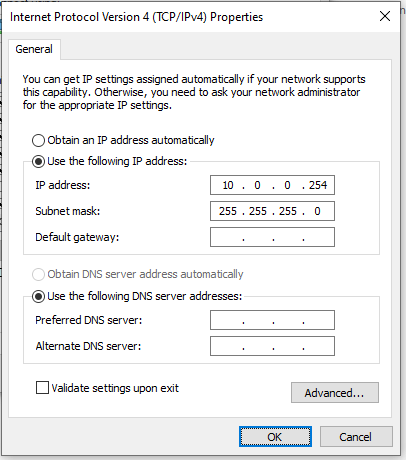
d. Select the “Use the following IP address” radio button, and put in the desired IP address for the first virtual switch. We want the subnet 10.0.0.0/24 set. This covers the 10.0.0.1 – 10.0.0.254 IP range, we use the last usable host for the switch, but again: it can be any address in the range we like.
For more details on how subnetting works click here. The /24 subnet has the 255.255.255.0 subnet mask, we don’t worry about the default gateway, not the DNS servers. Those can stay empty.
e. Do the same for the other virtual switches. Switch2 will have the IP: 10.0.1.254 and subnet mask 255.255.255.0, and Switch3 the IP: 10.0.2.254 and subnet mask 255.255.255.0
5. Set up NAT for the subnet(s)
At this point we have multiple virtual switches, with multiple subnets. However, if virtual machines are connected to those switches, they won’t have access neither to the internet, nor to each other.
To make it work we have to set up NAT (Network Address Translation) for each new subnet separately. Hosts in that particular subnet will use the IP address of the virtual switch as their default gateway (10.0.0.254, 10.0.1.254 or 10.0.2.254 respectively), and the switch will be acting on behalf of the hosts when accessing external network addresses. For more information on how Network Address Translation, or more precisely PAT (Port Address Translation) works, please check out this article.
Open up an elevated PowerShell window and use these commands to create the appropriate NAT rules:
New-NetNat -name "Subnet1 NAT" -InternalIPInterfaceAddressPrefix 10.0.0.0/24
New-NetNat -name "Subnet2 NAT" -InternalIPInterfaceAddressPrefix 10.0.1.0/24
New-NetNat -name "Subnet3 NAT" -InternalIPInterfaceAddressPrefix 10.0.2.0/24
6. Testing
Lastly, we add a virtual machine to the new subnet, and test it.
We install a new virtual machine in our Hyper-V environment, connecting it to the Subnet0 virtual switch.
The new virtual server will look like this:
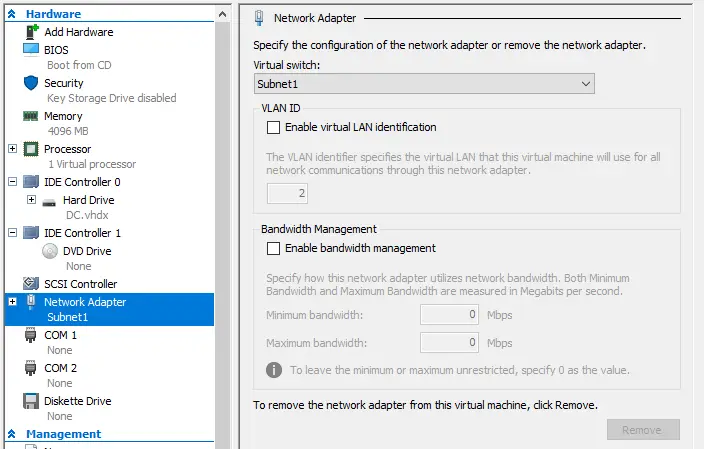
Note, that DHCP service is NOT running to assign automatic IP addresses for hosts. Later we can use this same server to configure the DHCP service for the subnet 🙂
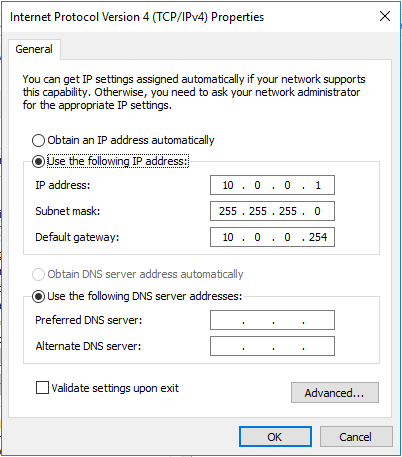
For now we assign an IP address manually for the new host: 10.0.0.1/24.
All that left is testing network connectivity. We get response back from both the virtual switch (10.0.0.254), and a public Google server (8.8.8.8) so now we confirmed that external network access is working!
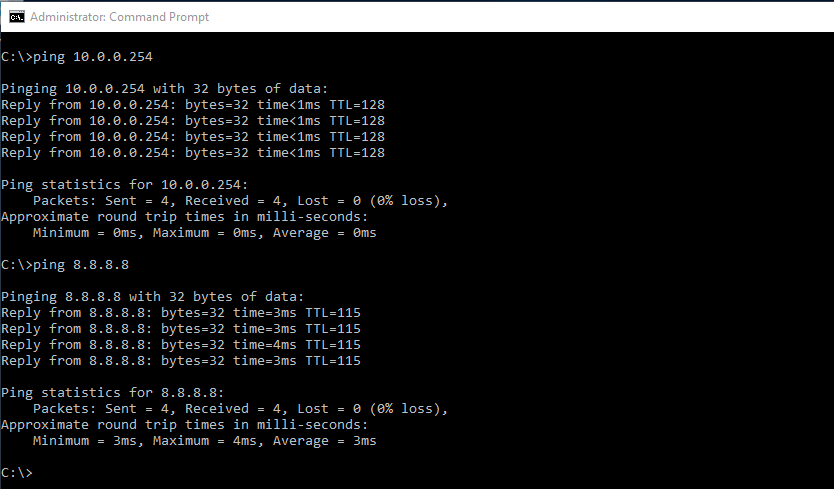
Note: by default, Windows computers are blocking incoming ping requests, so you might not get a response back from your virtual switch. That doesn’t mean it is broken, only that you have not enabled incoming ping (ICMP echo) packets. That doesn’t affect network connectivity 🙂
7. Routing between Subnets on the same Hyper-V host
Note that the basic Hyper-V system only has NAT functionality, it has no other routing capabilities. That means subnets on the same Hyper-V machine can communicate with the host machine and with the external network, but not with each other. If we want to allow the configured subnets to communicate with each other, we need a layer 3 (router) server to provide routing. Detailed guide is coming
Excited to learn more on it. Awesome!!!!
Great guide, but I found a small part that is a bit confusing.
The sentence “For now we assign an IP address manually for the new host… should read “For now we assign an IP address manually for the new guest…”
Using the word host is a bit confusing because it makes it seem like you are setting up a new Hyper-V host.
I had struggled for the last day or so and managed to get the internet connection working with a hack from this post https://superuser.com/a/949806, but I didn’t like how much of a jerryrigged solution it was, and the guide here is a much more proper and correct way to provide internet for a Hyper-V guest.
After figuring this out I managed to get the internet connection working for Ubuntu Server within Hyper-V on Windows Server 2019.