Open Up a Shell on Proxmox
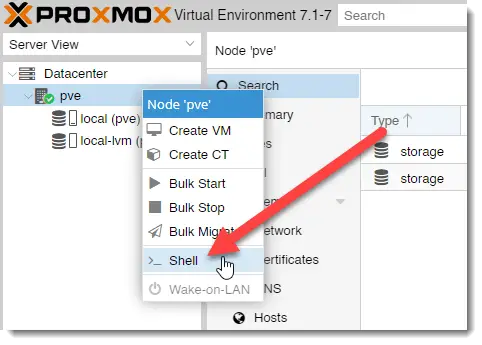
On the management portal of your Proxmox server ( usually it's http://[server IP]:8006/ ) right-click on the hostname and select Shell.
Identify New Drives In The System
Check what new disks are added to your system with the following command:
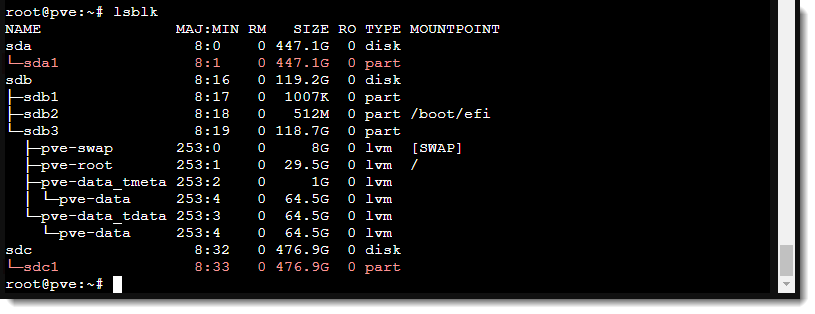
lsblk
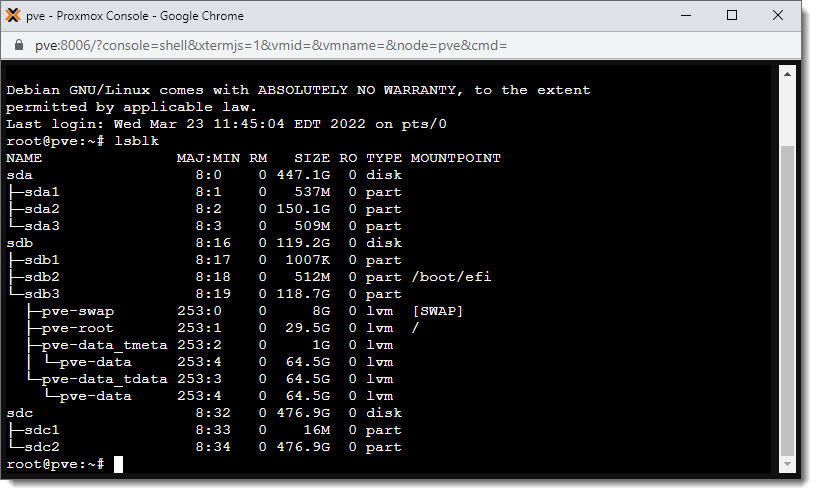
On the example above drive sdb is our system drive where the Proxmox system is installed. We can see that by checking the mountpoints, this is the only drive that has our boot partition and root mounted.
That means we want the sda and sdc drives re-partitioned and mounted in the filesystem.
Re-partition the New Disks
To re-partition the disk marked as sda, run fdisk that is pre-installed on Proxmox:
fdisk /dev/sda
To see the existing partitions on the drive use command p and hit Enter.
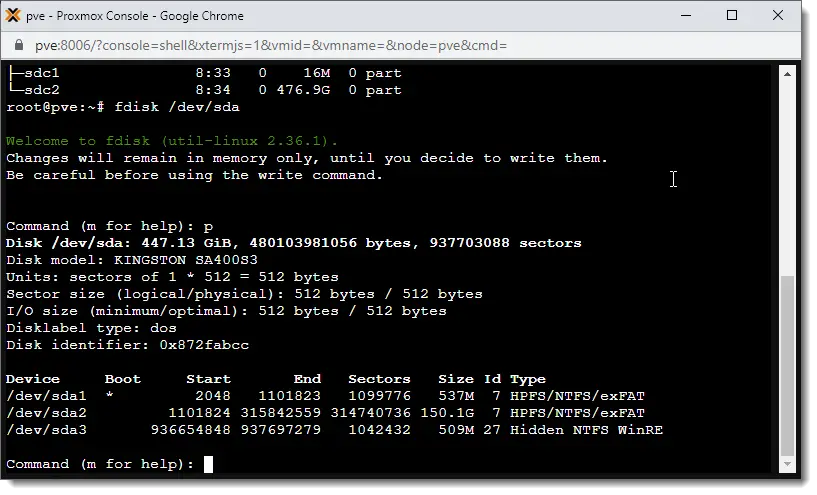
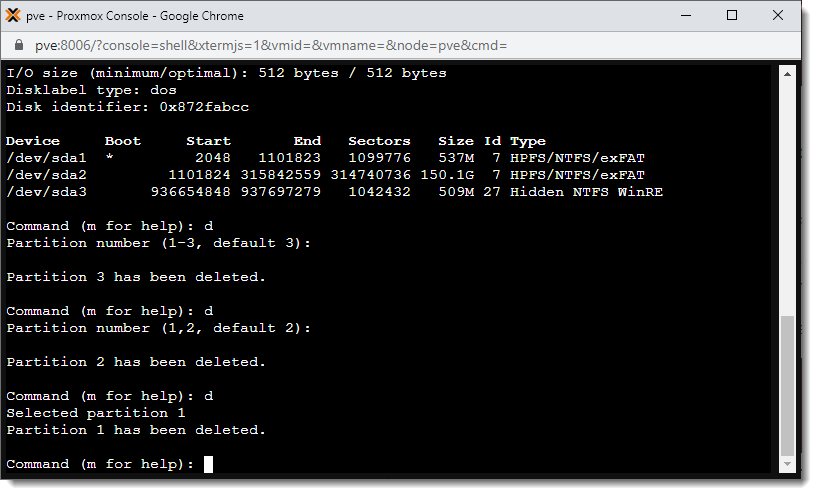
We see that there are three partitions on the disk, we delete them all to start with a fresh blank disk. Use the d command and hit Enter. Do this three times to remove all three partitions on the disk.
Create a single new partition that uses the whole available disk space.
Use command o to create a fresh dos type partition table.
Next issue the n command and go with the default options: partition type is primary, and when asked about the first and last sector just hit Enter both times. This way the partition uses up the whole disk, and this is what we want.
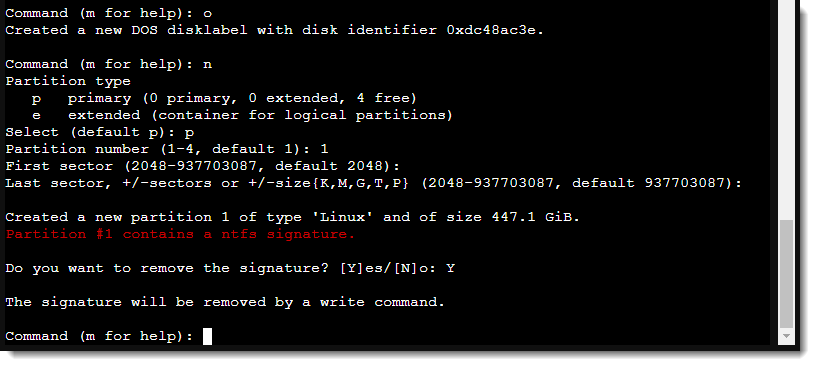
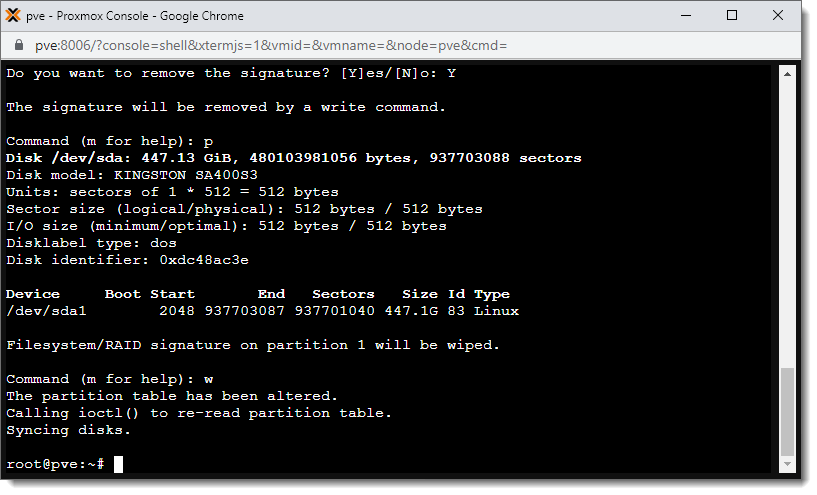
Use command p to check the configuration. If you're happy with what you see finish the job by writing the changes on the disk by typing w and hitting Enter.
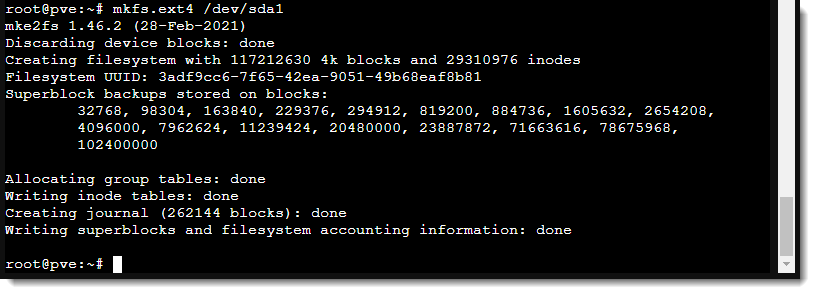
Lastly create an EXT4 filesystem on the new partition that we'll be able to mount in the filesystem.
mkfs.ext4 /dev/sda1
If you have another disks repeat this whole partitioning process on those too.
Mount new drives to the filesystem
This point we have a new partition on each new disks ready for mounting: /dev/sda1 and /dev/sdc1.
In the shell window create a new directory for each new disks where we'll be able to mount them.
We call them /mnt/Store1 and /mnt/Store2 respectively.
mkdir /mnt/Store1
mkdir /mnt/Store2

Add the new mount points in the /etc/fstab file like so:
/dev/sda1 /mnt/Store1 ext4 defaults 0 0
/dev/sda1 /mnt/Store2 ext4 defaults 0 0
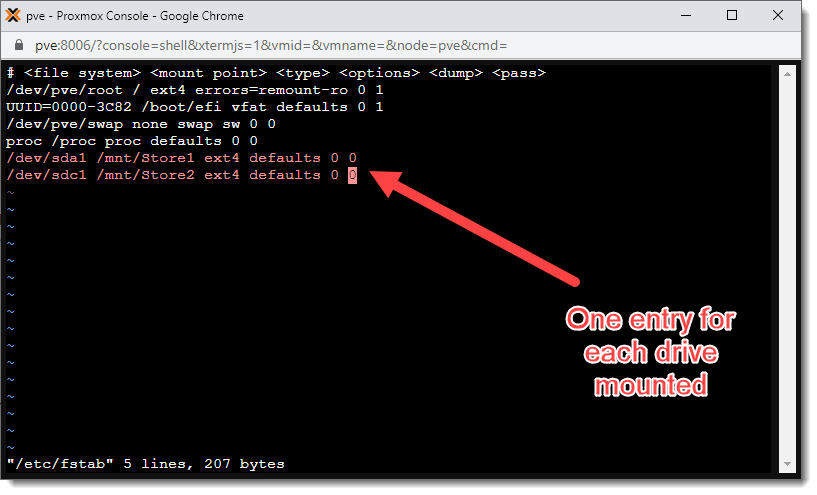
We mount our two new disks in the Store1 and Store2 directories under /mnt, both have filesystem ext4, we use all the defaults mounting options, with no dumping and no error checking.
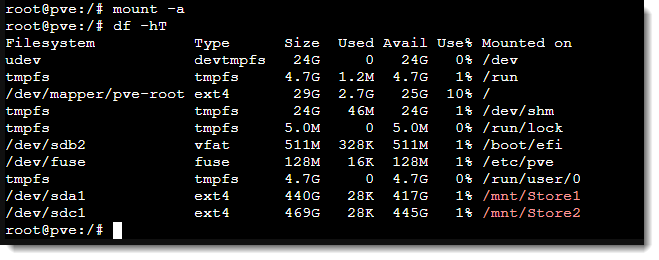
After saving the config use the following command to mount the drives. Alternatively you can restart proxmox, at boot time the contents of the /etc/fstab file are mounted automatically.
mount -a
With df -hT verify that they are loaded indeed:
Add the storage space to Proxmox
For this step jump to the Proxmox portal again.
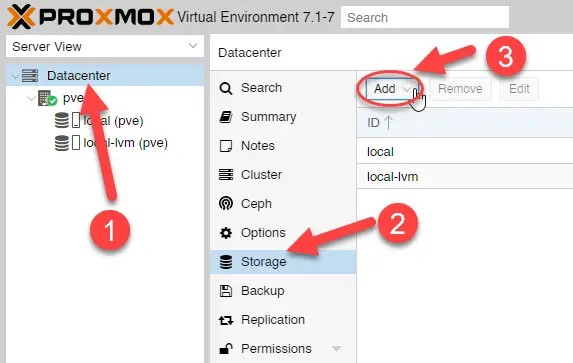
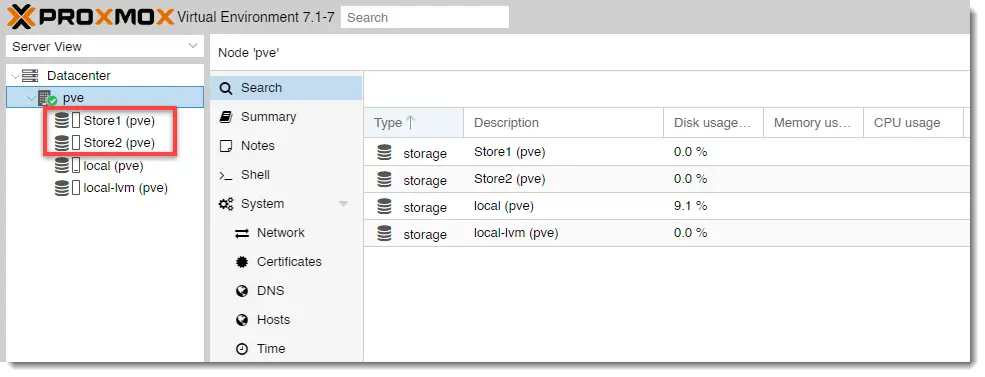
On the Datacenter tab select Storage and hit Add. Select the Directory type.
The ID should be the name you can easily identify the store, we use the same name as the name of the directory itself.
Directory is the mount point, in our case it's /mnt/Store1 for the first store.
Content: select Disk Image and Container.
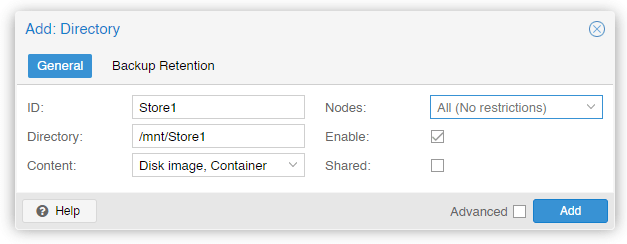
Do the same for Store2.
You have the two new disks available for new virtual machines. Enjoy!

Hi, can u help me with some questions? when i type “mkdir /mnt/Store1” and “mkdir /mnt/Store2” and i try to type “/dev/sda1 /mnt/Store1 ext4 defaults 0 0” i got “-bash: /dev/sda3: Permission denied” how do i solve it or how do i go to that page?
you need to put those lines into your existing fstab file. It’s located in /etc
Depending on your system/preference you could use:
nano /etc/fstab
or
vi /etc/fstab
to edit the file
Thanks for this. Really helped setting up my mini-PC for labbing, couldn’t figure out how to mount the spare disk.