You have a new Exchange installation. You've just clicked on the Setup Finished window, lean back in your chair and sip on your steamy coffee, saying to yourself: great, now I have a mail server, I could start setting up databases, users, mailboxes, public folders, etc. So far so good! But how do I access any kind of admin area to start my work?
What are you looking for at first? A kind of graphical console! Back in the old Exchange 2010 days and earlier Exchange servers had proper application-based management tools, meaning you opened an app and started your work right away. Starting with Exchange 2013 you don't find such a tool, even though the management tools were checked when you installed the server. So where has it gone?
The good news is that the console is there, but it is web-based now which has two advantages. First, it can be lighter on the CPU and memory, but most importantly it is accessible remotely from any random computer, using a simple web browser.
In fact, after installing an Exchange server I hardly ever log into it directly. I use either the web interface, now called the Exchange Control Panel, or ECP in short, or most of the time I use the Exchange Management Shell which is a PowerShell snap-in, also accessible remotely from any computer where PowerShell is installed.
In this article we discover these two tools, or more precisely the ways to access them.
Exchange Control Panel: ECP
Probably the simplest way to access an Exchange server is through it's web user interface (WebUI). It is graphical, simple to use, but lacks certain functions that are only accessible through the PowerShell snapins.
In fact, ECP literally runs PowerShell cmdlets in the backend.
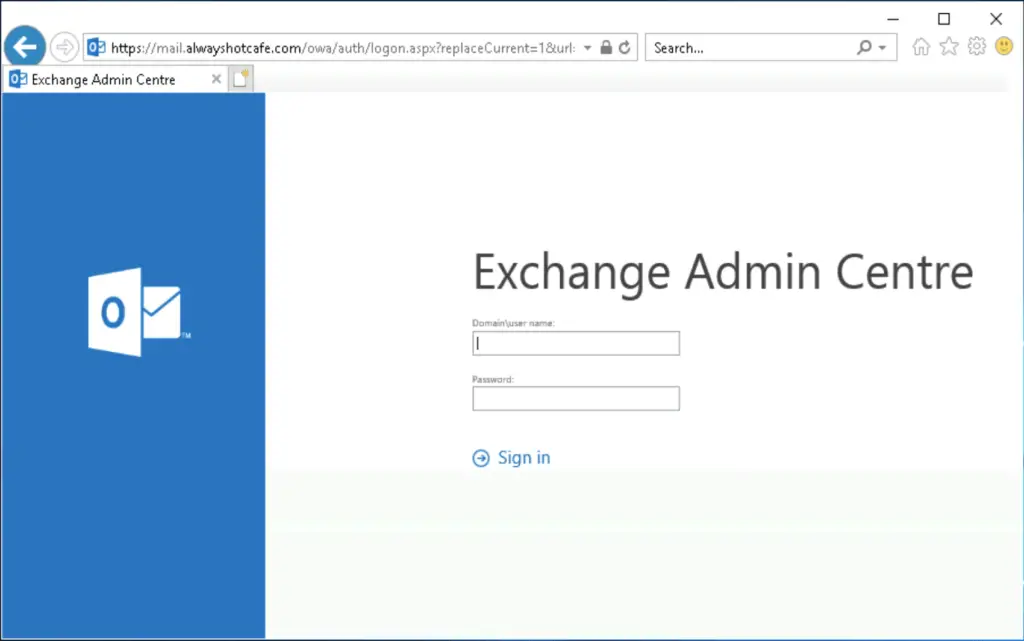
Accessing ECP is simple: you can use any computer that has network connectivity to the server, by browsing to the following address:
https://[server name or IP]/ecp

In our earlier example (see HERE) we installed Exchange for AlwaysHot Café, we'd access their server browsing to https://mail.alwayshotcafe.com/ecp.
There's not much to it, from inside the domain the server name resolves to it's private IP, from outside to the public IT address of the network, that should already forward ingress 80/tcp, and 443/tcp traffic to the Exchange box. If we have a proper SSL certificate installed we get to the console page without any issues.
After logging in we are good to go!
Exchange Management Shell
The Shell is the holy grail of the Exchange deployment, you have to know it as it is the best, most versatile tool to configure literally anything that can be set on the server and even beyond it. As Exchange integrates with AD organically - in fact many Exchange attributes are only stored in AD - it is simple to manage multiple servers, query them, configure them using the same shell, or even the same cmdlet that most of the time changes global Active Directory specific attributes as well! For instance you can change a username, last name, telephone number both by using either AD or Exchange commands.
1. Opening the Shell from the Exchange server straight
This is the simplest way to access the shell cmdlets, on the Exchange server open a PowerShell window and simply import the Exchange-specific cmdlets:
Add-PSSnapin microsoft.exchange.management.powershell.snapin

Then you are ready to go!
2. Importing the Shell cmdlets from another domain-joined computer
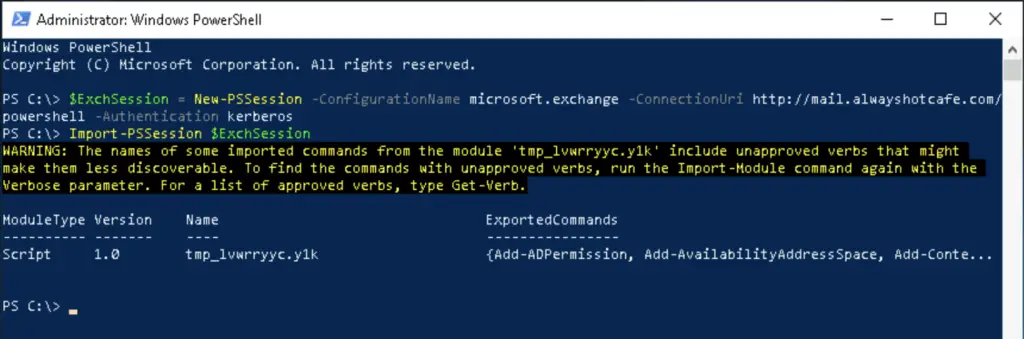
This is probably the most common way to access an Exchange server as you can have a single management server or client in the network and manage hundreds of servers from it the same time. You just create a new powershell session with them and import it:
$ExchSession = New-PSSession -ConfigurationName microsoft.exchange -ConnectionUri http://mail.alwayshotcafe.com/powershell -Authentication Kerberos
Import-PSSession $ExchSession
3. Access the Shell as another user
If you are logged in as a simple user on the computer that has no admin privileges, you can speficy your admin credentials and include it when importing the Shell, see below:
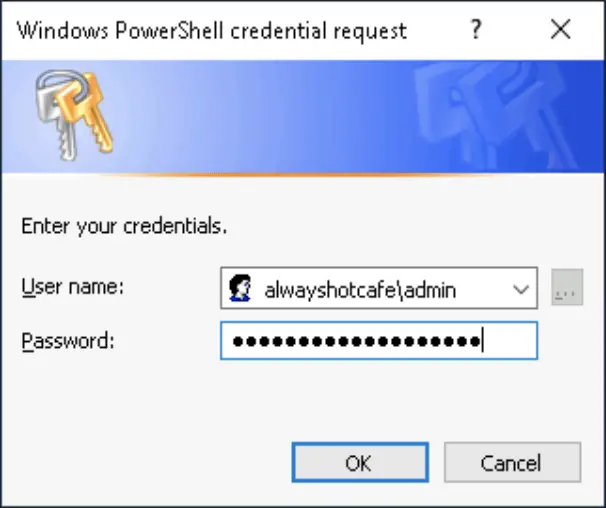
$cred = Get-Credential
$ExchSession = New-PSSession -ConfigurationName microsoft.exchange -ConnectionUri http://mail.alwayshotcafe.com/powershell -Authentication kerberos -Credential $cred
Import-PSSession $ExchSession
4. Access Office365 - Exchange Online login
A special case is the widely popular Office365, as it is a full Exchange environment, naturally it has PS Shell capabilities. The only difference is the URI it uses, which is encrypted and the authentication type is Basic. See this example:
$cred = Get-Credential
$ExchSession = New-PSSession -ConfigurationName microsoft.exchange -ConnectionUri https://outlook.office365.com/powershell-liveid -Authentication basic -Credential $cred -AllowRedirection
Import-PSSession $ExchSession -DisableNameChecking
If you have any question guys let me know in the comments below!
Comments